User Manual#
Scope
This manual is written for the Orion web application as implemented in this repository. It covers the main user experience, search and investigation workflows, live lookup tools, graph views, tenant workflows, and administrative screens. Some features appear only for specific licenses, tenants, or roles.
About This Guide#
Orion is an investigation and monitoring platform that combines indexed intelligence, live lookups, graph exploration, tenant workflows, and platform administration in one interface. Users typically work in one of four ways:
Enter the platform through login, signup, verification, onboarding, or shared links.
Search indexed data from the main dashboard.
Run a targeted lookup or scan against a domain, file, email, IP, username, or other entity.
Open a report view to inspect metadata, evidence, and relationships.
Manage tenant, user, alert, case, collection, and platform settings based on role permissions.
This document is organized around those tasks.
For concise, task-based instructions with navigation and troubleshooting, see the Orion Help Manual.
Access and Entry Points#
Signup#
Signup creates a new account request. The form validates username format, email format, and password requirements before submitting the registration.
The username must start with a letter and use the supported username pattern. If the value is invalid, Orion suggests a corrected format. Password input shows strength and requirement feedback before submission.
After a successful signup, the user is sent to the welcome flow. The account may still require administrator review, email verification, or tenant onboarding before full dashboard access.
Signup is served only on the root platform domain and on the subdomain of a tenant that an administrator has marked as a primary tenant. A signup completed on a primary tenant subdomain creates a sub-tenant beneath that primary tenant, and its verification email points back at the primary tenant URL. When the primary tenant has consumed its full tenant quota, the Sign Up link is hidden on that login page and the signup URL redirects to /login.
Login#
The standard entry point is the login screen. Depending on deployment settings, users may also encounter:
account onboarding
welcome or notification screens
password reset flows
Browser sign-in uses an encrypted, HTTP-only session cookie instead of storing the access token in browser local storage. In production, the cookie is also marked Secure, uses SameSite=Lax, and expires after 30 minutes. Session renewal and authenticated requests use the cookie automatically. Signing out invalidates the server session and removes the authentication cookie.
Unsuccessful login attempts are tracked against the entered email or username. The fifth consecutive failure temporarily pauses login for 1 minute, the next failure pauses it for 10 minutes, and later consecutive failures pause it for 30 minutes. The login screen reports how long to wait. A successful login clears the failure count, and an inactive failure history expires after 30 minutes.
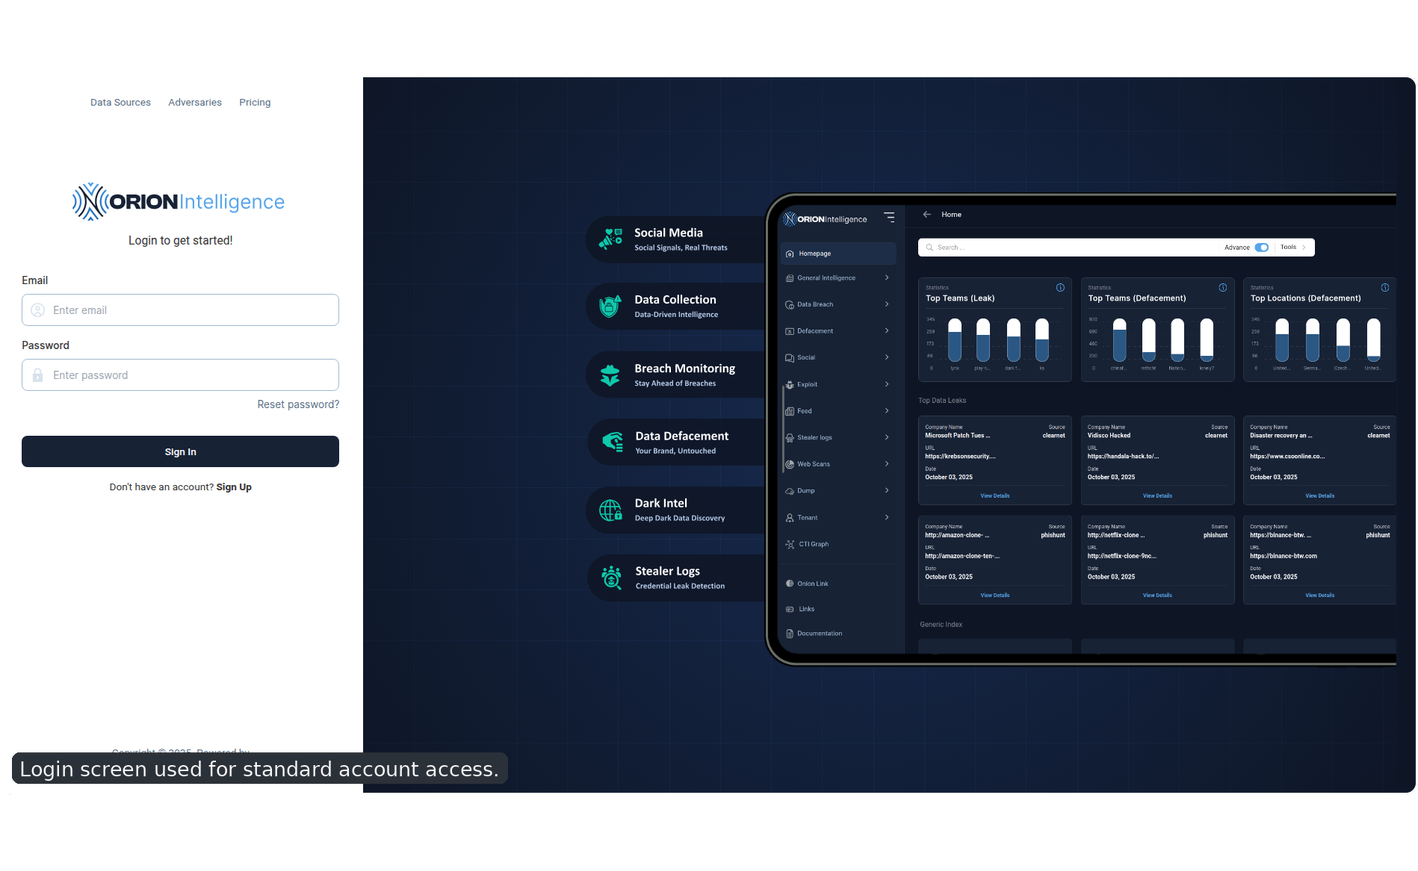
Login screen used for standard account access.#
Role-aware experience
The sidebar, available modules, and some actions are controlled by role, tenant state, and license assignment. Two users in the same deployment may not see the same menu.
Password Reset#
Select Recover account? on the login screen to open the recovery page. The page provides two separate tabs:
Reset passwordsends a reset link to the registered email address.Account recoveryverifies the registered email together with the user’s global recovery key before sending the same type of reset link.
The standard reset flow supports two stages:
requesting a reset link by email
submitting a new password using a tokenized reset link
The request form validates the email format when submitted. Orion always displays the same success result for a well-formed request, whether or not the email is registered. This prevents the recovery screen from revealing which accounts exist.
Reset links expire after 20 minutes, are restricted to the correct tenant, and can be used only for an active account. The reset token is stored as a hash and is removed after a successful password change. The new-password form includes password-strength guidance and confirmation validation, and the new password cannot match the previous password.
If an administrator requires a password change, a successful login redirects the user to the same new-password screen before normal work continues. Completing the change clears the forced-reset requirement.
Recover With a Recovery Key#
Use account recovery when you have the global recovery key generated from Account Settings:
Select
Recover account?on the login screen.Select the
Account recoverytab.Enter the registered email address.
Enter the complete 43-character recovery key.
Select
Recover accountand check the registered email for a reset link.Open the link, choose a new password, confirm it, and submit the form.
The page validates email and recovery-key formats before submission. For correctly formatted input, Orion returns the same success screen even when the email or recovery key is incorrect. A reset email is sent only when both values match.
Recovery key and 2FA setup key
The global recovery key is different from the authenticator setup secret shown while configuring 2FA. Use the global recovery key on the Account Recovery tab. Keep both values private and store them outside the Orion browser session.
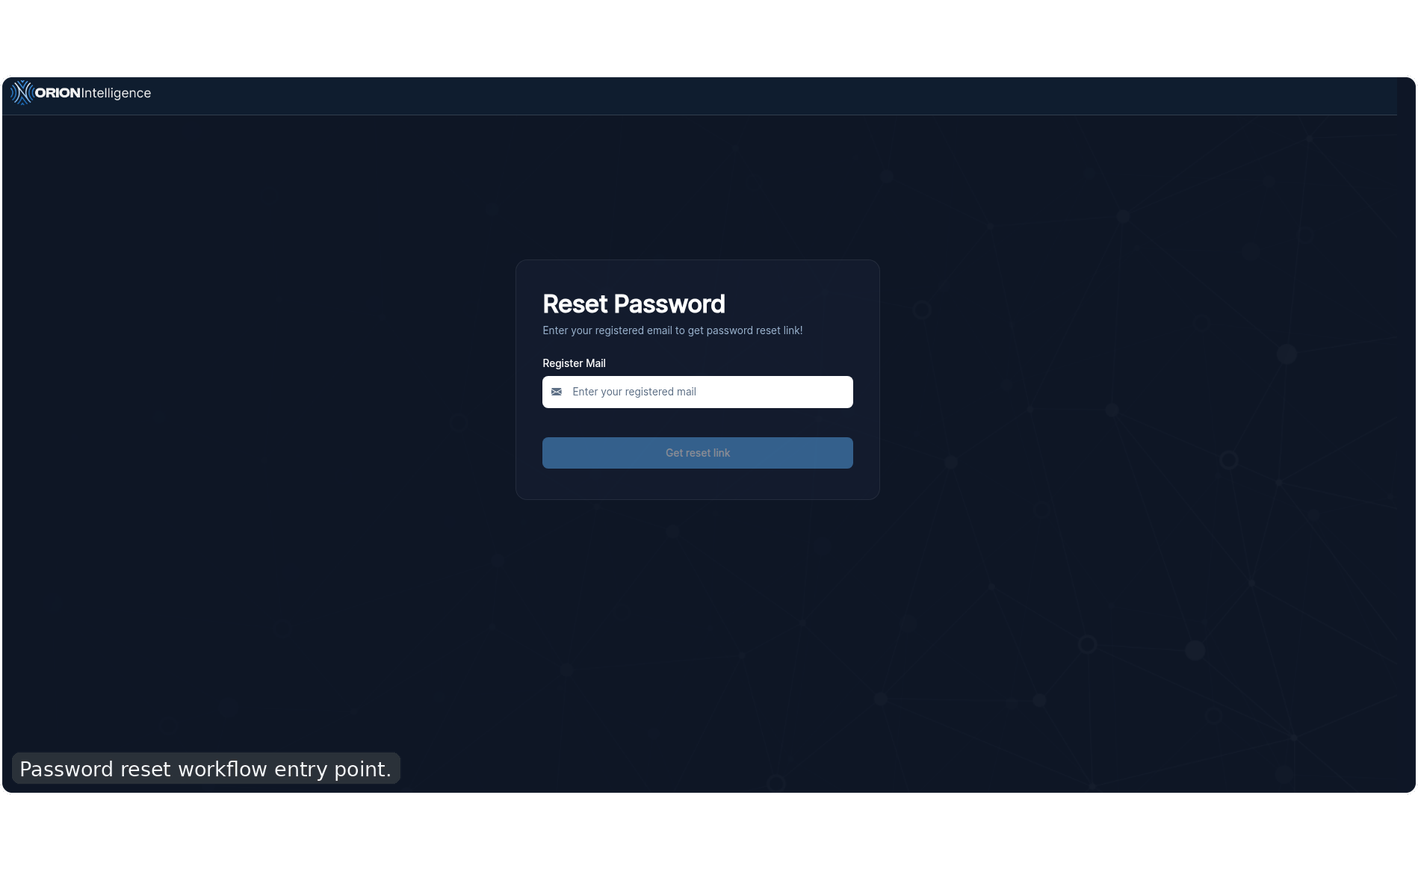
Password reset workflow entry point.#
Welcome and Email Verification#
The welcome page appears after signup and after tokenized verification links. Without a token, it confirms that registration was submitted and tells the user to wait for administrator approval or email notification.
When opened with a verification token, the page verifies the token and reports one of the following states:
verification successful
expired verification link
invalid verification link
temporary verification failure
After a successful verification, users can continue to login or onboarding depending on account state.
Tenant Onboarding#
New tenant users may be routed through a multi-step onboarding flow before using the main dashboard. The onboarding wizard includes:
company information
IOC setup
confirmation
During onboarding, users can define monitored IOC values by category before entering the main application.
The tested tenant flow confirms that onboarding is part of a larger tenant lifecycle rather than a standalone form. Covered user-visible behavior includes:
tenant signup and verification email delivery
admin-side tenant review and verification changes
enterprise-license assignment before first tenant login
onboarding wizard completion
IOC seeding during onboarding
tenant sub-user creation immediately after onboarding
Notifications and Subscription Screens#
Notification screens are used for access-level messages such as trial expiration, subscription prompts, or deployment-specific access notices. The payment gateway screen displays trial or subscription messaging when payment or upgrade flow context is needed.
These screens do not expose investigation data. They explain why a user cannot continue directly into the requested workflow and provide a path back to the main application.
Main Application Layout#
After authentication, Orion opens inside the dashboard workspace.
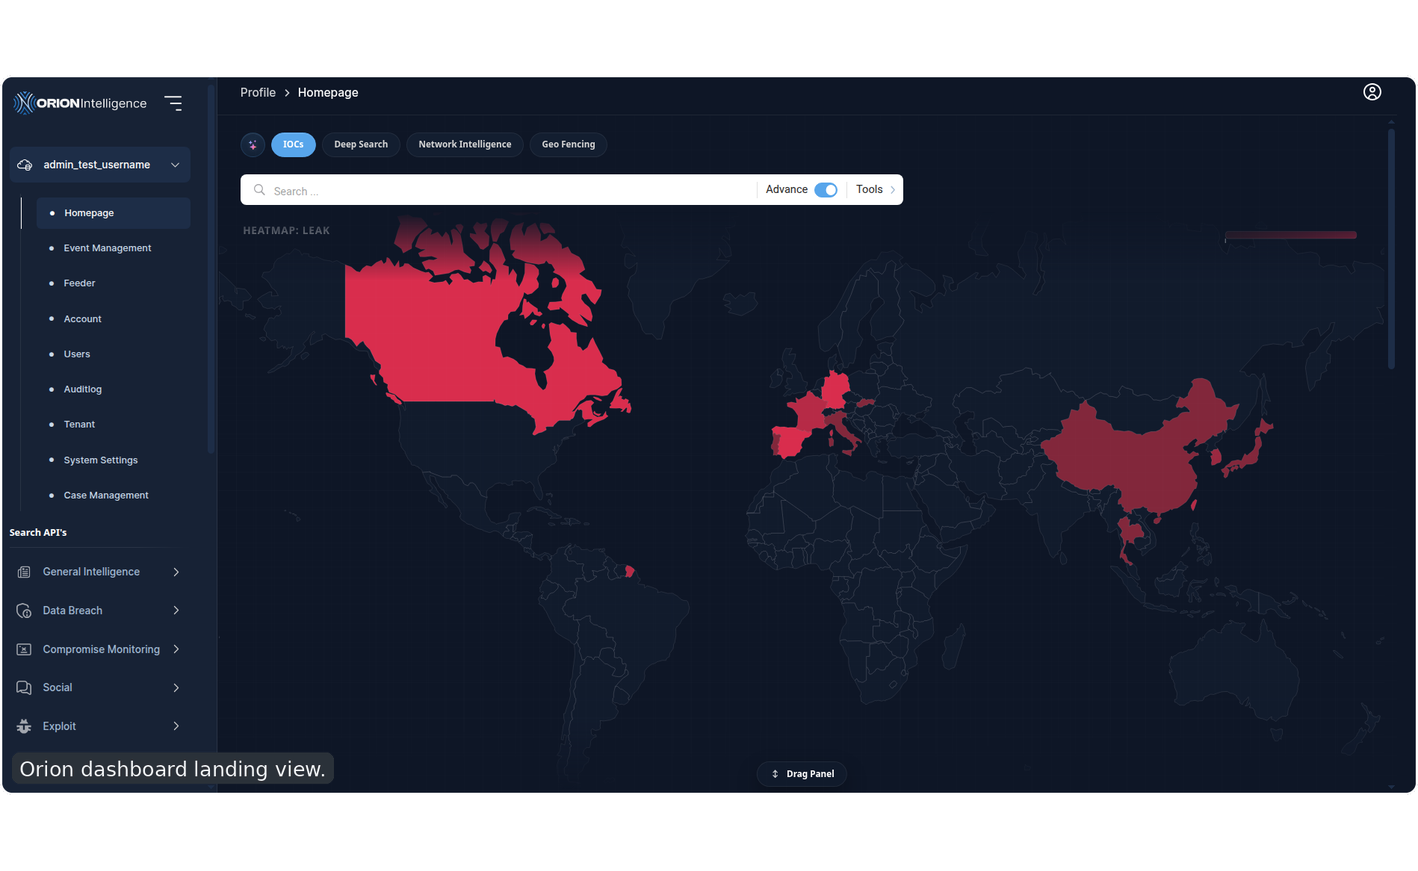
Orion dashboard landing view.#
The main UI is centered around four areas:
the left sidebar for navigation
the global search and module toolbar
the result or report workspace
slide-out or inline filter panels
Left Sidebar#
The left sidebar is the primary navigation system. It groups features by investigation area and by operational purpose.
Expanded sidebar with major modules and support links.#
The sidebar can include:
user profile and account pages
indexed search modules
live scan and API modules
graph tools
support links such as
Onion Link,Links, andDocumentation
Global Search Area#
Most data-driven modules share the same search pattern:
a search box
optional advanced filtering
optional search tools
an optional right-side filter drawer
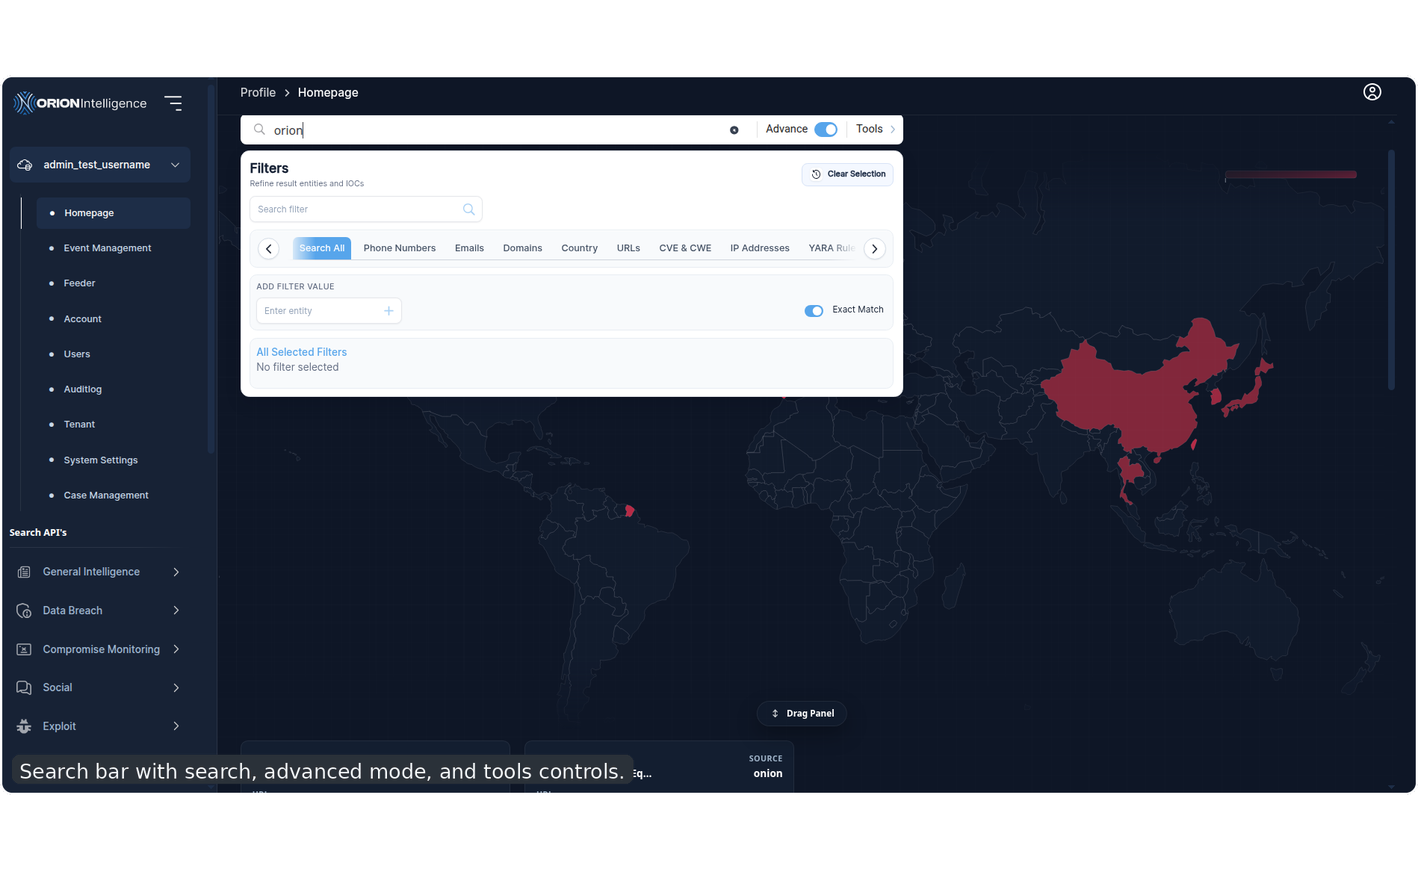
Search bar with search, advanced mode, and tools controls.#
Result Workspace#
The result area changes by module, but commonly includes:
a result count
cards or row-based entries
analytics summaries
filters
pagination
empty, loading, and no-result states
Global Search Workflow#
The search bar is the main entry point for indexed investigation.
Basic Search#
In standard mode, users can enter a free-text query and submit it immediately. Orion then loads results for the current module context.
Advanced Search Toggle#
The Advance toggle enables the filter overlay below the search bar. When enabled, Orion exposes indexed filter controls that let users narrow the query more precisely.
Tools Menu#
The Tools section provides search behavior controls and, in some contexts, sorting options.
Search entry area with search mode and tools controls.#
Available search modes in the main result workflow include:
Match SemanticMatch any term (OR)Match individual terms (AND)Match full query
These modes affect how broadly or narrowly Orion interprets the query.
Search Filters#
When advanced mode is enabled, users can add indexed filters to refine the result set.
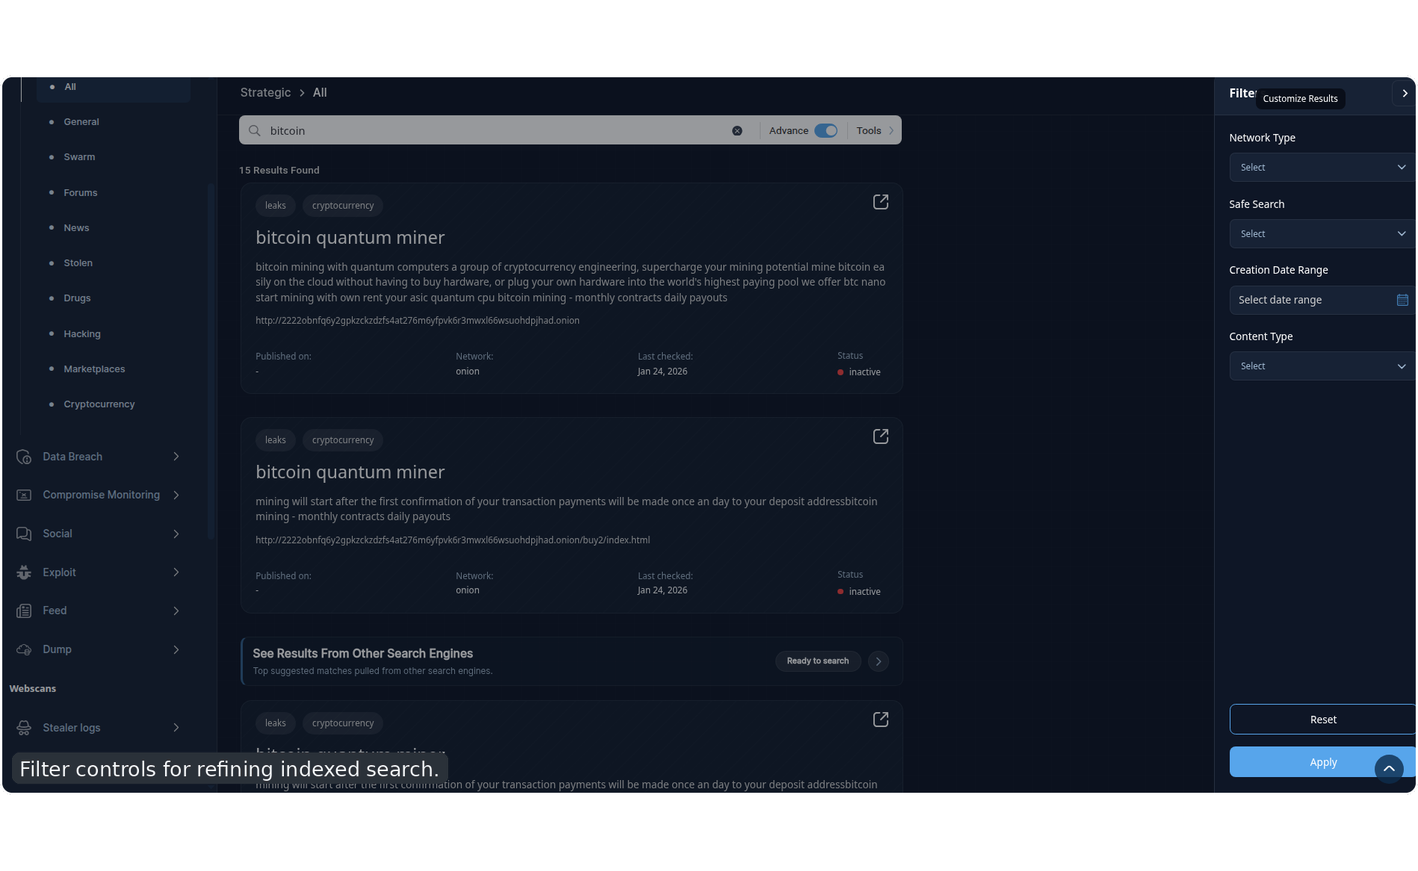
Filter controls for refining indexed search.#
Across the application, filter panels typically support:
dropdown selection
text input
date range input
apply
reset
Selected Filter Bar#
When entity filters, sidebar filters, or non-default search tools are active, Orion can display a selected-filter bar showing what is currently affecting the result set.
Homepage#
The homepage is the default overview for many users and acts as a search-first dashboard.
The homepage typically includes:
the global search entry point
high-level summaries
statistics or insight cards
general and leaked index summaries
For some privileged roles, the homepage also includes a draggable insight panel layered over the main search experience. Other users may instead see a simplified search-first landing view or a tenant-home style alert summary, depending on license assignment and whether the account belongs to a default tenant.
Homepage Summary Areas#
General Index: broad indexed content gathered across supported sources.Leaked Index: sensitive, exposed, or higher-priority findings.Recent or featured results: direct pivots into current records.Insight blocks: charts and counts used for quick triage.
Homepage overview with summary panels and search-first layout.#
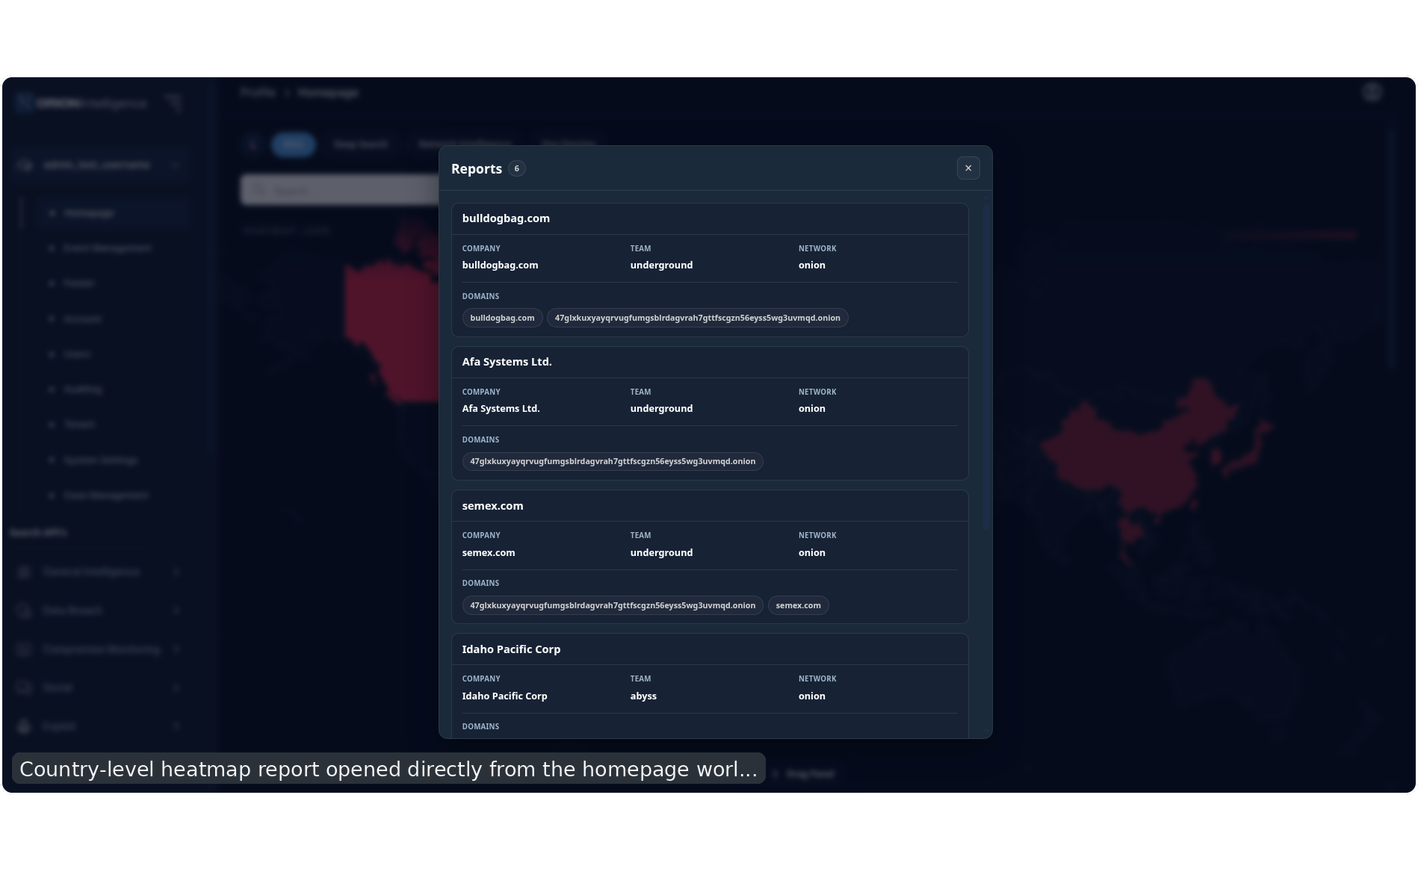
Country-level heatmap report opened directly from the homepage world map.#
The tested homepage workflow also includes:
hovering countries to reveal tooltip state
opening country-level report panels from the heatmap
closing the report by close control and by overlay
keeping homepage search and heatmap pivots available in the same workspace
Analytics and Result Insights#
Orion exposes analytics alongside search results to help analysts understand the composition of the returned dataset.
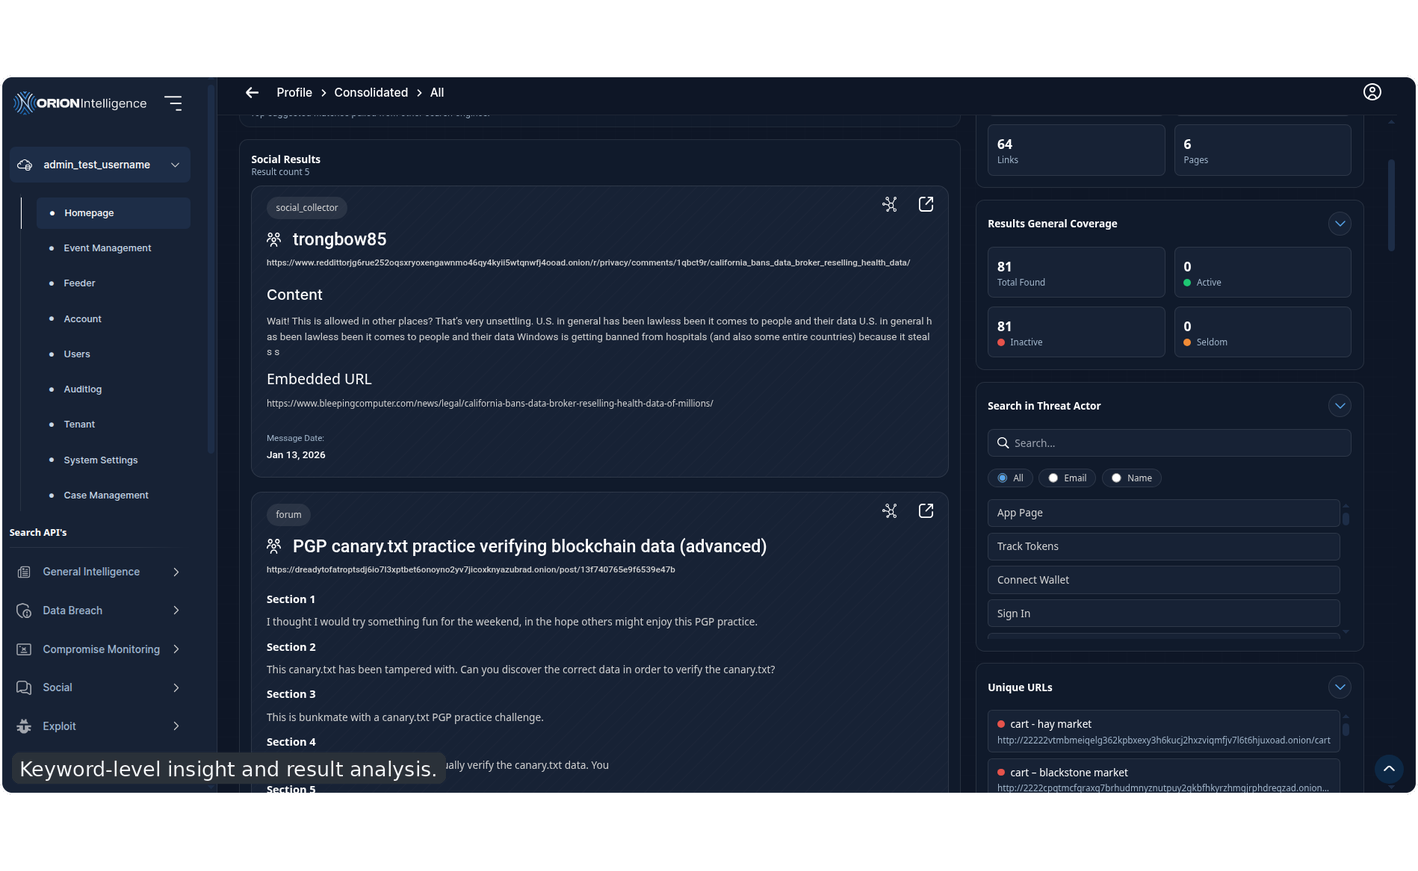
Keyword-level insight and result analysis.#
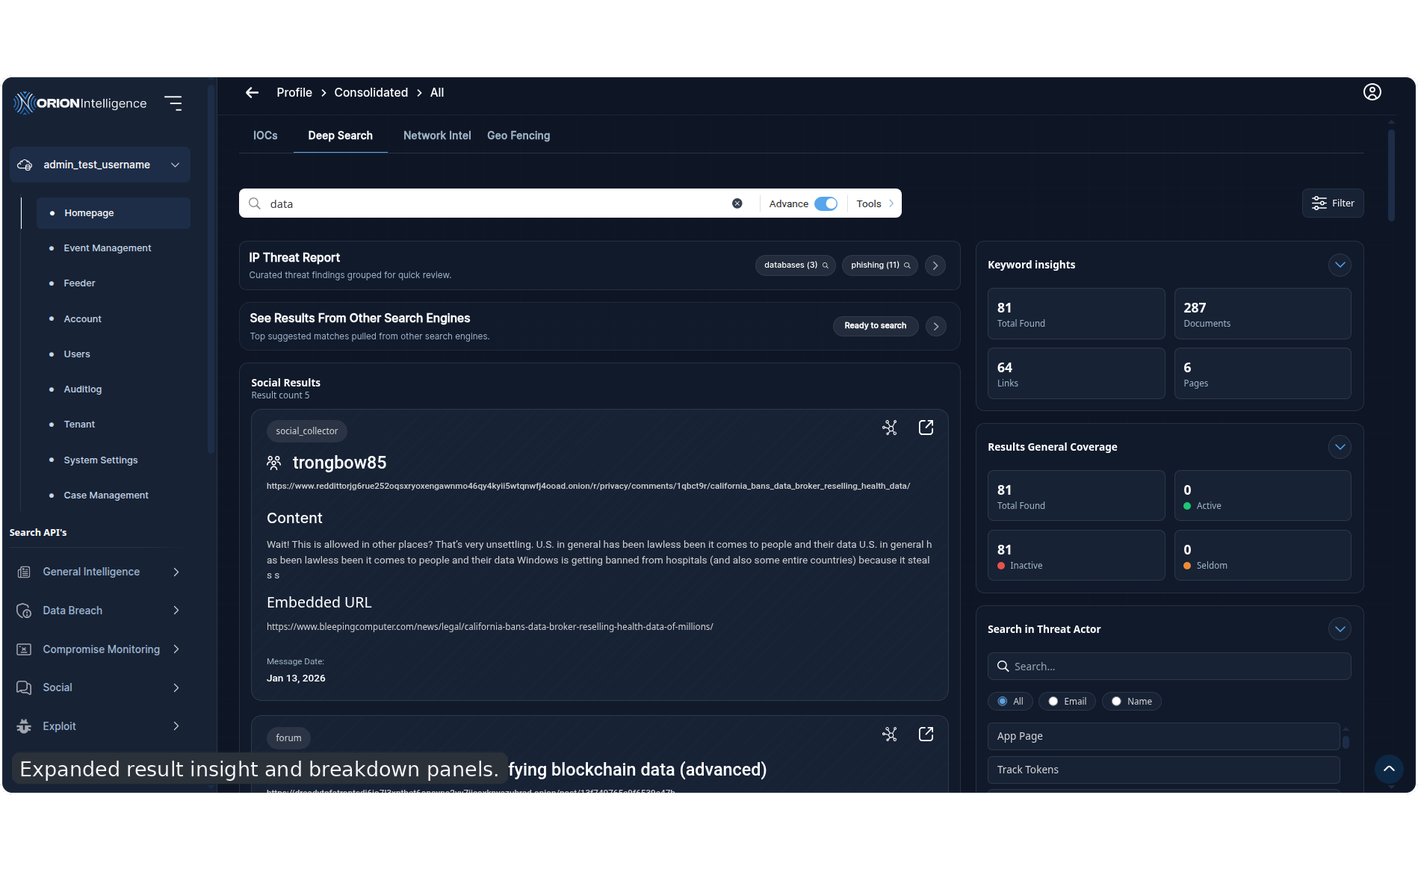
Expanded result insight and breakdown panels.#
Depending on module and query, analytics can summarize:
keyword frequency
category distribution
result volume
network or source distribution
URL and title breakdowns
Indexed Investigation Modules#
Consolidated#
The consolidated view is Orion’s combined investigation workspace. It is designed for users who want one query to drive multiple result channels instead of searching each module separately.
The consolidated workspace can expose three major tabs:
IOCsDeep SearchNetwork Intel
Depending on the query and license state, this view can combine:
grouped indexed results
stealer-log matches for qualifying queries such as emails or URLs
embedded network or scan-style pivots
Use consolidated search for first-pass triage when you want breadth before moving into a dedicated module.
Combined result workflow used for broad first-pass triage.#
General Intelligence#
General Intelligence is the primary broad-spectrum indexed search area. Use it when you want to search topics, entities, or keywords across multiple kinds of sources.
Subcategories:
AllGeneralForumsNewsStolenDrugsHackingMarketplacesCryptocurrencyLeaks
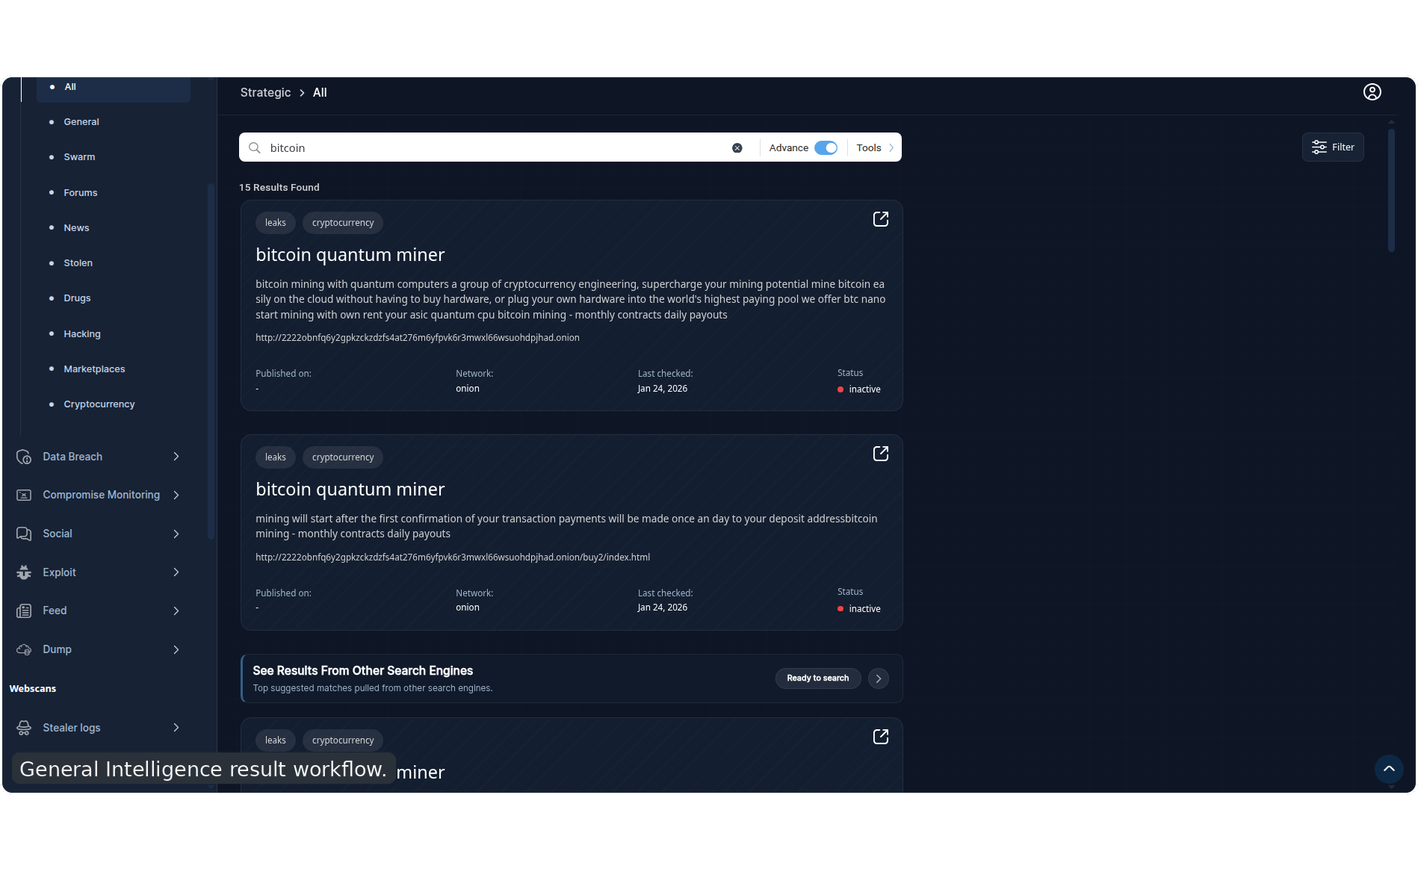
General Intelligence result workflow.#
Typical use cases:
surveying discussions around a topic
reviewing leak mentions
exploring dark-web marketplace activity
scanning mixed-source intelligence for a keyword
Data Breach#
The Data Breach module is used for known breach data, identity exposure checks, leak references, and breach-related listings gathered from monitored sources.
Subcategories:
AllDatabasesTracking
Use Databases when you want structured breach records. Use Tracking when checking whether a specific email or identity appears in known breach data. Use breach report fields and URL/link pivots when the key artifact is a leak URL, dump reference, or channel-style source mention.
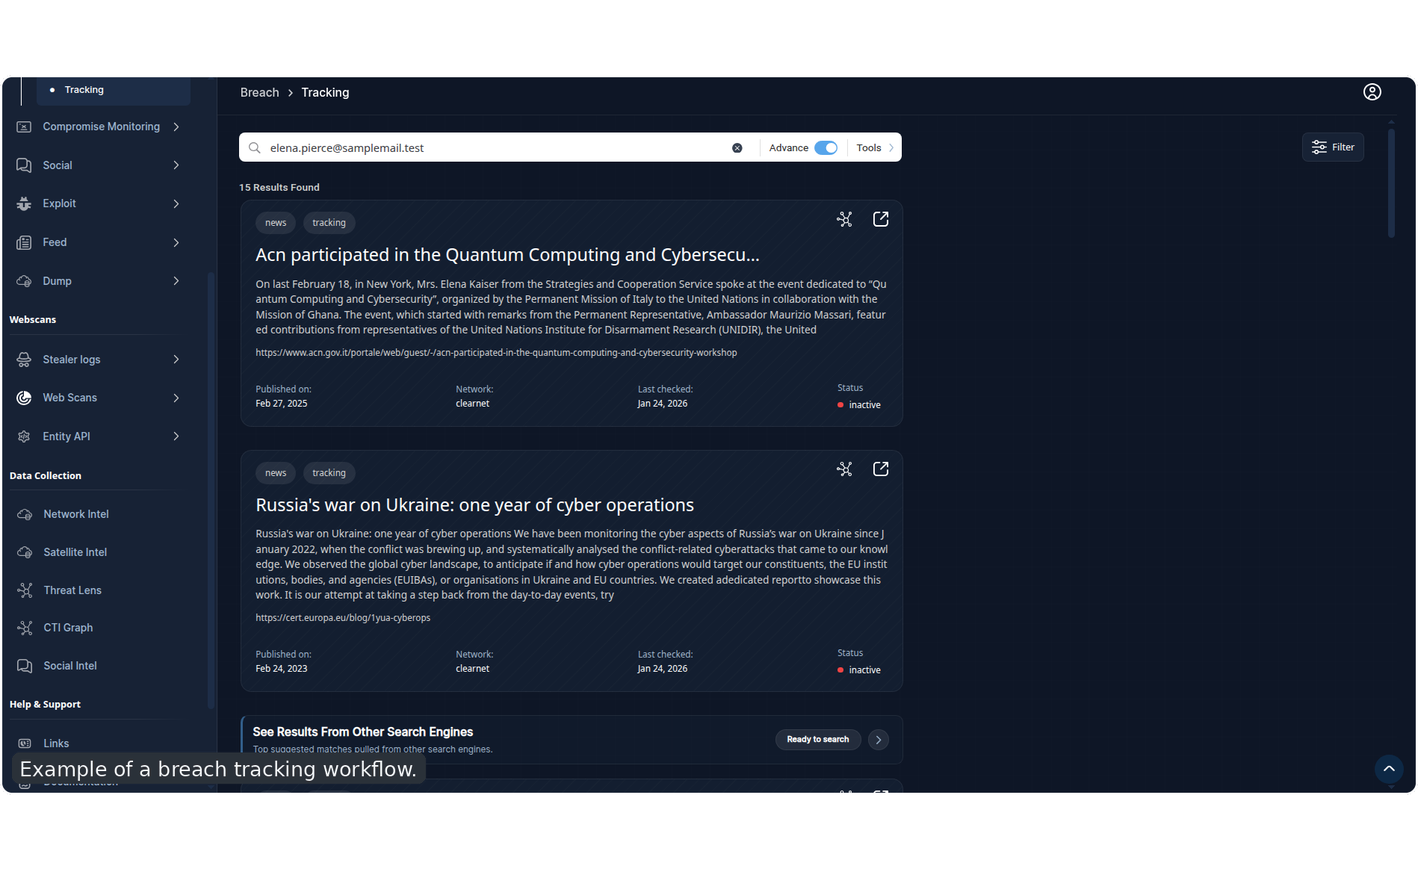
Example of a breach tracking workflow.#
Compromise Monitoring#
Compromise Monitoring tracks defacement-style website incidents where sites were altered, hijacked, cloned, or otherwise compromised. Backend routes and some report names still use the defacement term, but the current sidebar label is Compromise Monitoring.
Subcategories:
AllHackedPhishingDatabases
The detail view commonly exposes:
target URL
date saved
attacker or defacer
team name
server or IOC context
breach or source reference
IP and location
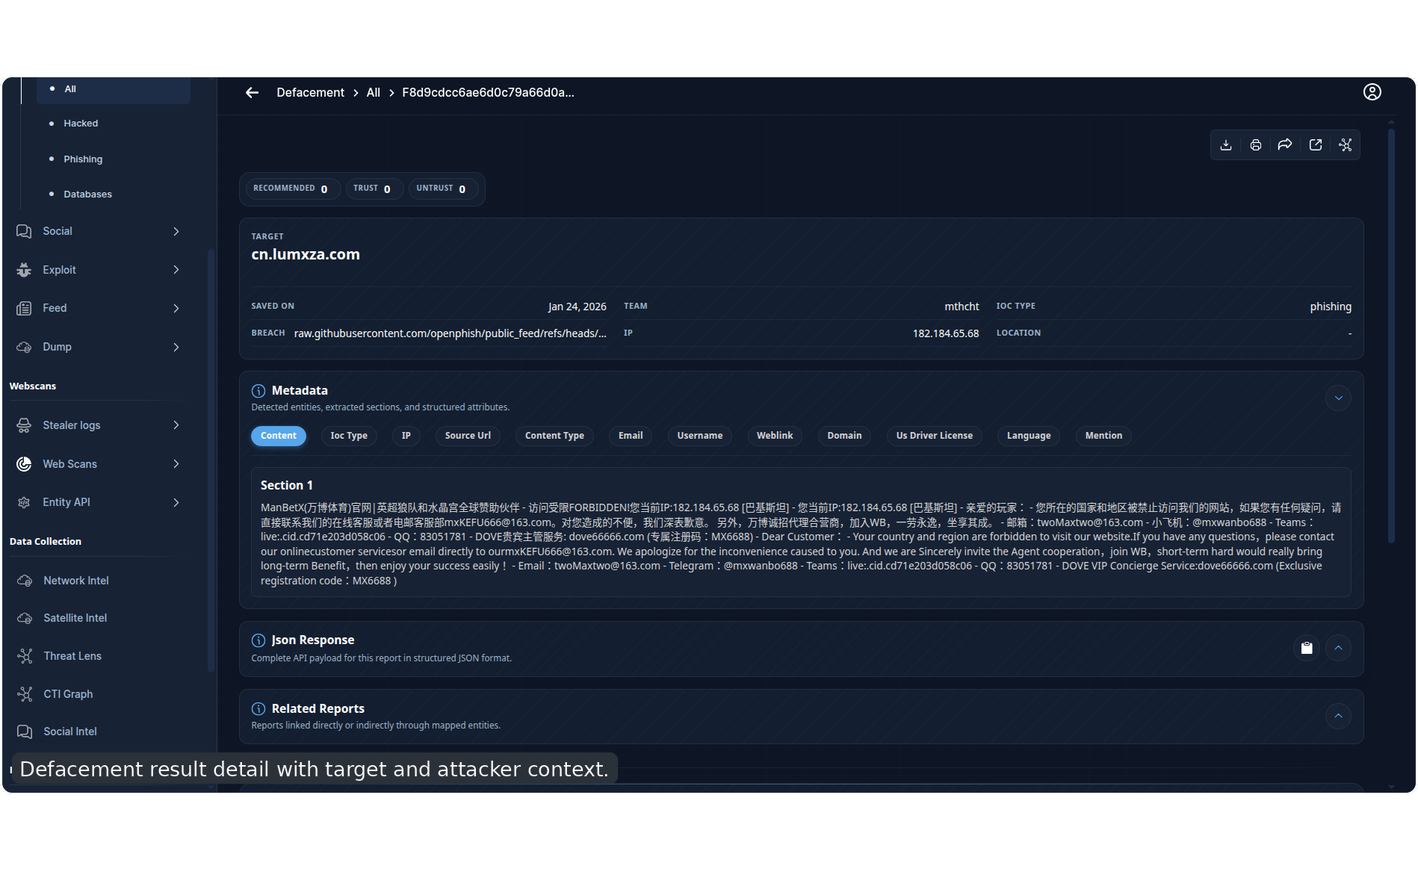
Compromise Monitoring result detail with target and attacker context.#
Exploit#
Exploit focuses on vulnerability and exploit-related intelligence.
Key views:
CVEToolsZeroDay
This module is useful when starting from:
a known vulnerability ID
a product or platform with public exploit coverage
a threat report mentioning exploit tooling
The E2E workflow covers all tested exploit entry points:
AllCVEToolsZeroDay
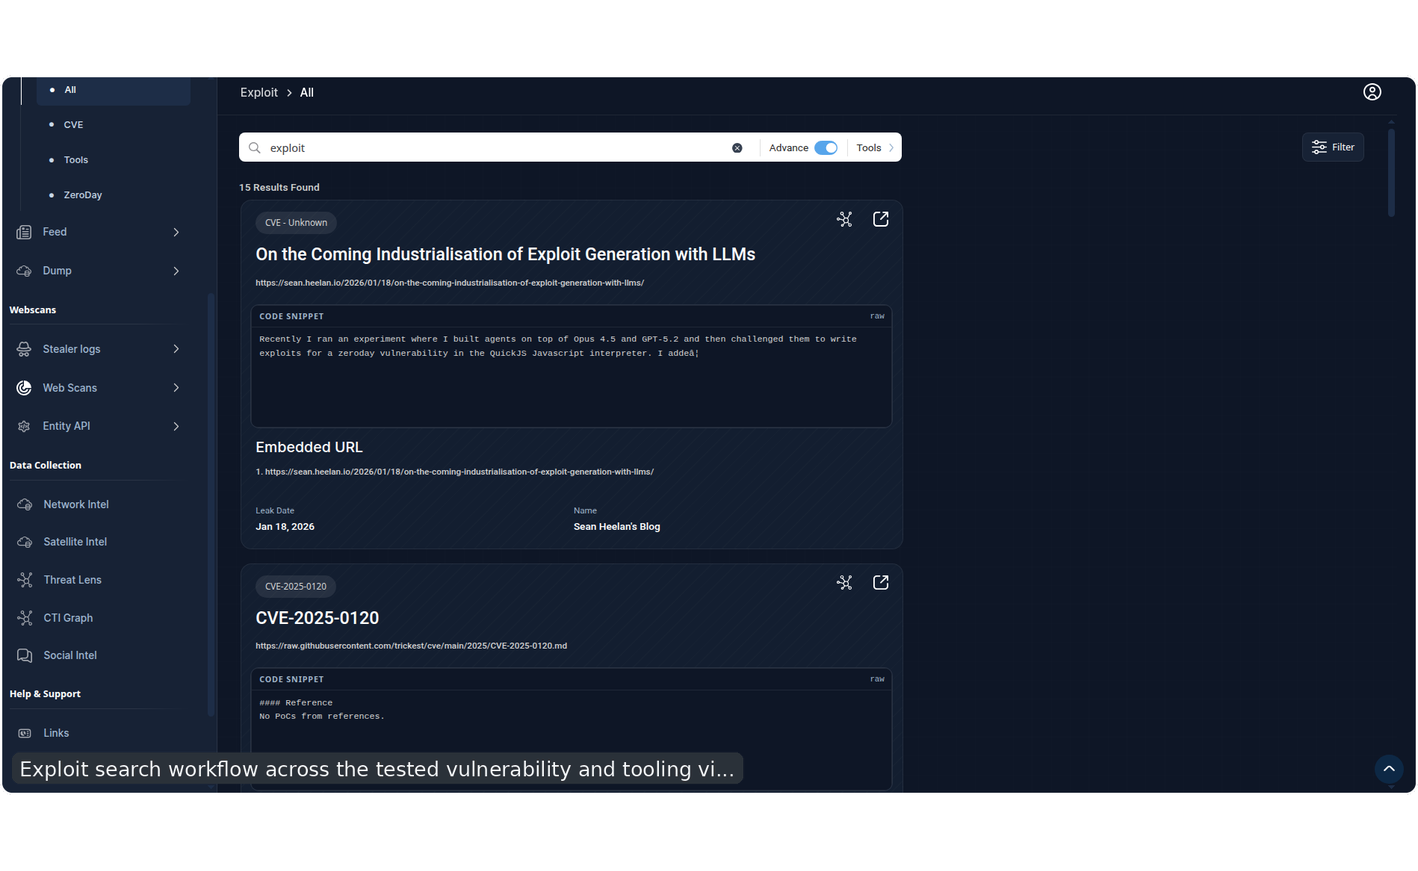
Exploit search workflow across the tested vulnerability and tooling views.#
Actors & Malware#
Actors & Malware is the APT Intel workspace for actor and malware tracking. It is exposed as a licensed sidebar module when the user’s license allows access.
Key views:
AllAPTMalwareCompromised-Actors
Use this module when starting from:
an APT actor name or alias
a malware family, signature, or reporter
a country-linked threat actor question
a need to compare actor and malware records in one search
Actor and malware results open into detail reports with the same report review, export, and pivot behavior used by other indexed investigation modules.
News Feed#
News Feed is the stream-oriented intelligence area for news-style content and current reporting. It is useful for users who want a curated readout without first building a structured query.
The tested feed workflow covers:
opening the
Newsfeed viewsubmitting a live query
opening a report
reviewing JSON-backed detail inside the report
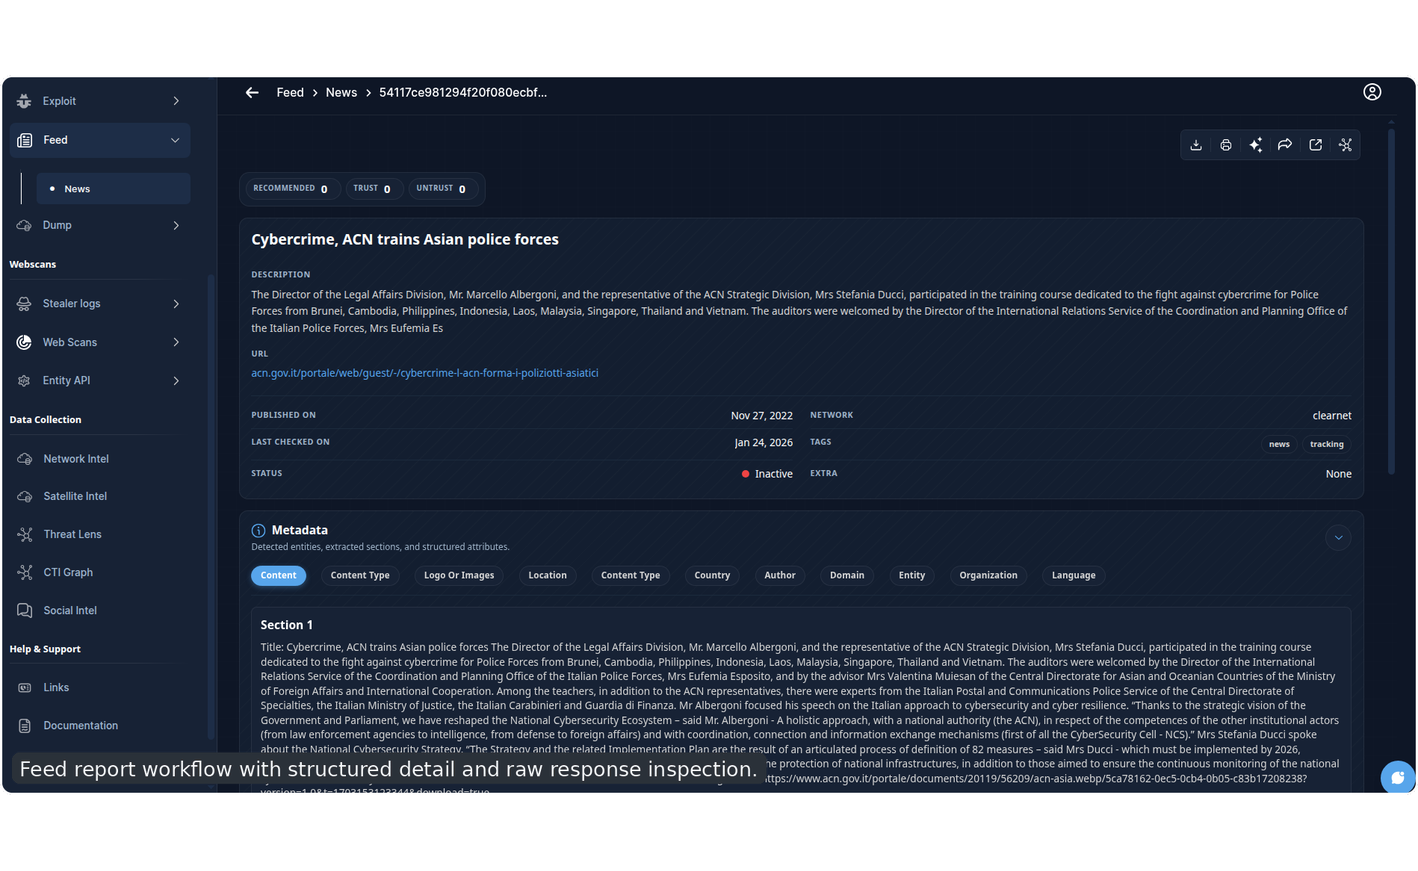
Feed report workflow with structured detail and raw response inspection.#
Help & Support#
The profile menu exposes a support workflow that is part of the tested navigation model.
Covered user-visible behavior includes:
opening Help & Support from the profile menu
filling email, subject, and message fields
submitting the support request
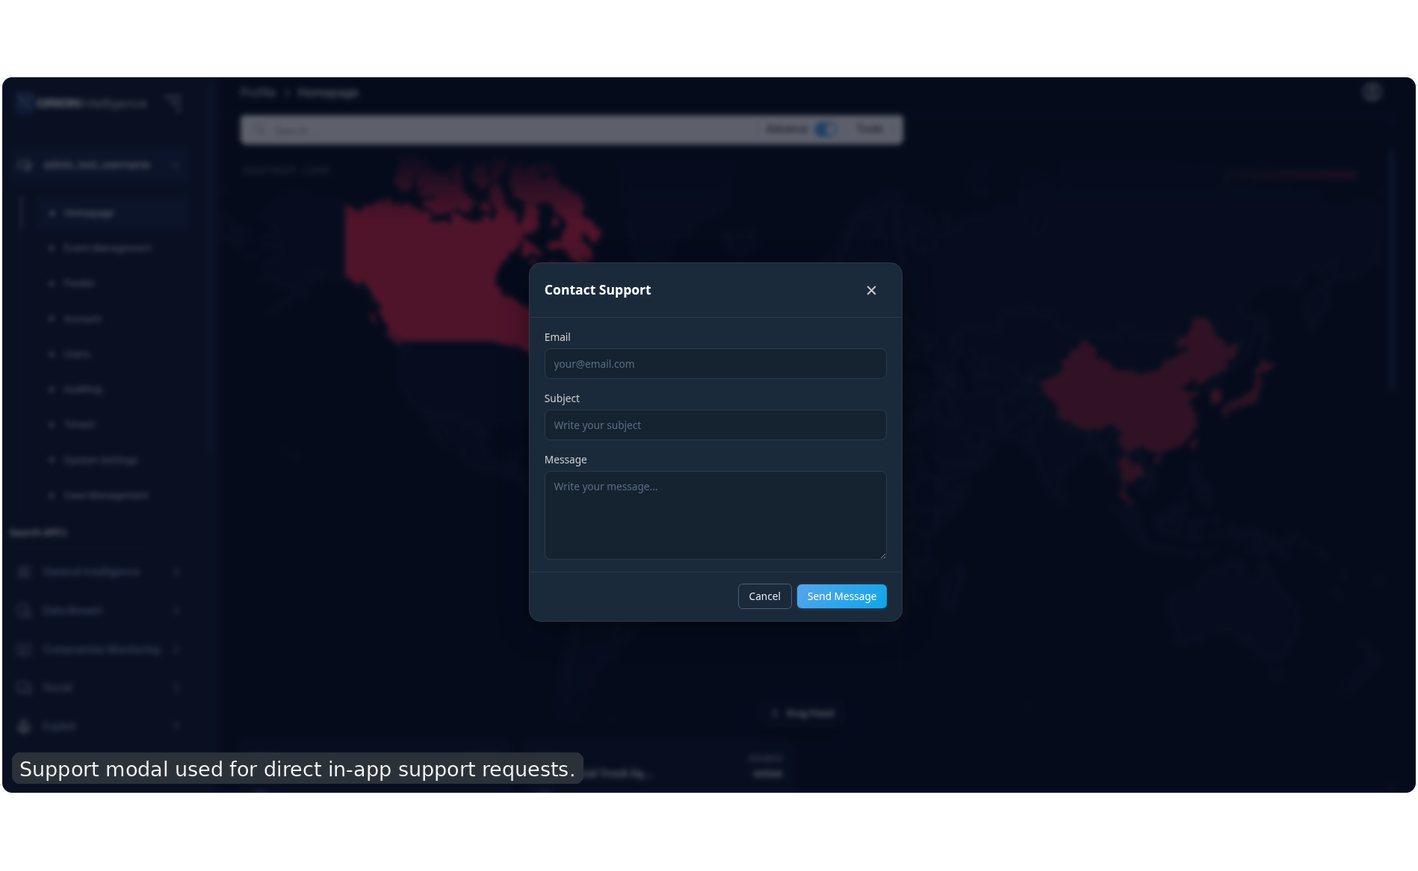
Support modal used for direct in-app support requests.#
Stealer Logs#
Stealer Logs is a dedicated credential and IOC investigation workflow for infostealer-derived data.
Search Modes#
The stealer-log search bar supports two operating modes:
BasicAdvanced
Basic Mode#
Basic mode lets users search by a selected tag. Available tags include:
AllDomainEmailCredit CardIP
Validation is applied to tag-specific inputs where needed.
Advanced Filter Builder#
Advanced mode exposes a row-based query builder that supports:
WHEREANDOR
Each row combines:
an operator
a data tag
a value
This is the preferred mode for precise hunting across large stealer datasets.
Result Metrics#
The Stealer Logs results page surfaces quick metrics such as:
search elapsed time
total results
asset count
aggregated count
Supporting Actions#
The toolbar can include:
password scheme view
domain or subdomain helper
result download
The password-scheme helper is useful when you want to inspect likely password formats or schema patterns. The domain helper provides a fast pivot into related host or subdomain exploration without leaving the stealer-log workflow.
Result Review#
The results area is designed for:
large record volumes
structured credential review
pagination
ranked result handling
Common use case
Use Stealer Logs when you already have a domain, email, or IP and need to confirm whether it appears in infostealer-derived material.
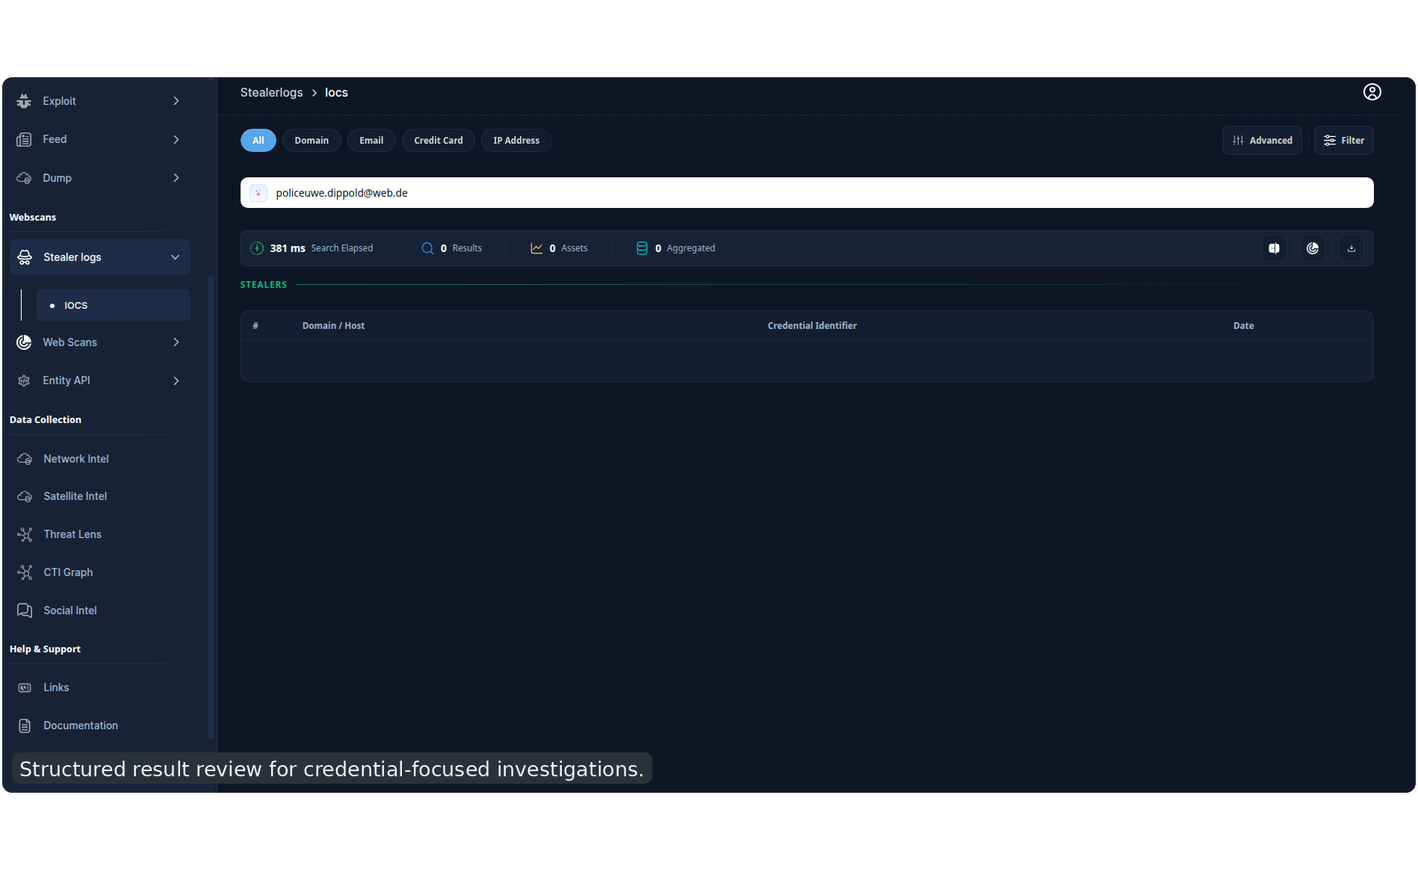
Structured result review for credential-focused investigations.#
Dismissing Results#
Stealer-log and credential results can be dismissed so they stop appearing in future investigations. Dismissal is tenant-wide: once a result is dismissed, every user in that tenant stops seeing it, not just the person who dismissed it. A dismissed result can be restored again from the same control.
A Hide dismissed toggle controls whether dismissed rows are hidden from the current view or shown with a dismissed marker, so reviewers can still audit what was dismissed when needed.
Dismissing and restoring results requires the Dismiss Result user permission. Users without that permission can review results but cannot dismiss or restore them, and the dismiss control is not available to them. The permission is granted per user in tenant user management (see Tenant Users); tenant administrators can dismiss across the tenant.
Live Lookup and Scan Modules#
Entity Lookup#
Entity Lookup is used for targeted live lookups rather than passive indexed browsing. The sidebar label is Entity Lookup, and the module groups focused enrichment workflows in one place.
Available lookup types:
Email BreachSocial ScannerWanted ListNational IdentityPlaystore ScannerSoftware ScannerFile ScannerText AnalysisCrypto ScannerDKIM Lookup
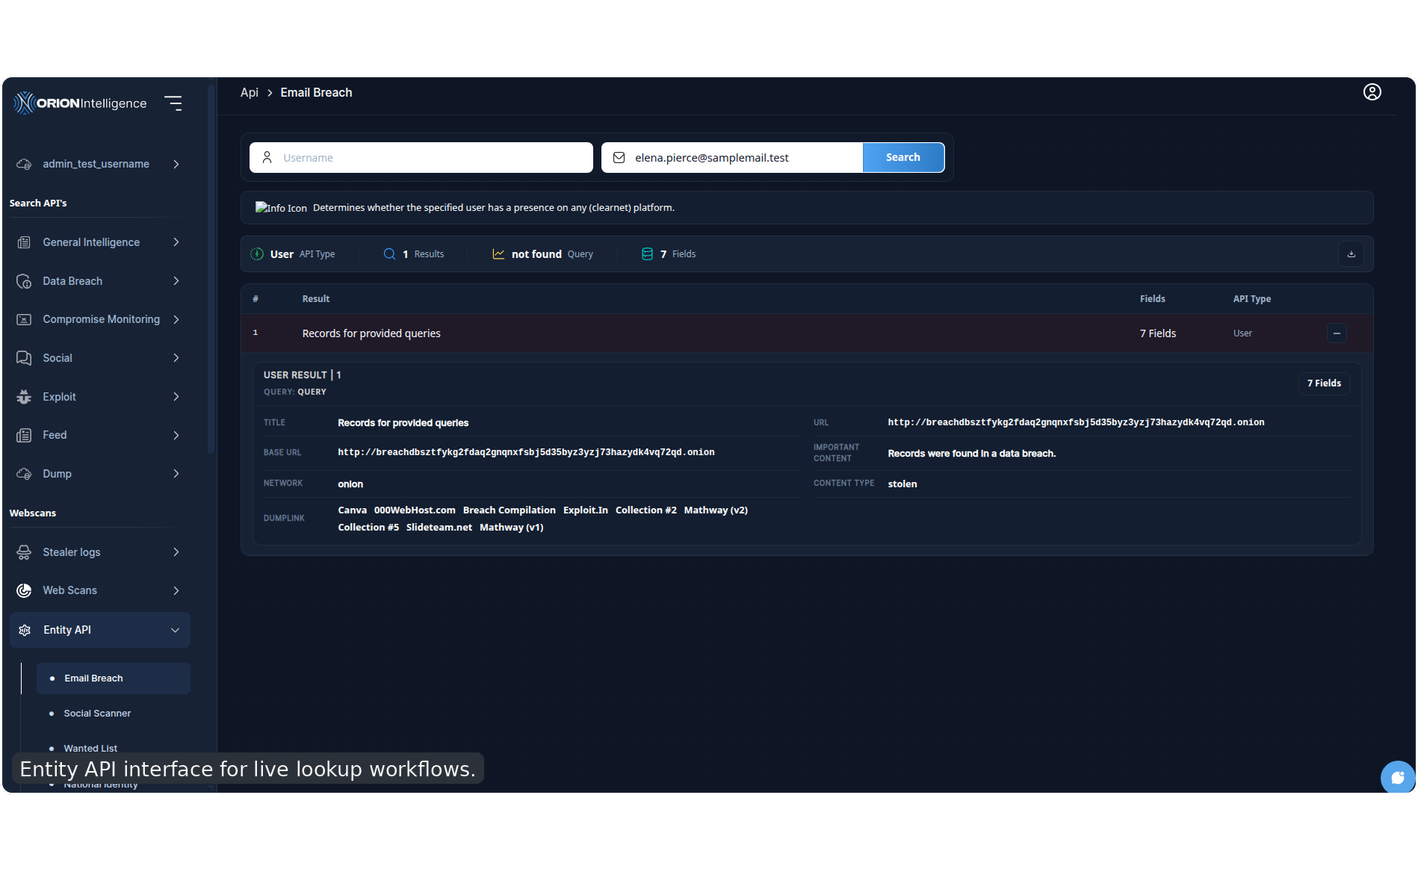
Entity Lookup interface for live lookup workflows.#
Common Entity Lookup Use Cases#
breach validation for a single email
identity enrichment
app and software lookups
file analysis
text analysis for spam or malicious URL detection
crypto-address context
email-authentication (DKIM/DMARC/SPF) posture checks
email forensics and delivery tracing for a received message
DKIM Lookup#
DKIM Lookup is part of Entity Lookup. It inspects email-authentication posture (DKIM, SPF, and DMARC) and can trace how a message was delivered. The page has two tabs: Domain Lookup and Raw Email Forensics.
Domain Lookup#
Discovers DKIM selectors for a domain, validates each DKIM DNS record, and runs the related DMARC and SPF checks.
Inputs:
Domain(required), for exampleexample.comSelector(optional)
If a selector is provided, only that selector is checked. If the selector field is left empty, the lookup discovers selectors automatically from public archives and common selector names, then validates each discovered selector one at a time.
For each selector the result shows whether the record was found, the syntax and public-key checks, the key type and size, the source (live DNS or archive), any warnings (such as a weak 1024-bit key or a record seen only in archives), and the raw record. A Domain Security panel summarizes the domain’s DMARC policy and SPF record. Completed lookups can be exported as a report.
Use Domain Lookup for:
confirming a domain’s DKIM selectors and record validity
reviewing DMARC policy and SPF publication for a domain
spotting weak keys or selectors no longer published in live DNS
Raw Email Forensics (Email Trace)#
Analyzes a single received message from its raw source instead of from a domain. In your email client, open the message, view its original source, and paste the full message — headers and body — into the box. A How to get this? button at the top-right of the panel shows step-by-step instructions for Gmail, Outlook / Microsoft 365, Apple Mail, Yahoo, and Thunderbird.
For that specific message the result reports:
DKIM Signature — the signing domain and selector, and whether the receiving server recorded a
dkim=pass.SPF Check — the SPF result, the sending server’s originating IP, and the envelope sender.
DMARC Policy — the DMARC result, the
Fromdomain, and the published policy (for examplep=quarantine).Network Hops — the delivery route rebuilt from the
Receivedheaders, shown as a timeline (source at the bottom, destination at the top).
Use Raw Email Forensics for:
checking whether a specific message was authenticated (spoofing and phishing triage)
tracing where a message actually originated and which servers it passed through
confirming the SPF, DKIM, and DMARC results for a message you received
The results reflect the authentication verdicts recorded in the message headers and the routing they describe; they are a fast forensic read of the message rather than an independent re-verification of the DKIM signature.
Text Analysis#
Text Analysis is part of Entity Lookup. It is used when the artifact is text rather than a file, domain, username, or IP address.
Use Text Analysis for:
suspicious message bodies
text that may contain malicious URLs
spam or phishing-style content checks
short copied snippets that do not justify a full file upload
The output depends on the configured analysis service, but the workflow follows the same scan-oriented pattern: provide the input, run the analysis, review the result, and use the result in a broader investigation if needed.
File Scanner#
File Scanner is the upload-based analysis area inside Entity Lookup.
Main Modes#
The workflow supports two related use cases:
file IOC extraction
APK analysis
Supported Behavior#
The File Scanner workflow includes:
file-type validation
size validation
upload and processing progress
grouped IOC output
export and print for supported scan types
IOC Extraction Output#
For file IOC extraction, Orion groups indicators into categories such as URLs, packages, permissions, tampering markers, and other extracted values based on the uploaded content.
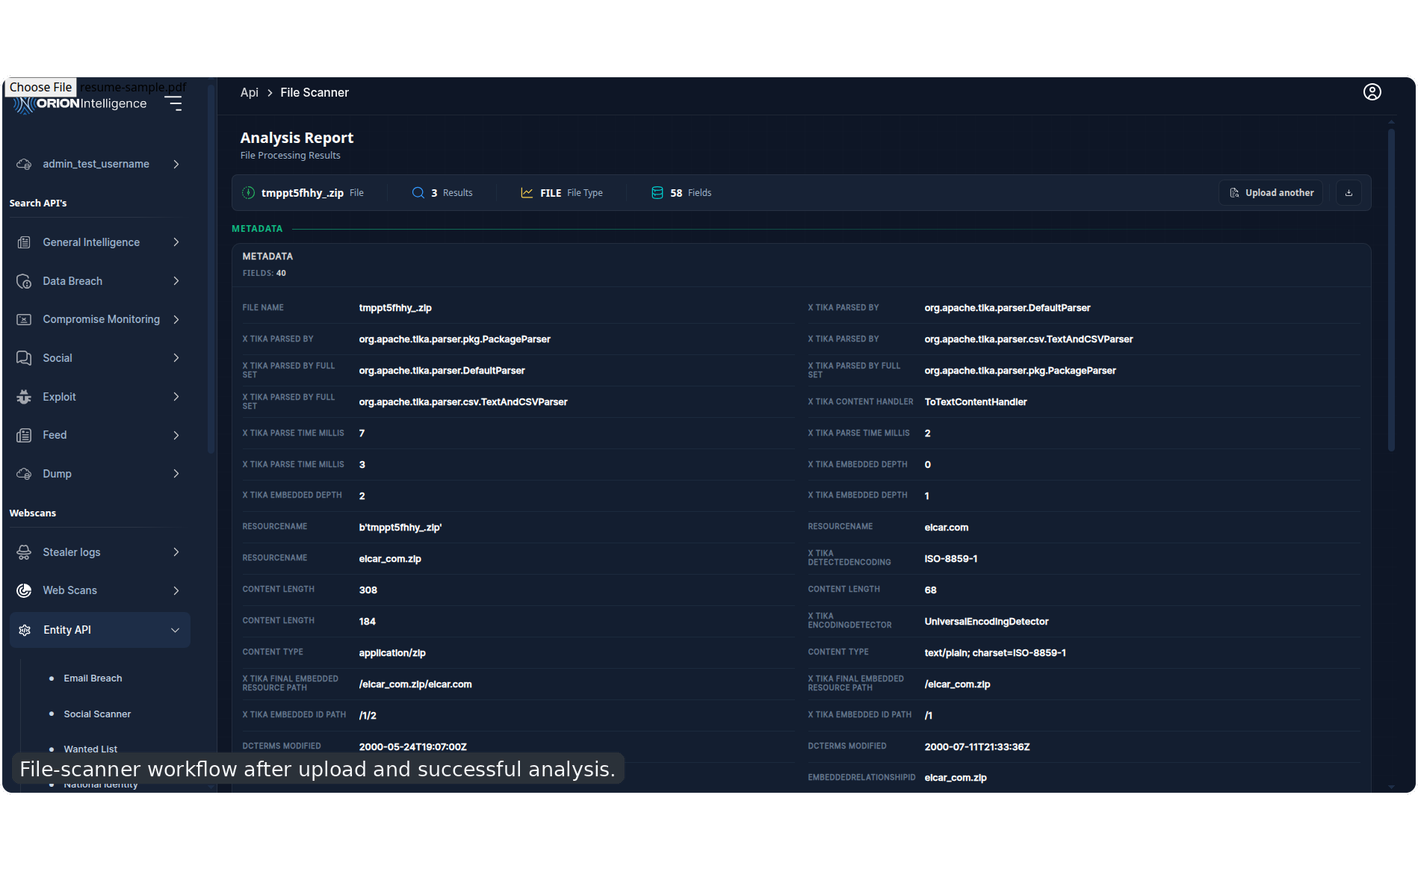
File-scanner workflow after upload and successful analysis.#
Web Scans#
Web Scans is the live scanning area for web-facing targets. Depending on the selected scan, the workflow may run through Entity Lookup, Network Intel, or the scan report view used to reopen completed scan jobs.
Available Scan Types#
Basic ScanPort ScanRepository ScanSEO ScanAPK Scan
Standard Workflow#
The standard web-scan flow is:
enter a target domain or repository-style URL
run the scan
wait for loading-step progress
review the generated report
reopen the report from scan-job notifications if needed
Report Structure#
The resulting report commonly includes:
a security grade
host and port
TLS status
scan metadata such as
Scanned OnandScanned Bycategorized findings
evidence or proof blocks
download and print actions
Findings and Error States#
Finding sections also show severity and confidence labels, so the report can be used for quick triage as well as export.
Scan failures are handled with retry guidance and error messaging.
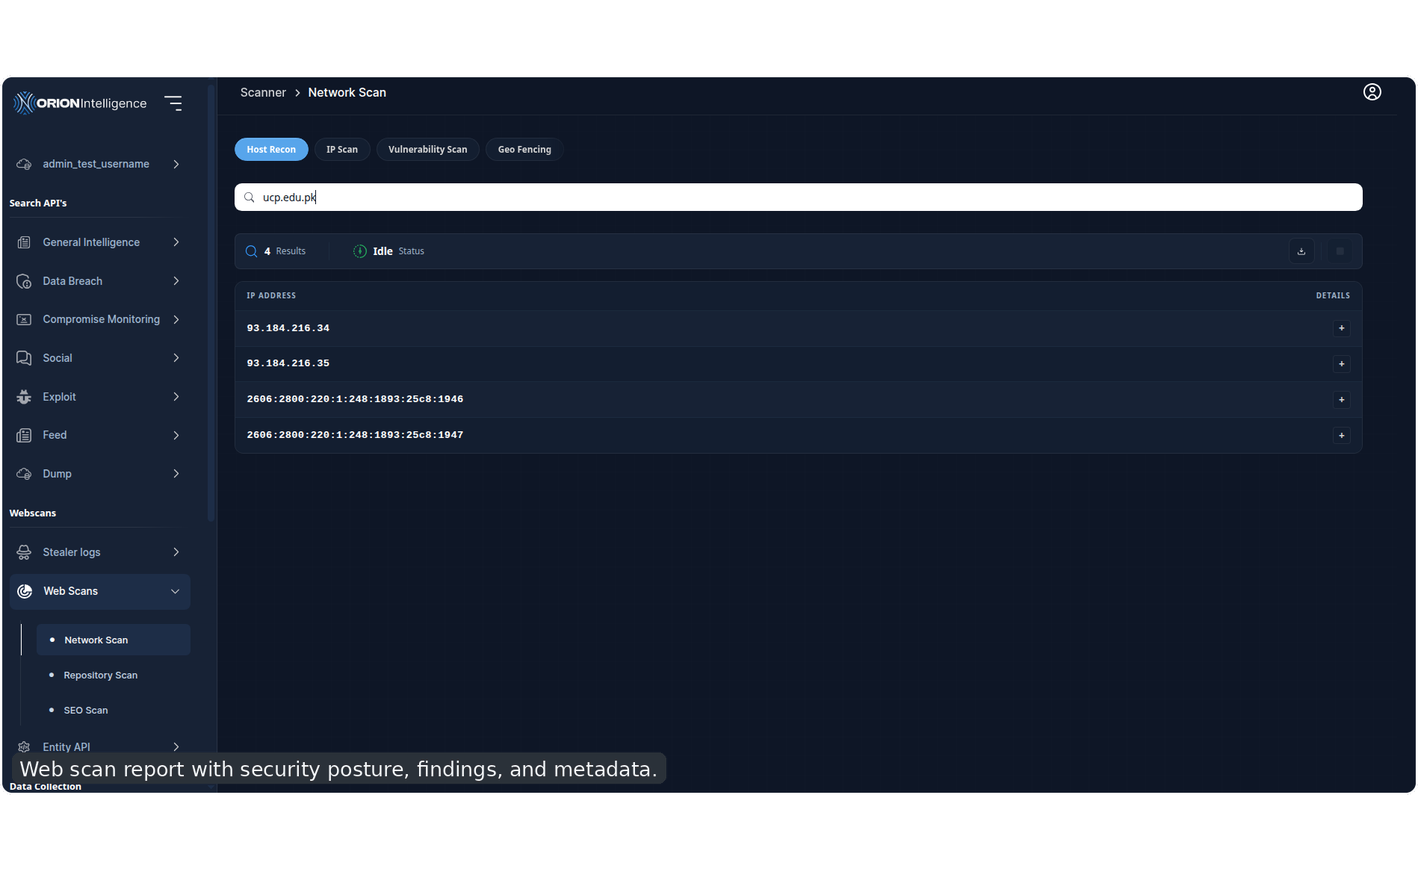
Web scan report with security posture, findings, and metadata.#
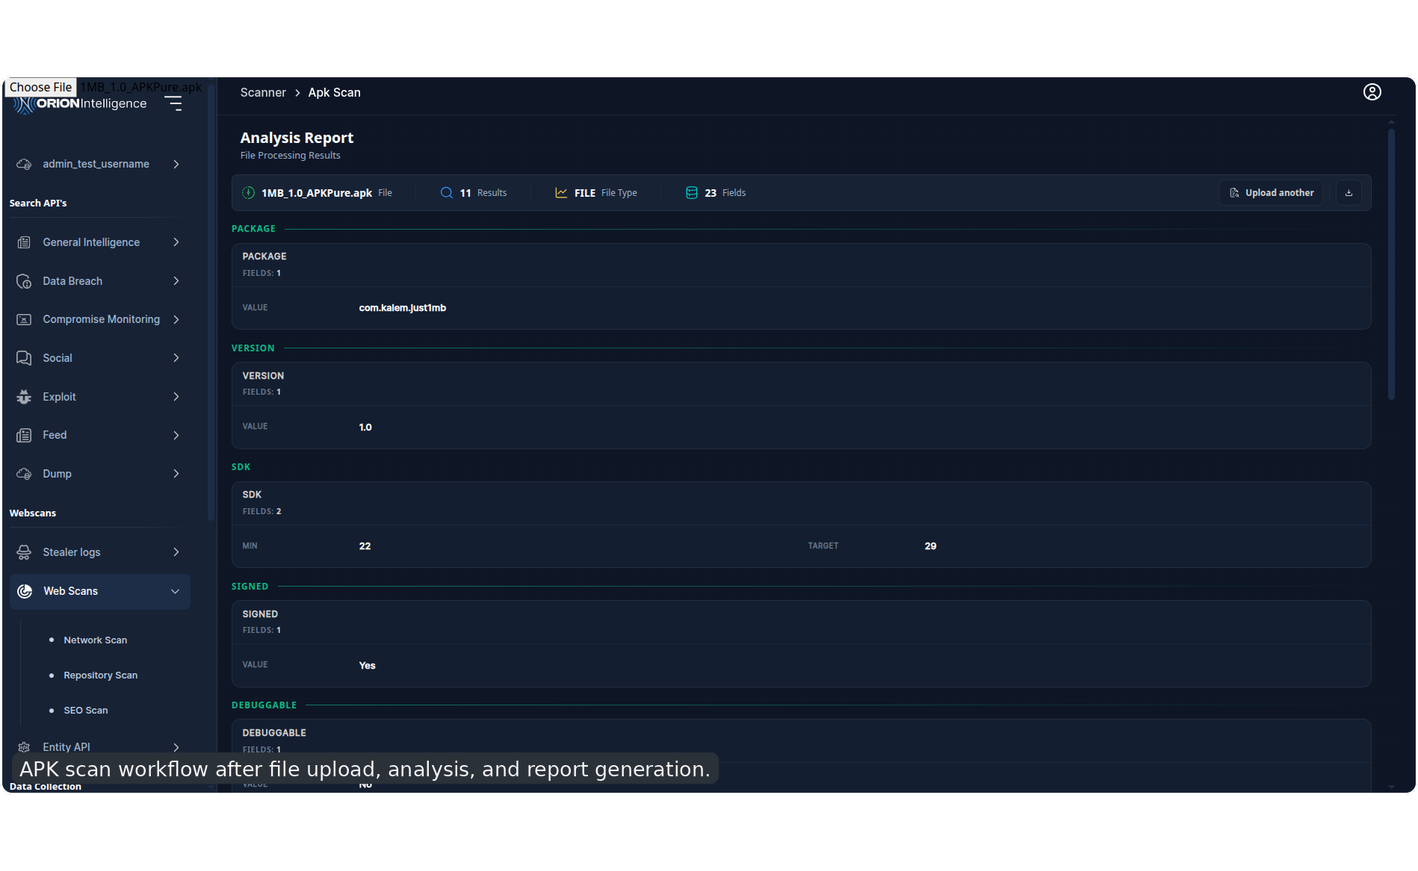
APK scan workflow after file upload, analysis, and report generation.#
Tracked Scan Jobs#
Long-running scan and lookup actions are tracked as scan jobs. This applies to several Entity Lookup, Web Scan, Network Intel, crypto, dynamic social, wanted-list, and national-identity workflows.
Scan jobs can appear in the left home menu and notification surfaces with states such as queued, running, done, or error. Users can reopen completed scan reports, resume incomplete jobs, and poll running jobs without starting the same scan from scratch.
User-visible scan job actions include:
opening the completed scan report
returning to an incomplete job
polling a running job for fresh status
marking a scan notification as seen
deleting one completed scan notification
clearing all completed scan notifications
Duplicate scan handling follows these rules:
if an identical scan is already running, Orion reuses the existing running job
if an identical scan completed in the last three days, Orion opens the previous result automatically
if the last identical completed scan finished more than three days ago, Orion asks whether to use the previous result or run a new scan
choosing to run a new scan sends the request with
force_new=true
Notification controls allow terminal scan jobs to be marked seen, deleted individually, or cleared in bulk. Incomplete jobs are prioritized so users can continue active work before reviewing completed scans.
Scan reports open from notifications, result links, or completed scan workflows. Users normally do not need to type a direct address manually.
Network Intel#
Network Intel provides live recon workflows for domains and IPs.
Tabs:
Host ReconIP ScanVulnerability Scan
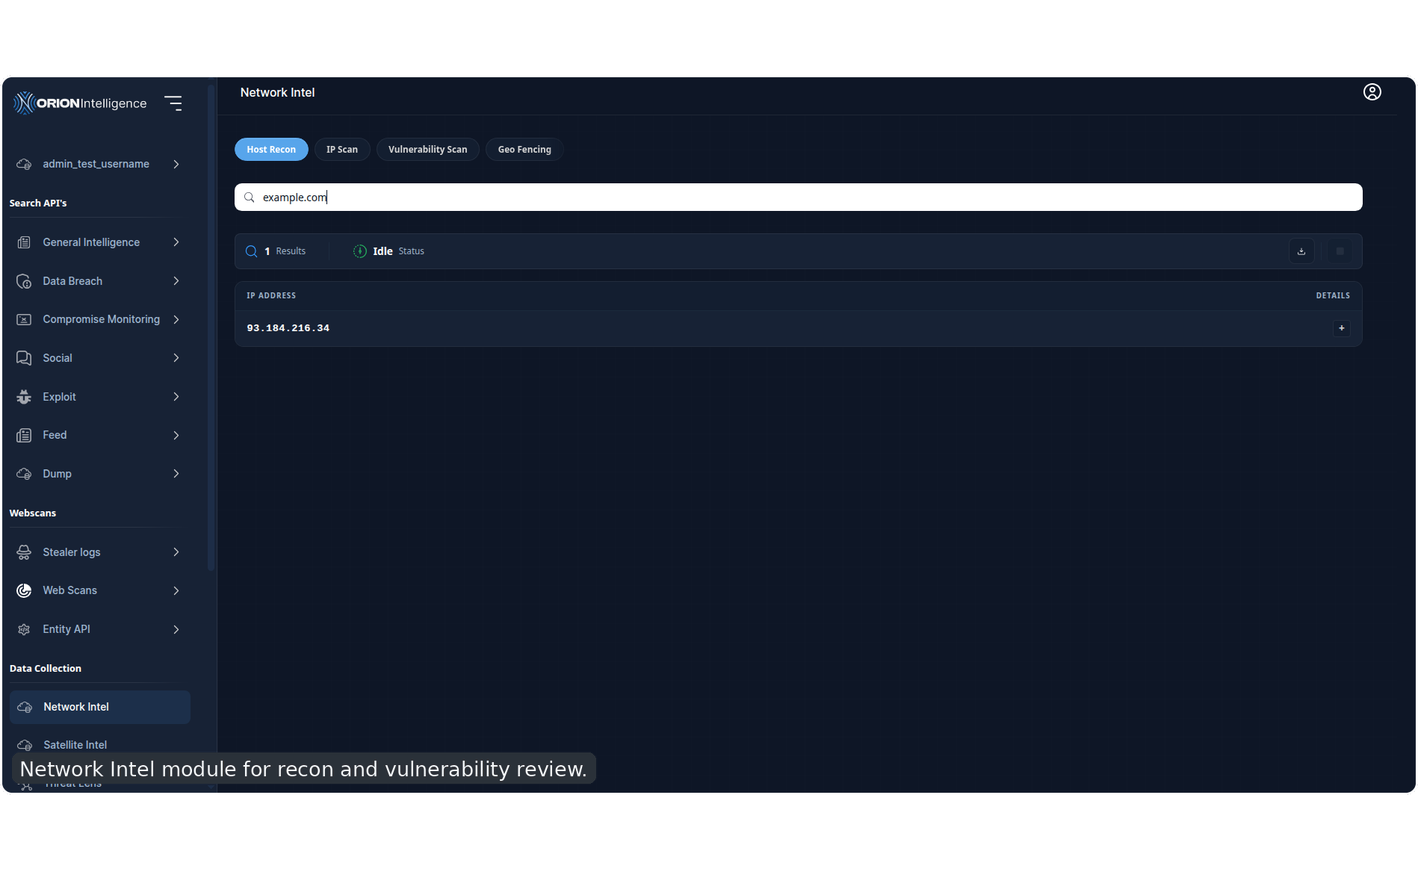
Network Intel module for recon and vulnerability review.#
Host Recon#
Host Recon is used to resolve a domain into infrastructure and network information. It commonly surfaces DNS-style and IP-related context for the queried host.
IP Scan#
IP Scan focuses on a specific IP and can expose service or infrastructure context derived from the target address.
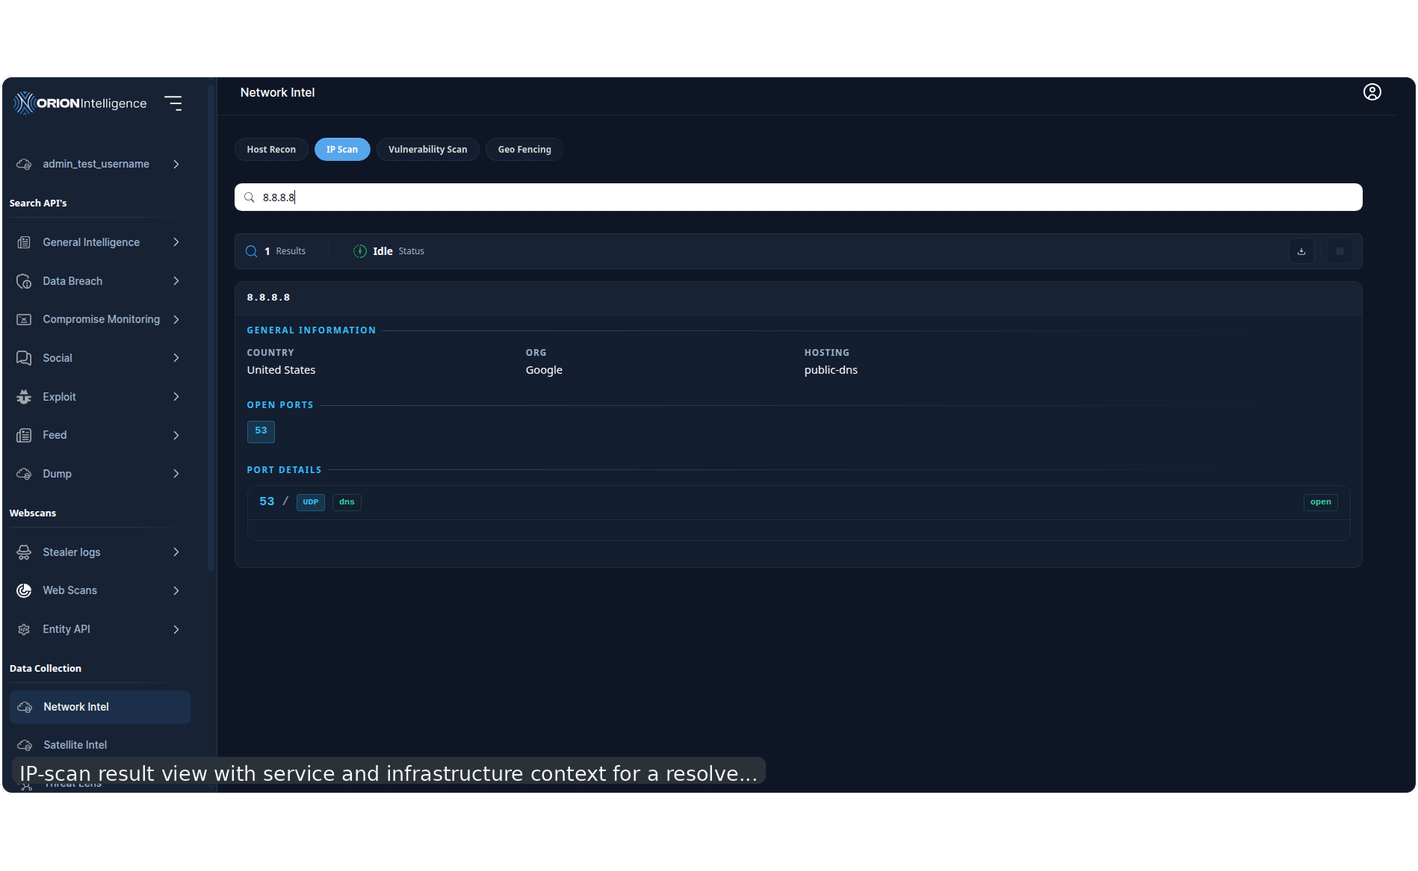
IP-scan result view with service and infrastructure context for a resolved address.#
Vulnerability Scan#
Vulnerability Scan reviews security issues for a supplied target and includes:
progress feedback
elapsed time
downloadable report output
cancel support during scanning
After a target is resolved, the vulnerability view lists the primary domain and any discovered subdomains as selectable targets. Each target can be scanned with a depth level before opening the target result:
Depth |
Intended use |
Tool coverage shown in the UI |
|---|---|---|
|
fast first-pass review when the analyst needs quick signal |
URL probes and heuristic checks |
|
broader validation when the target needs passive security review |
URL probes, heuristic checks, ZAP passive checks, and CVE lookup |
|
deeper review when the analyst accepts a longer scan |
URL probes, ZAP spider, heuristic checks, ZAP passive checks, and CVE lookup |
Changing the depth prompts the user to confirm the scan before the selected target is run. The selected depth is stored per target in the current view, so one target can be scanned at Low while another target is reviewed at Medium or High.
Completed vulnerability results can show severity summary cards, extracted response details, scanned URLs, request metadata, and individual findings. Findings may include title, category, risk, description, affected URL, reference URLs, and evidence snippets when those fields are returned by the scanner.
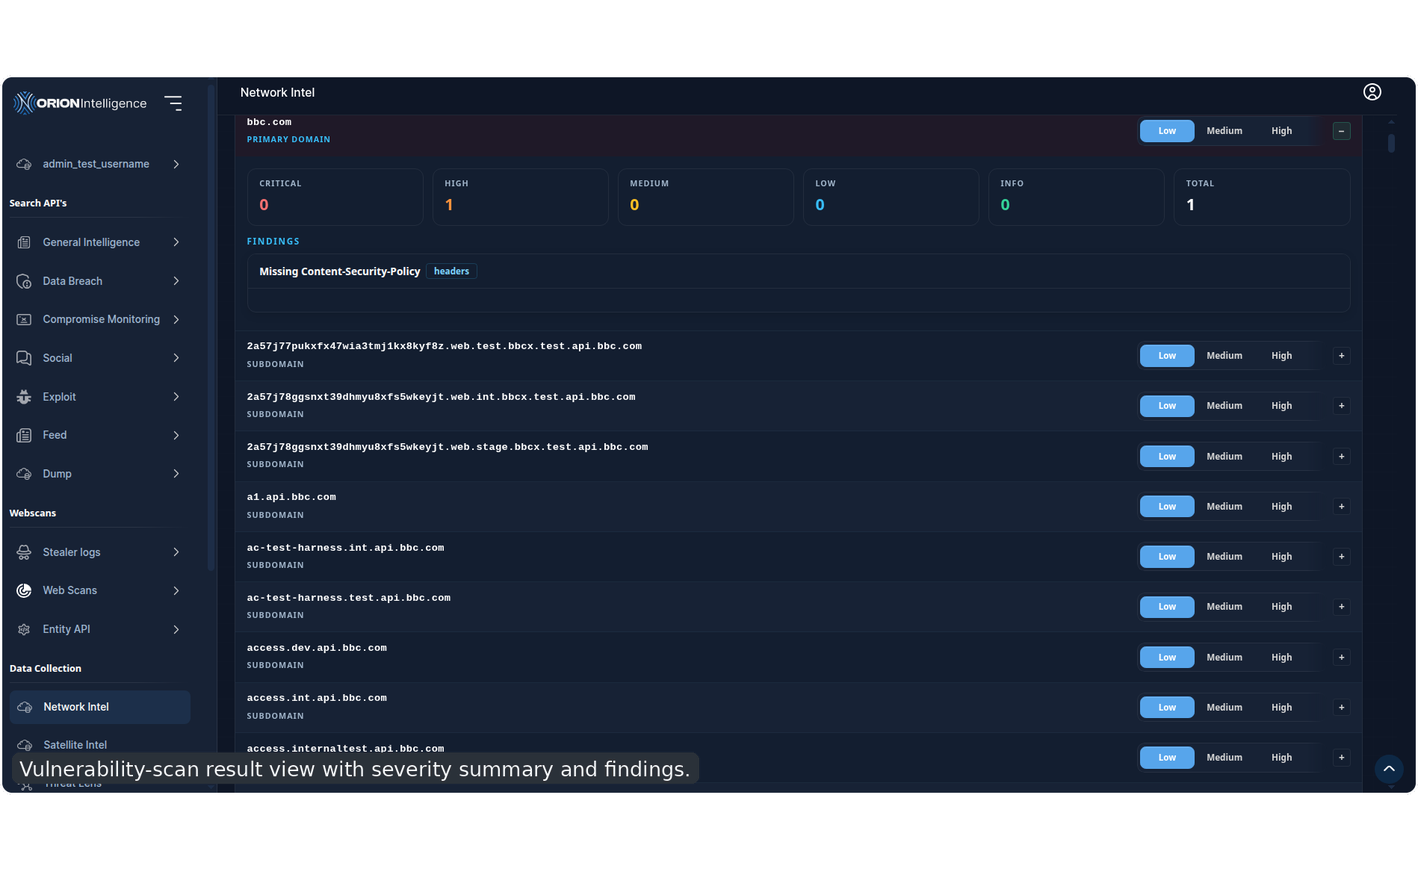
Vulnerability-scan result view with severity summary and findings.#
Common Toolbar Features#
The Network Intel toolbar can include:
query input
status indicators
result count
elapsed time
download report
cancel current run
optional geo search support for relevant views
Geo support is especially relevant when working from host-oriented results and wanting to pivot from a location or coordinates into nearby IP discovery.
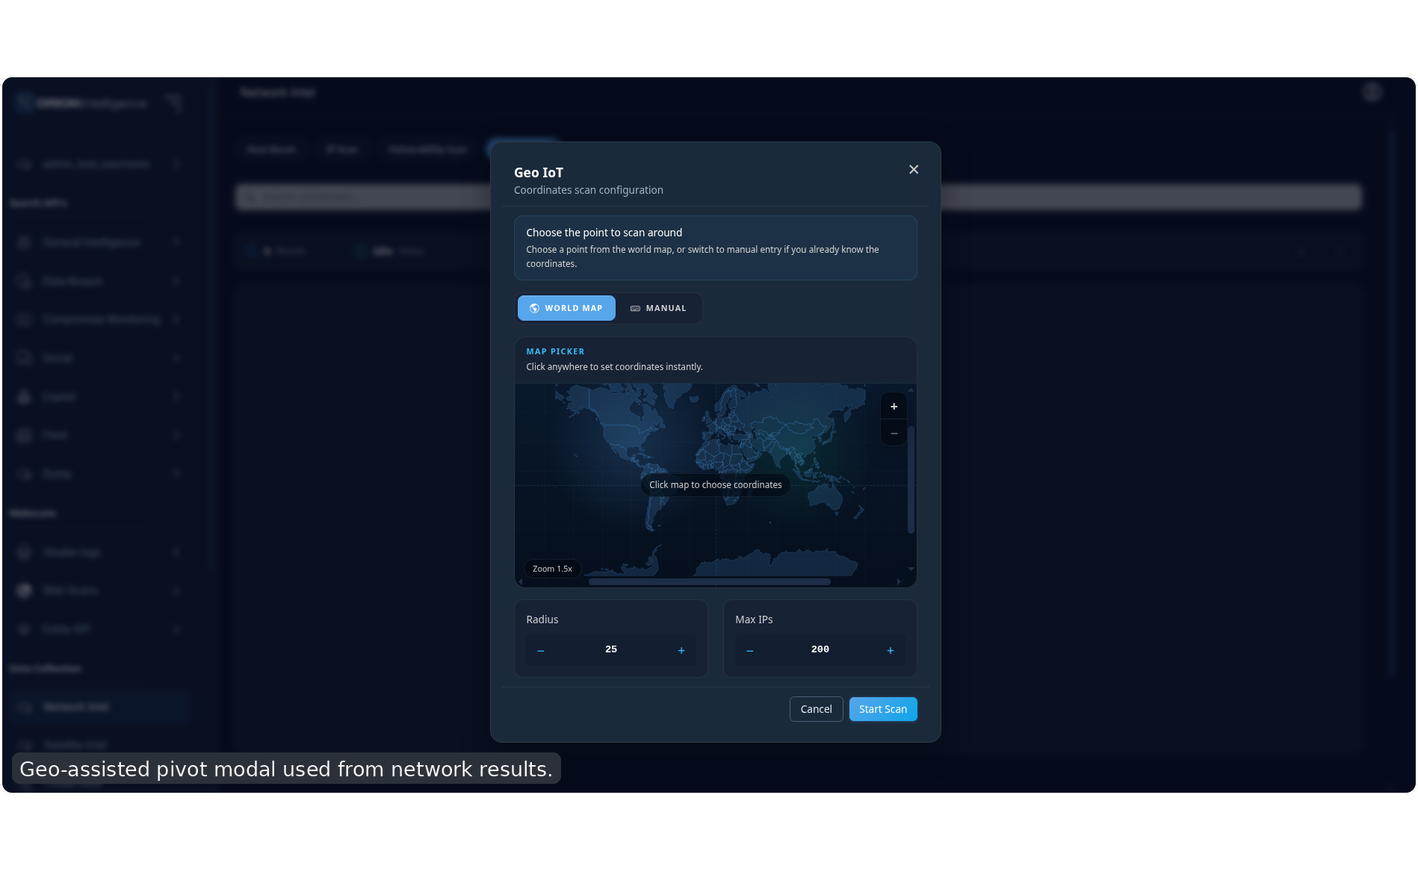
Geo-assisted pivot modal used from network results.#
Satellite Intel#
Satellite Intel is Orion’s geo-fencing map workspace for infrastructure, facilities, transportation tracking, and satellite imagery review. It combines a Leaflet map, indexed map entities, nearby facility discovery, live aircraft and ship overlays, and comparison imagery in one operational view.
Satellite Intel can be opened from the sidebar as Satellite Intel. It is also embedded inside the consolidated results Geo Fencing tab, where the top toolbar can switch between Satellite Map and Threat Lens.
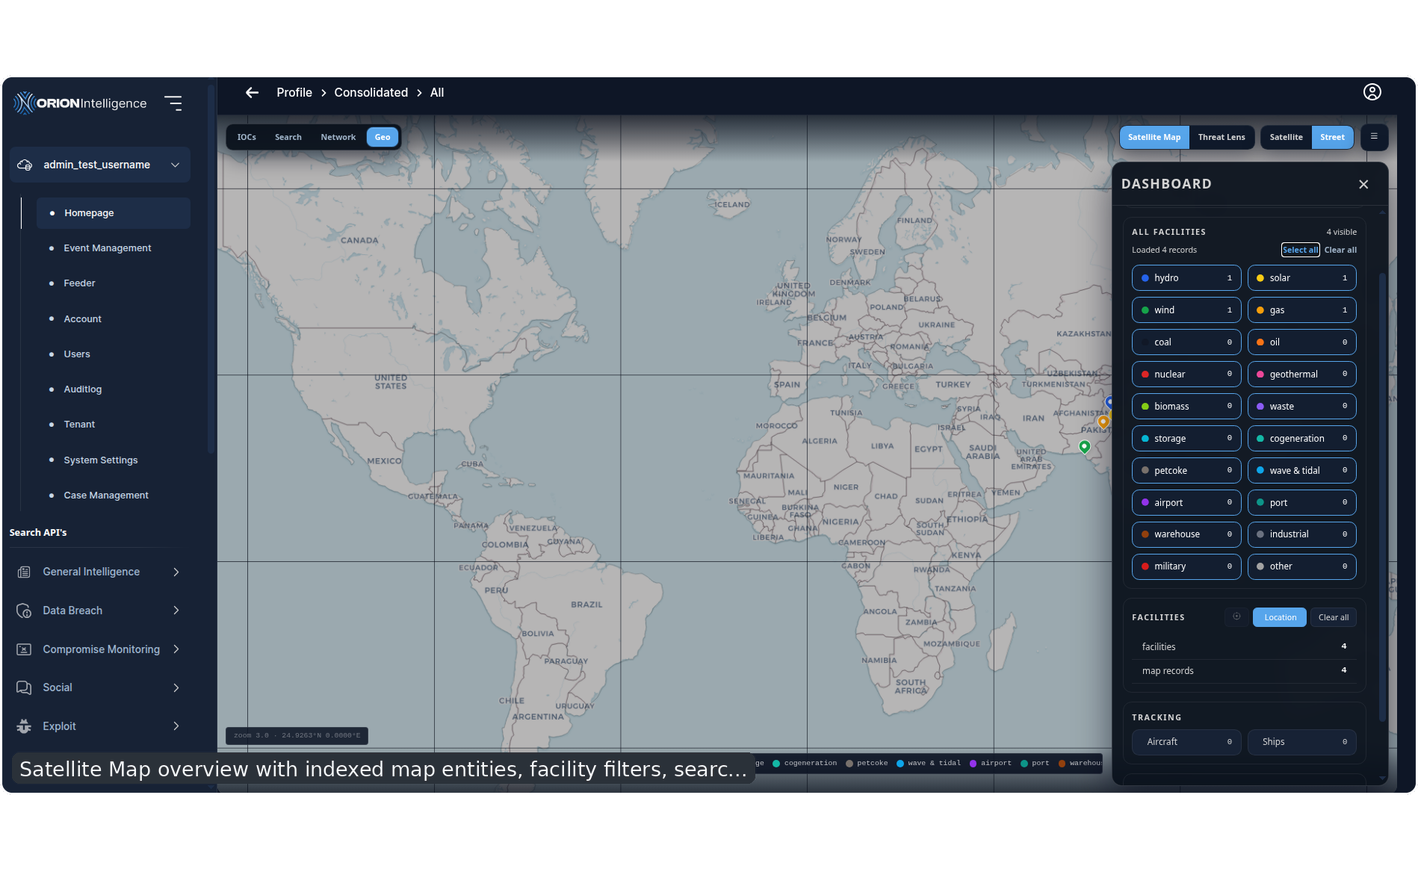
Satellite Map overview with indexed map entities, facility filters, search, tracking controls, selection state, and the map renderer.#
Access and Licensing#
The sidebar entry is available to admins and users with the osint_advanced module. If the module is unavailable, the sidebar entry remains gated by the subscription prompt.
Satellite Intel can be opened from the Geo Fencing sidebar entry or from consolidated geo-fencing flows.
The embedded view exposes the Satellite Map and Threat Lens toggle. The map view keeps its own panel menu, layer switcher, facility dashboard, imagery-analysis panel, location modal, and tracking overlays.
Map Renderer and Layers#
The map renderer uses Leaflet. The Street layer uses the Carto Voyager tile set, while the Satellite layer uses ArcGIS World Imagery.
Map behavior includes:
world-bounds limiting so the map does not wrap horizontally
dynamic minimum zoom based on the rendered container
map movement events that update the active viewport
feature focusing from search results
selected-location rendering after a geocode or coordinate lookup
marker sizing refresh after zoom changes
sidebars for aircraft and ship details
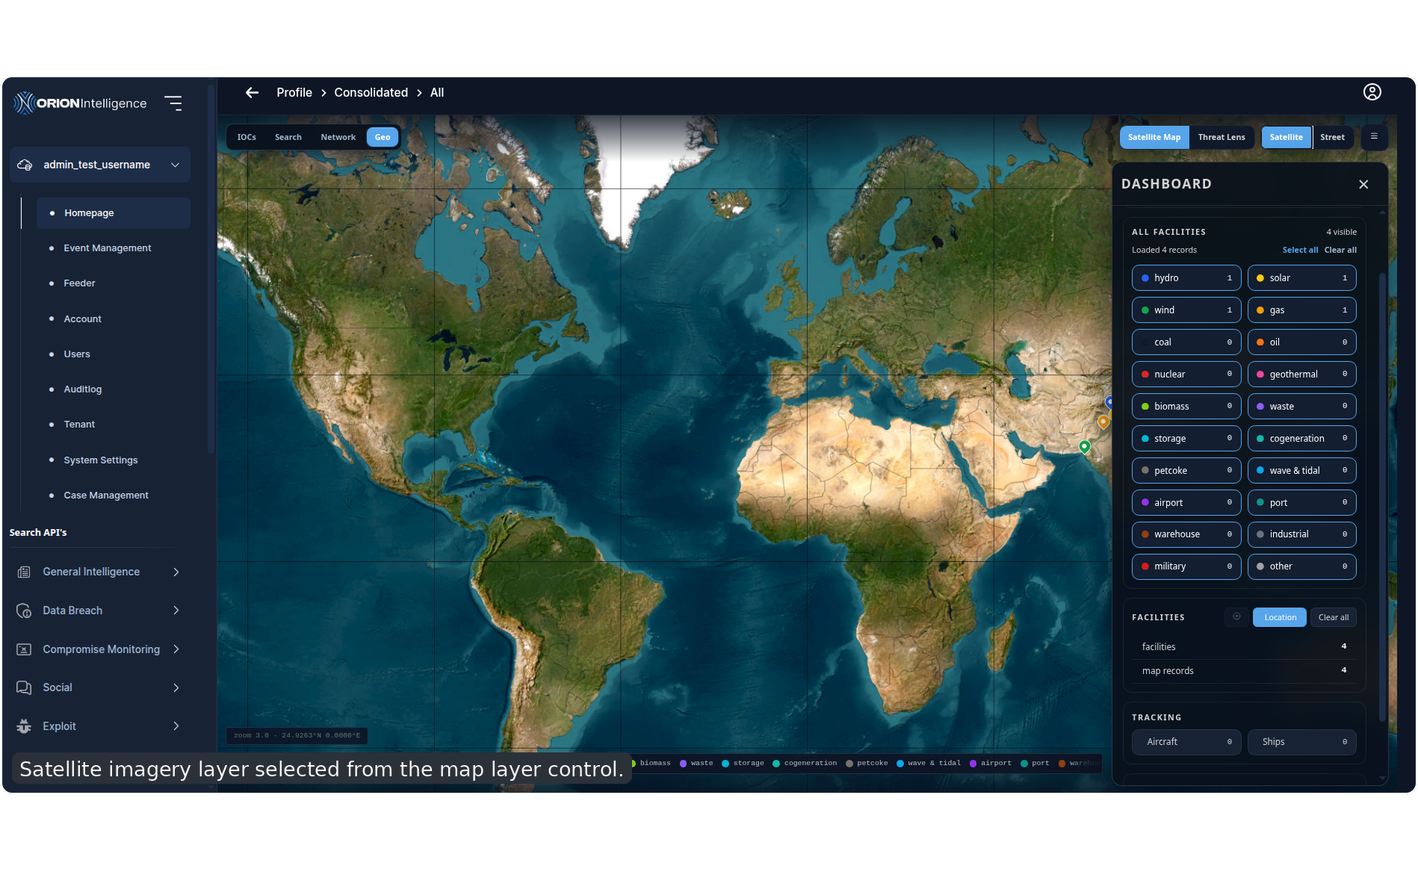
Satellite imagery layer selected from the map layer control.#
Indexed Map Entities#
On load, the dashboard requests indexed map entities and converts them into map features with name, type, source, coordinates, optional capacity, and a stable feature identifier.
The dashboard can show power and infrastructure facility categories, including:
hydro
solar
wind
gas
coal
oil
nuclear
geothermal
biomass
waste
storage
cogeneration
petcoke
wave and tidal
airport
port
warehouse
industrial
military
other
The All Facilities panel shows loaded and visible counts. Users can select all categories, clear all categories, or toggle individual categories to control which indexed points render on the map.
Search and Selection#
The dashboard search box filters loaded map entities and nearby facilities. Selecting a result focuses the map on that feature and updates the Selection panel.
The selection panel can show:
facility or entity name
normalized type
source, such as
WRIorOSMcapacity in megawatts when available
coordinates in latitude and longitude form
Location Search and Nearby Facilities#
The Location button opens the shared geocode modal. Users can search for a place, enter coordinates, adjust the map coverage delta, and apply the location to the Satellite Map.
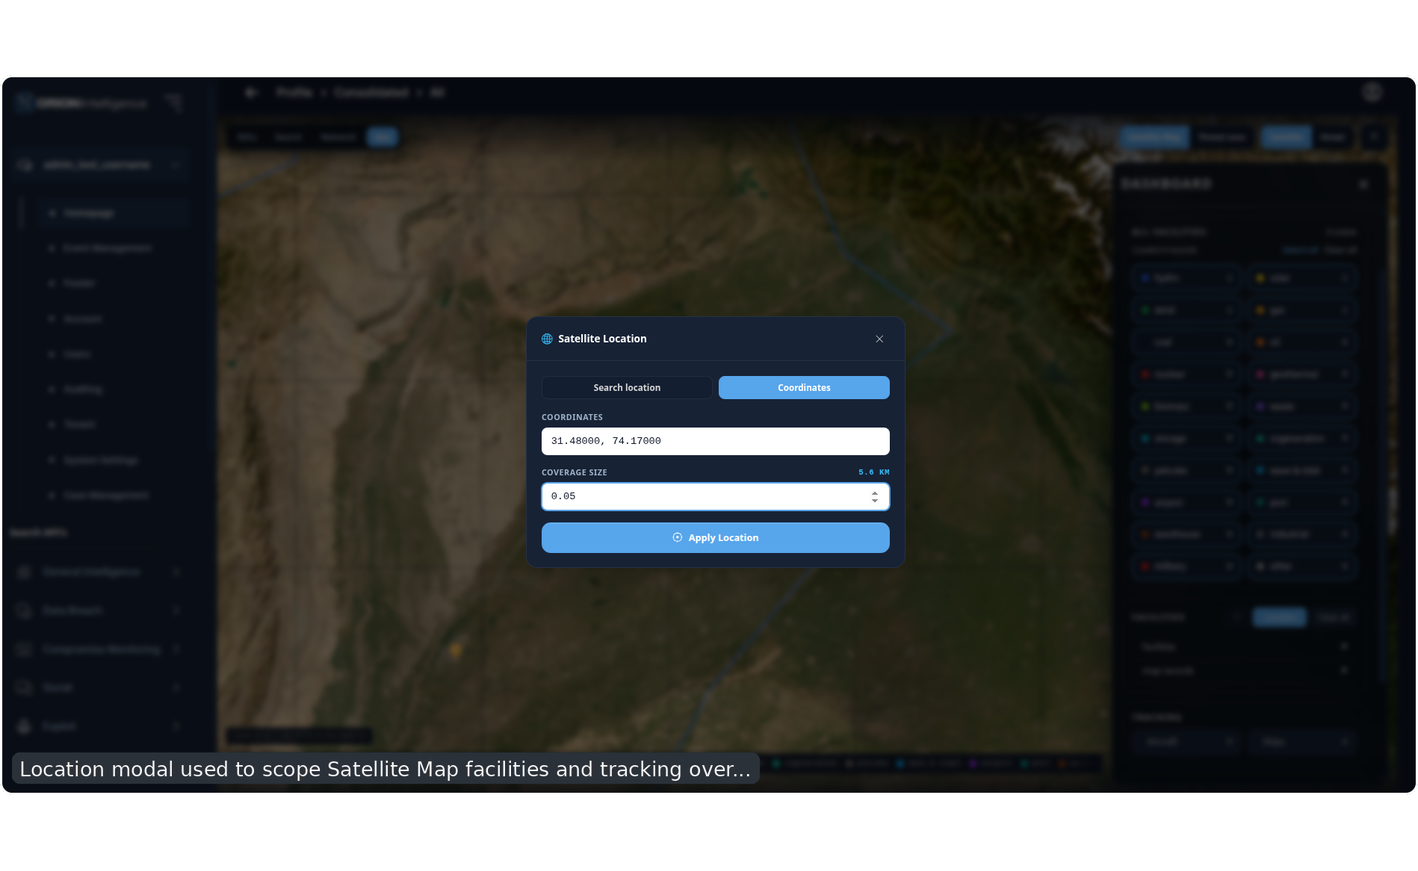
Location modal used to scope Satellite Map facilities and tracking overlays.#
After a location is applied, Satellite Intel:
focuses the map on the selected coordinates
records the active viewport
loads nearby facilities for the selected viewport
refreshes enabled aircraft and ship tracking against the scoped viewport
enables the location-target control so the user can return to the selected location
Nearby facilities are normalized into the same map-feature shape used by indexed entities. Point, line, polygon, and multipolygon geometries are converted into renderable coordinates. Facility kinds are normalized into Orion map categories such as airport, port, warehouse, industrial, military, solar, wind, hydro, coal, gas, oil, storage, and other.
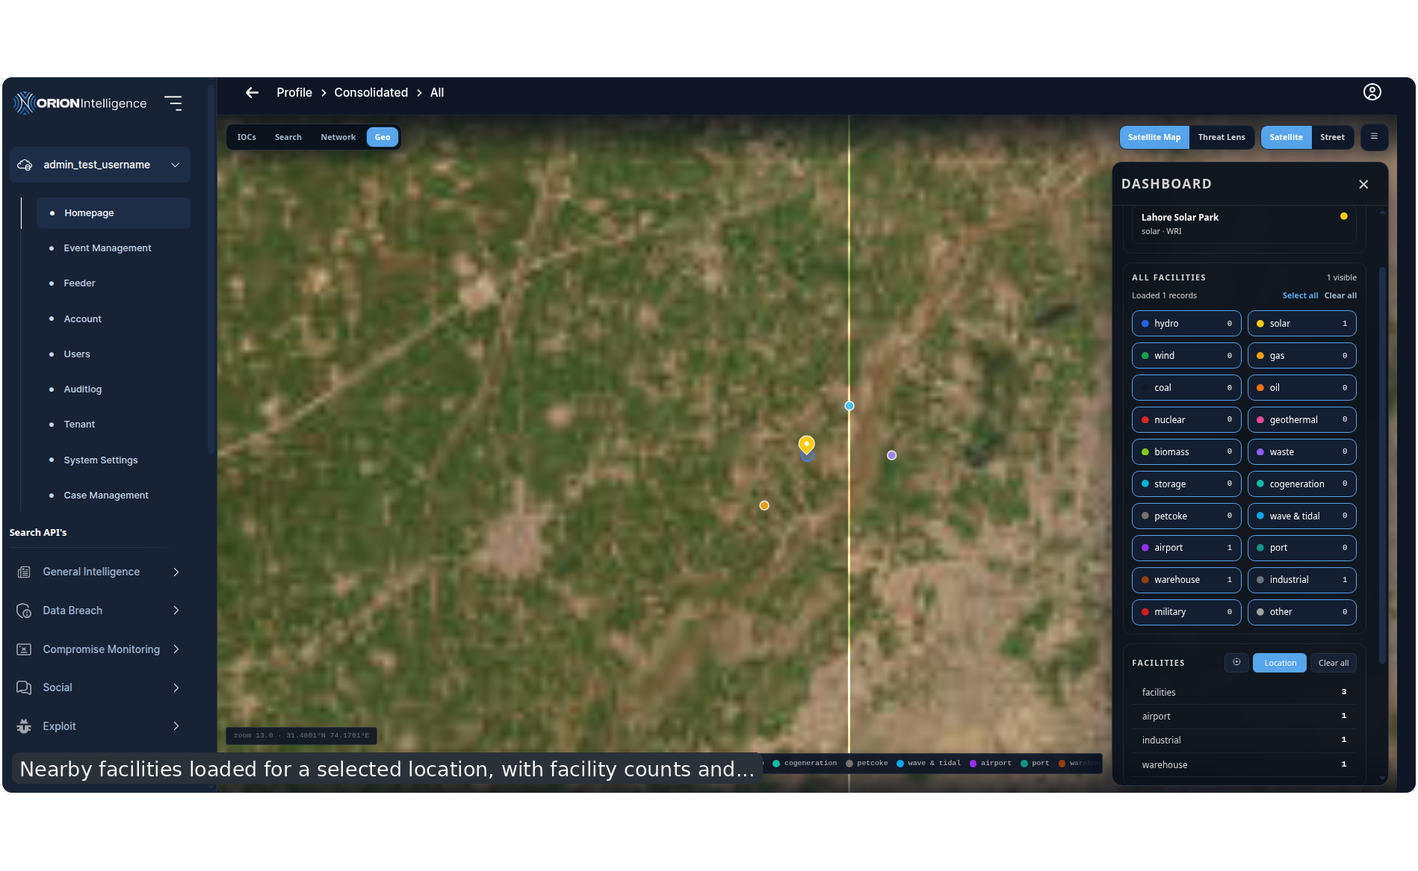
Nearby facilities loaded for a selected location, with facility counts and category breakdowns.#
Aircraft and Ship Tracking#
The Tracking panel controls live transportation overlays.
Aircraft tracking uses the active map bounds and can include OpenSky credentials when configured.
Ship tracking uses the active map bounds. Bounds are clamped to valid latitude and longitude ranges, and the request can include an AISStream API key when configured.
Tracking behavior includes:
separate toggles for
AircraftandShipsloading indicators per tracking source
visible counts in the tracking buttons
matching aircraft and ship counts in the facilities summary
marker rendering on the map
detail sidebars when a tracking marker is selected
aircraft detail lookup by ICAO
aircraft track lookup
ship detail lookup by MMSI
viewport refreshes for ships after the map moves
If a tracking feed is pending or busy, the polling helper keeps waiting. If a feed returns an error, the dashboard shows the tracking-specific error while preserving the rest of the map context.
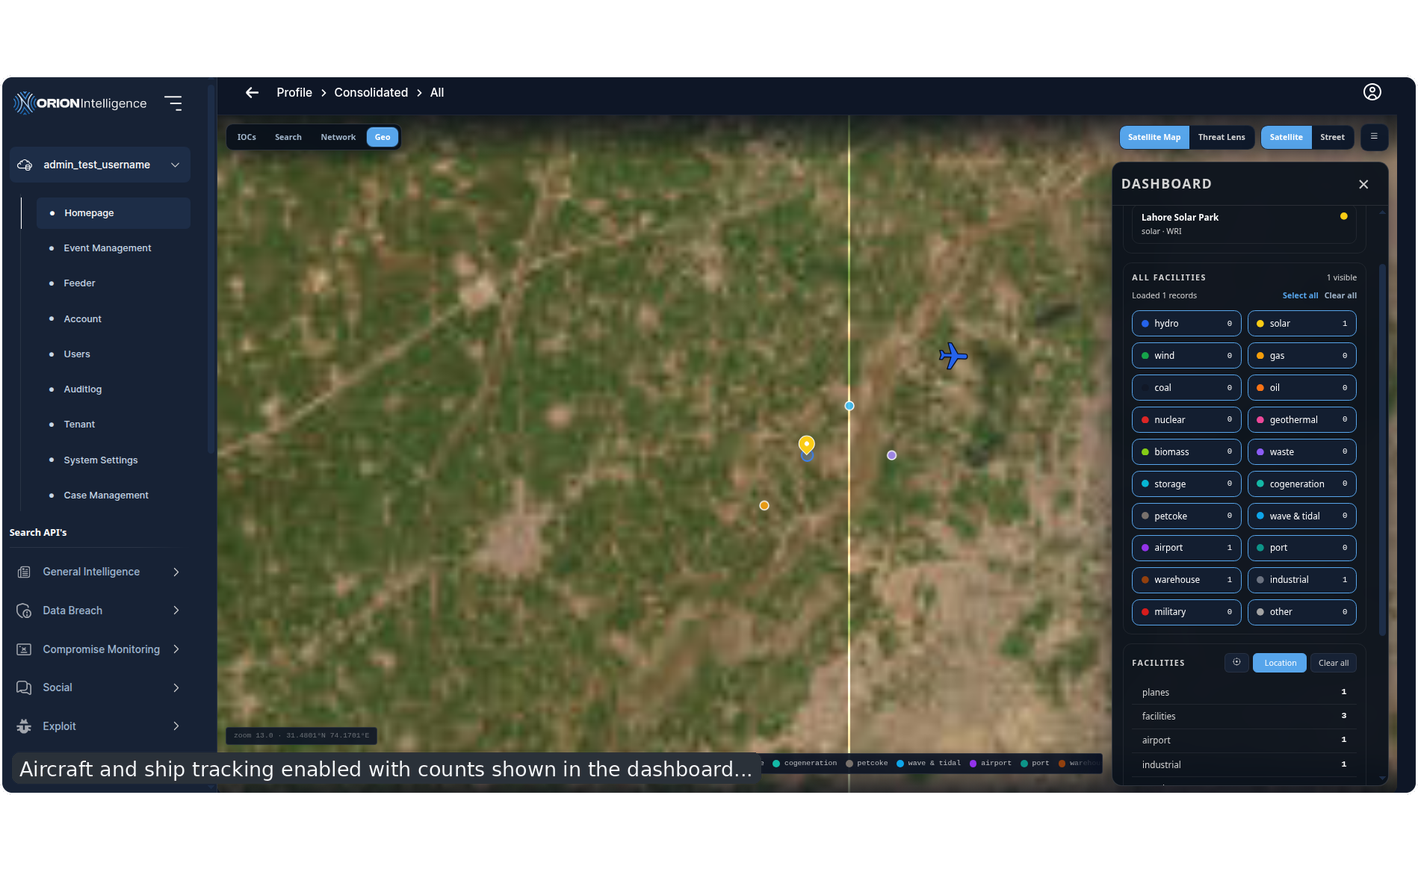
Aircraft and ship tracking enabled with counts shown in the dashboard panels.#
Imagery Analysis#
The panel menu opens Imagery Analysis. This view is used for satellite image comparison and anomaly review at a selected location.
The imagery workflow supports:
selecting or reusing a location
choosing an image type from the advanced controls
choosing a timeline date
resetting the date to the default
loading a comparison set
opening generated images in a lightbox
When Load comparison is clicked, the view runs a combined comparison flow. If no explicit month is selected, Orion can also request a year-ago image for comparison. Anomaly analysis runs against the selected imagery set.
The result panel can show:
number of comparison images loaded
image labels for each returned month
anomaly alert level
NDVI delta score
scan coordinates
month count for the anomaly scan
empty-image and failed-request states
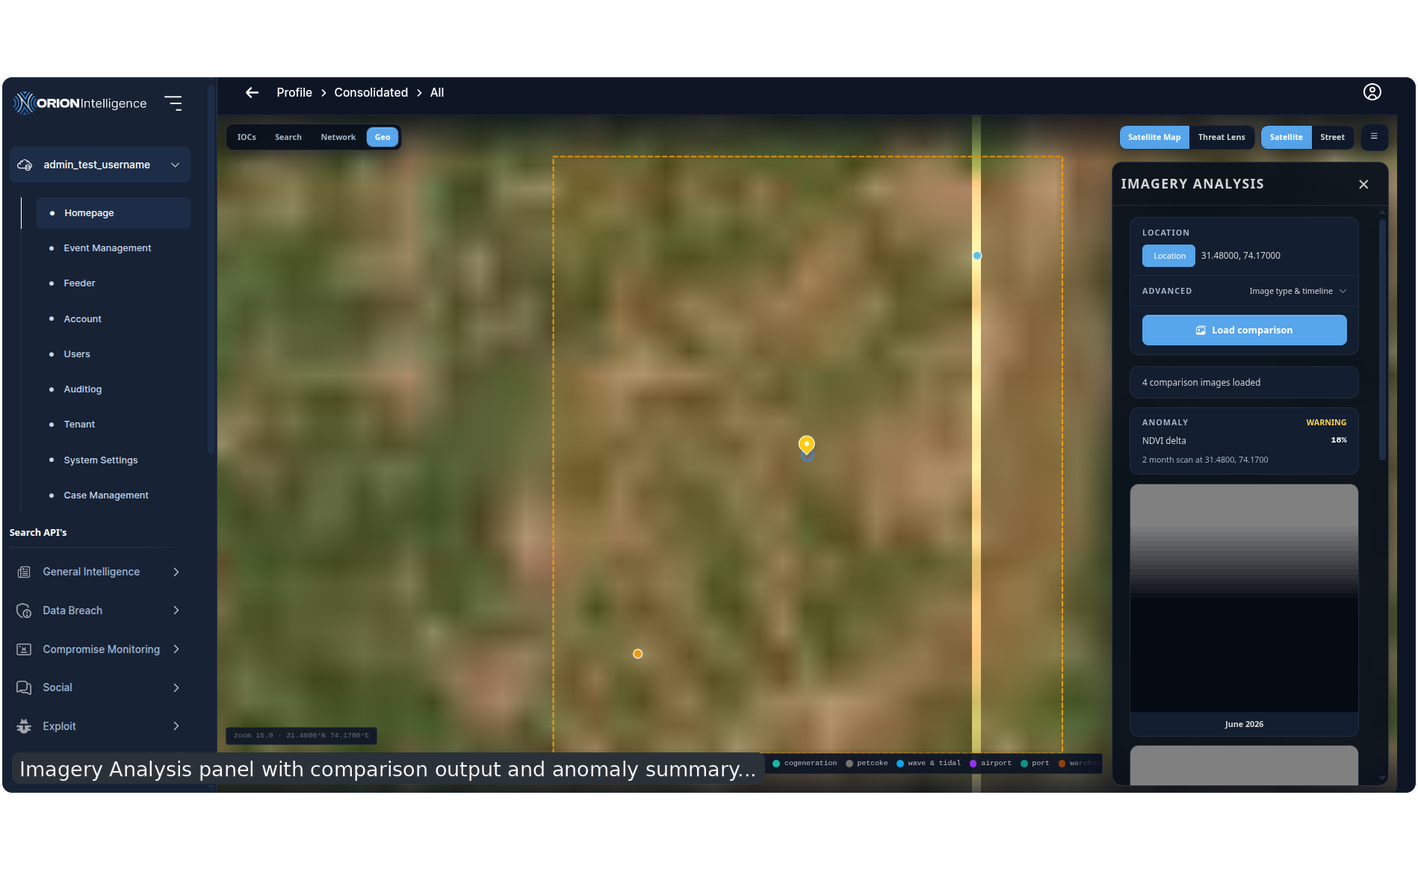
Imagery Analysis panel with comparison output and anomaly summary for the selected map location.#
Empty and Error States#
Satellite Intel keeps map and dashboard state visible while individual data sources load or fail.
Common states include:
the main loading overlay while large map or entity requests are in progress
Select location to load facilitiesbefore nearby facility lookupLoading facilities...while a facility request is runningNo facilities foundwhen a scoped lookup returns no renderable recordsrequest-failed messaging in Imagery Analysis
aircraft and ship feed warnings beside the affected tracking control
Clearing the selected location resets the focused feature, selected feature, nearby facilities, tracking data, and location overlay while keeping the base indexed map entities available.
Geo Fencing Threat Lens#
Threat Lens is the geo-fencing threat-intelligence workspace. It turns consolidated threat records into a country-oriented map, overlays category relationships as arcs, and runs an IP exposure scan for the active map scope.
Threat Lens can be opened directly from the dashboard sidebar as Threat Lens. It is also available inside Satellite Intel as the Threat Lens tab, where it shares the geo-fencing map workspace without showing the standalone filter button.
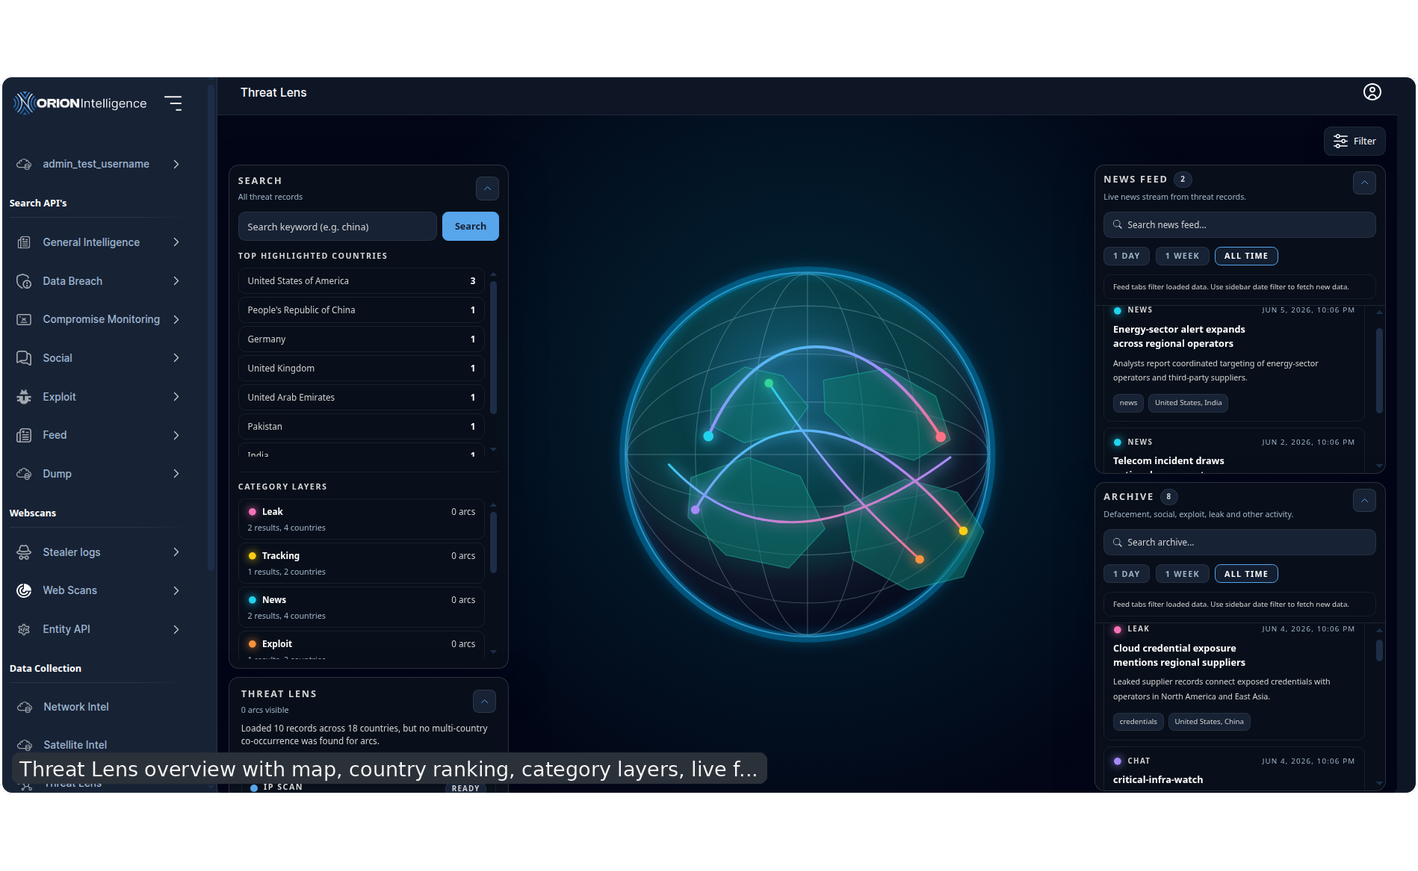
Threat Lens overview with map, country ranking, category layers, live feed, archive, and IP scan status.#
Access and Licensing#
The sidebar entry is available to admins and users with the osint_advanced module. When the module is not available, the sidebar item remains visible but gated by the subscription prompt.
Threat Lens can be opened as its own geo-fencing workspace or from the Satellite Intel tab switcher.
Data Request and Filtering#
Threat Lens requests consolidated map, feed, and category data based on the currently selected dashboard filters.
Before the request is sent, empty values, default values, empty arrays, and all selections are removed. The keyword field q and page field are kept so that an empty search can still load the complete Threat Lens dataset.
The standalone filter drawer uses the Threat Lens filter model:
network type
date range
content type
platform
platform result count
Changing filters refreshes the Threat Lens search. In the embedded Satellite Intel tab, the parent geo-fencing shell controls the surrounding map toolbar and opens the same filter behavior from its side panel.
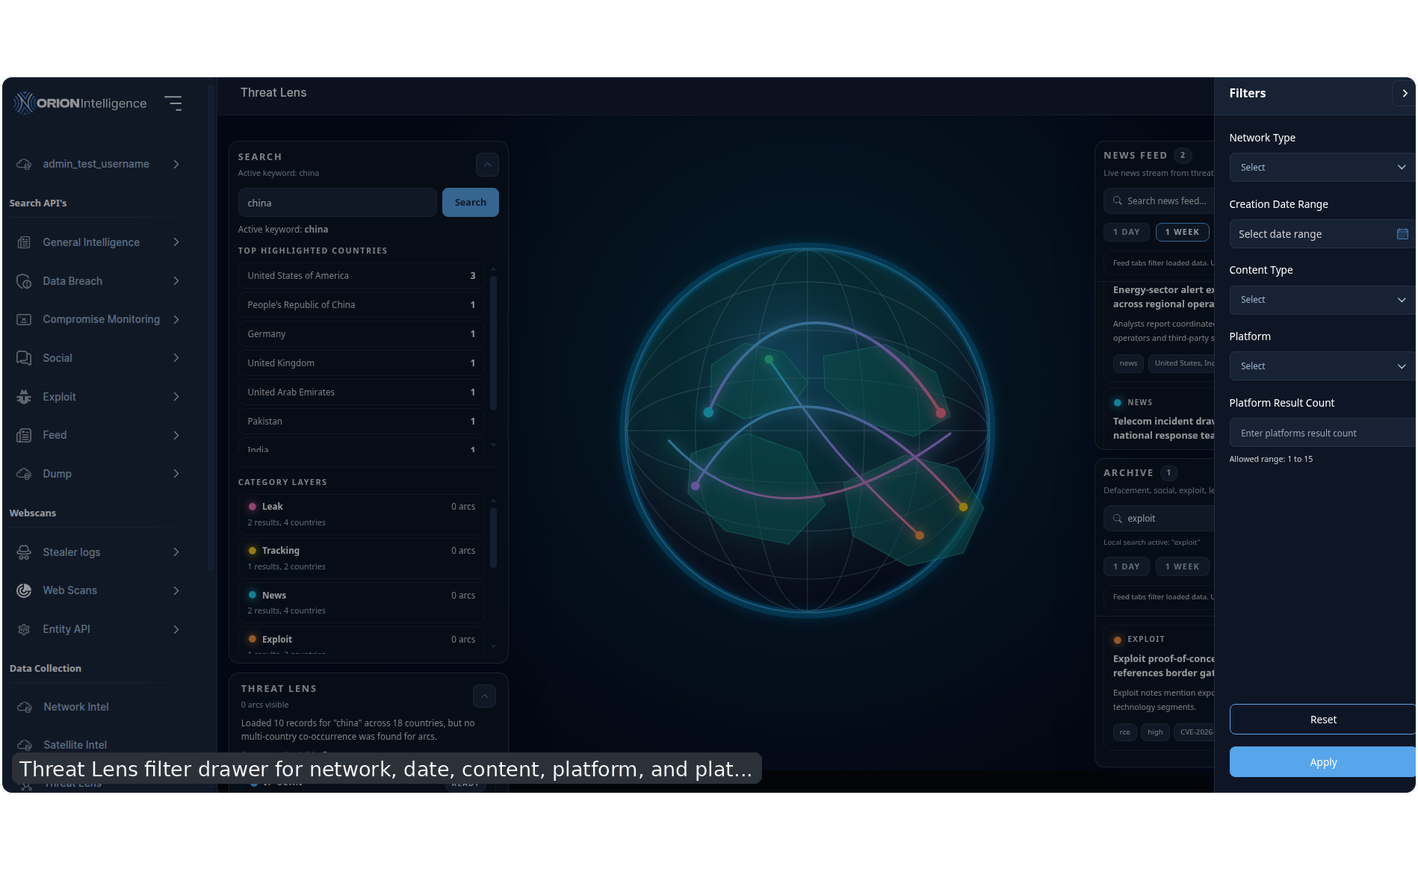
Threat Lens filter drawer for network, date, content, platform, and platform-count filtering.#
Consolidated Category Coverage#
The implementation reads these consolidated result categories:
LeakTrackingNewsExploitDefacementChatSocialGeneric
Each category has its own map color. Result records are deduplicated by hash, document id, id, URL, title, and creation date. If those fields are missing, the raw document body is used as the fallback identity.
Country labels are extracted from the available country and location fields, including m_country, m_country_name, m_location, country, and location. Comma, semicolon, and pipe-separated values are split into individual countries. Two and three letter region codes are normalized through browser region display names when possible.
The map data builder then produces:
total result count
ranked country counts
per-category country counts
document country groups used for arc generation
feed items sorted by timestamp
Search Panel#
The search panel supports free-text keyword searches and country pivots.
Search actions:
type a keyword and press
Entertype a keyword and click
Searchclick a top highlighted country
When the keyword matches a country known by the map layer, Threat Lens converts the search into a country-filtered request. In that case it sends an entity filter for m_country, enables strict matching, disables full search, and focuses the country on the map. For other keywords, the value is sent as q.
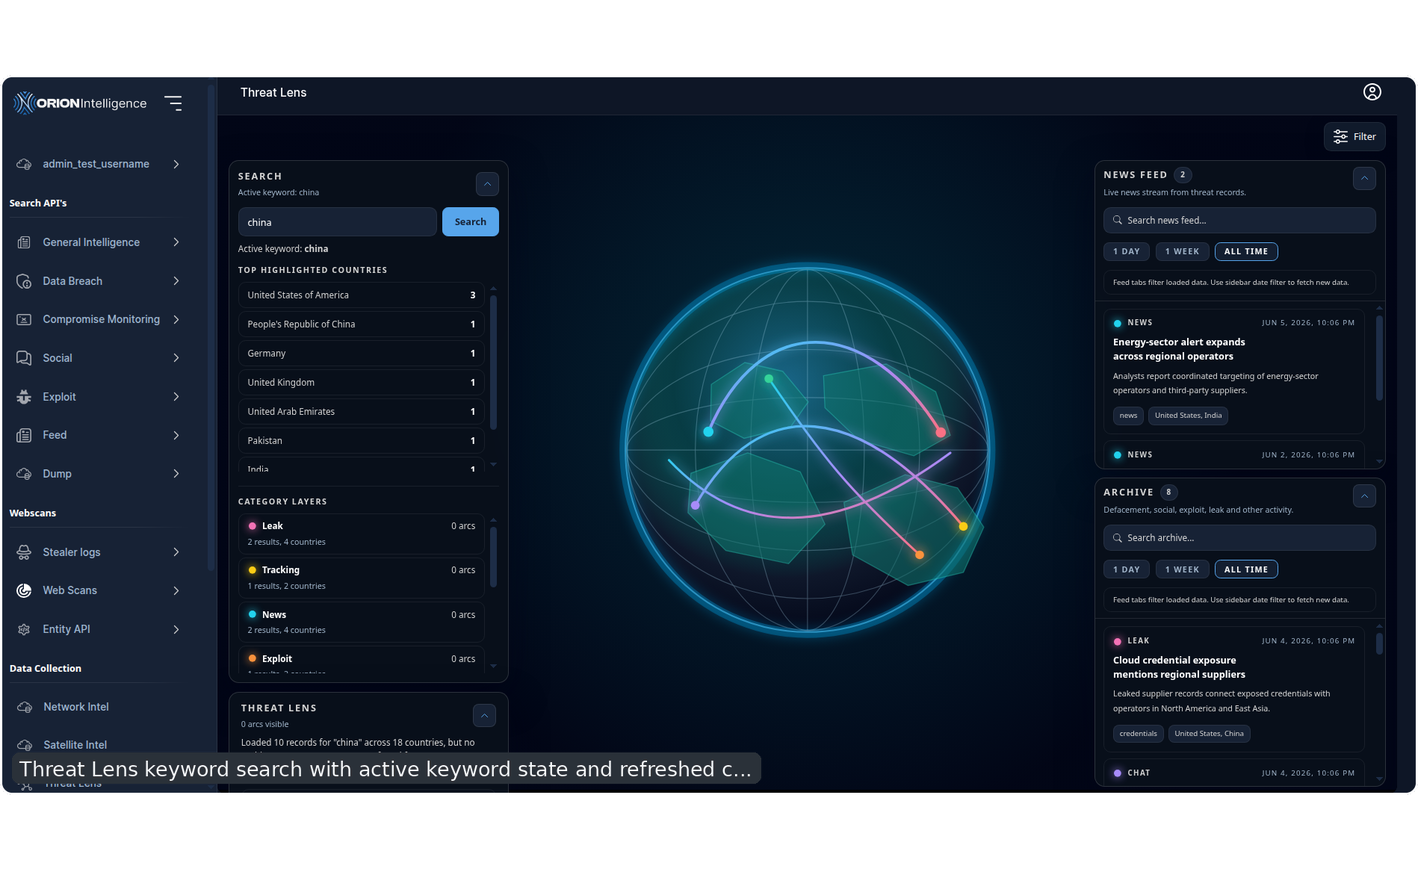
Threat Lens keyword search with active keyword state and refreshed country/category context.#
Map, Countries, and Arcs#
The map renderer uses ArcGIS SceneView with a global dark basemap. It loads a country feature layer, highlight styling, tooltip handling, arc graphics layers, and IP marker layers.
The country layer provides the selectable geographic surface. Hovering a country shows the country name, total count, and category breakdown. Clicking a country selects it, focuses the map on the country geometry, updates the summary panel, and starts a country-scoped IP exposure scan when boundary data is available.
Threat arcs are generated from records that mention more than one country. The renderer builds animated connections between country pairs, groups them by category color, and rotates visible arcs in batches of up to five. When a country search is active, the map shows only arc connections linked to the selected country.
The renderer also watches zoom and interaction state:
close zoom switches to a street-oriented night basemap
map movement pauses arc animation while interacting
completed navigation can request a new viewport IP scan
resize handling keeps the scene stable inside dashboard layouts
Documentation capture can use a fallback map state so screenshots remain stable while preserving the same visible panel flow.
Summary Panel#
The summary panel reports the active Threat Lens state:
selected country, when one is selected
current status message
visible arc count
per-category selected-country breakdown
IP scan status, scope, range, and marker count
Both the search panel and summary panel can be collapsed to clear map space.
News Feed and Archive#
Threat Lens converts result documents into feed cards. Each card can include title, summary, source link, date, category label, category color, and up to four highlights such as platform, risk, channel, attacker, IOC, CVE, or content type.
There are two feed panels:
News Feedshows onlyNewscategory recordsArchiveshows leak, tracking, exploit, defacement, chat, social, and generic records
Feed controls:
collapse or expand each feed
local text search inside the loaded feed records
range filtering for
1 Day,1 Week, andAll Timeauto-scroll while the pointer is away
temporary pause during hover, wheel, or touch interaction
safe link opening for HTTP and HTTPS source URLs
The feed range buttons filter data already loaded into the browser. The side filter date range requests refreshed data for the selected time window.
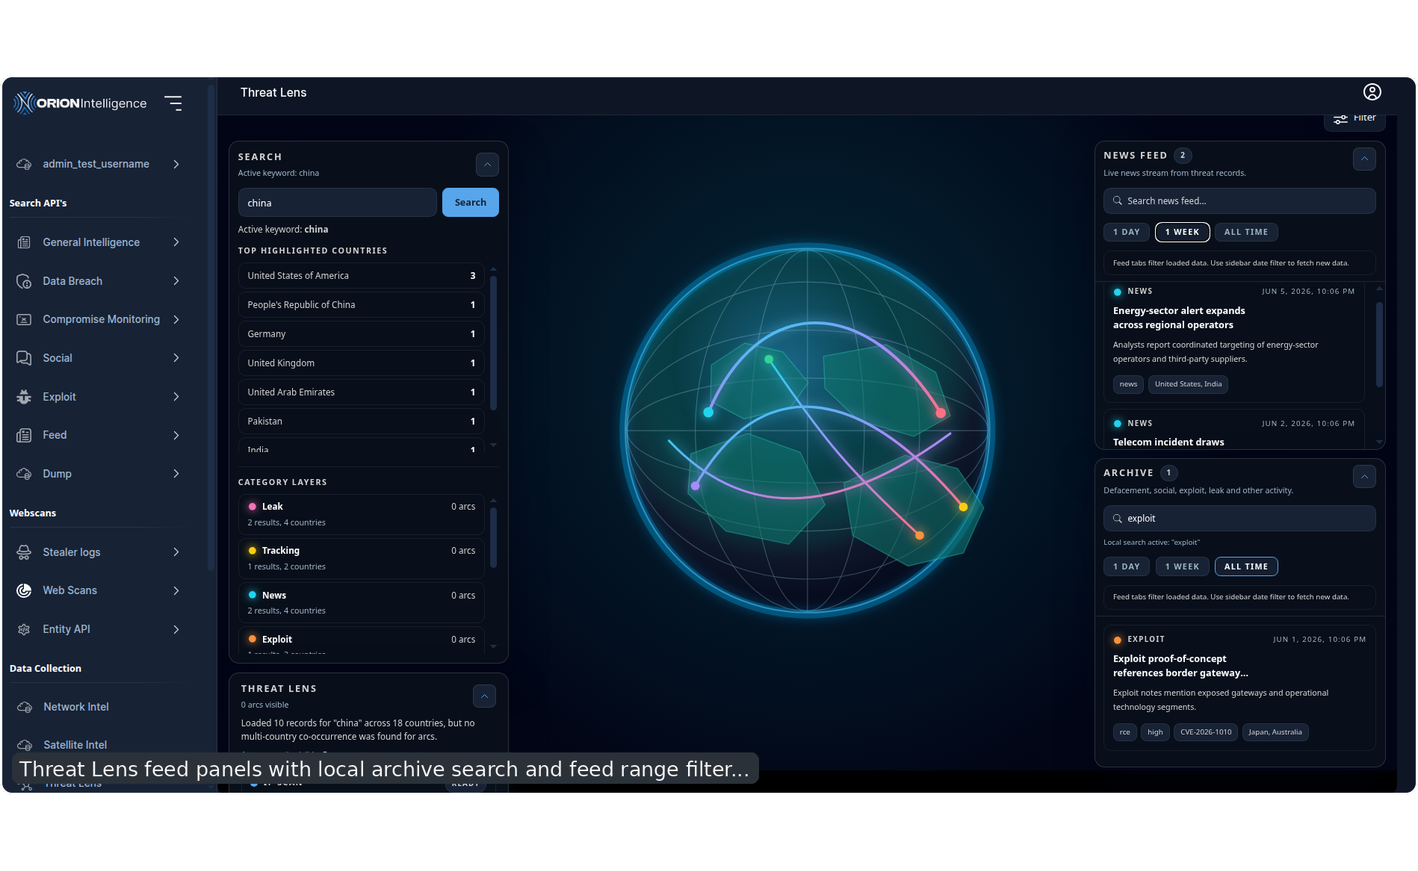
Threat Lens feed panels with local archive search and feed range filtering.#
IP Exposure Scan Overlay#
Threat Lens automatically uses the Network Intel geo scanner to look for exposed IP-backed camera or IoT records near the active map scope.
Default behavior:
initial coordinates are
20, 0default radius is
12,000 kmdefault max IP count is
200the summary label is
Global view
Viewport and country behavior:
map movement can request a viewport-based scan
country selection changes the scope to the selected country
country boundary data is passed to marker rendering when available
repeated scans with the same scope, center, and radius are deduplicated
The scan posts coordinates, radius, and max-IP count through the Network Intel geo-camera scan flow. Completed results are normalized from returned IP arrays or camera arrays, limited to renderable records, and displayed as map markers. Selecting an IP marker opens the Threat Lens IP detail popup.
The IP scan panel shows:
running, ready, complete, or error state
marker count
scope label
radius label
progress/status text
previous markers kept when a later scan returns no renderable records
Empty and Error States#
If the Threat Lens data request fails, the map is cleared and the status message explains that the data source could not be loaded. If records load but no country metadata is present, the workspace reports the loaded record count and explains that no country highlights were found.
If records contain countries but no multi-country co-occurrence, the country ranking still appears while the arc count remains zero.
If an IP exposure scan fails, the IP scan panel changes to the error state and preserves the map context.
Graph Investigation Modules#
CTI Graph#
CTI Graph is the relationship-mapping module for cyber threat intelligence pivots.
It opens in its own tabbed workspace and supports multiple sessions.
Key concepts:
ClusternodesDocumentnodesPropertynodesgrouped nodes
directional connections
Core CTI Features#
session tabs
sidebar filters
graph and list views
node search and highlighting
physics toggle
expand or collapse controls
right-side listings panel
import and export support
report export
The listings panel provides a document-oriented summary of the current graph state, while the legend explains node and edge types.
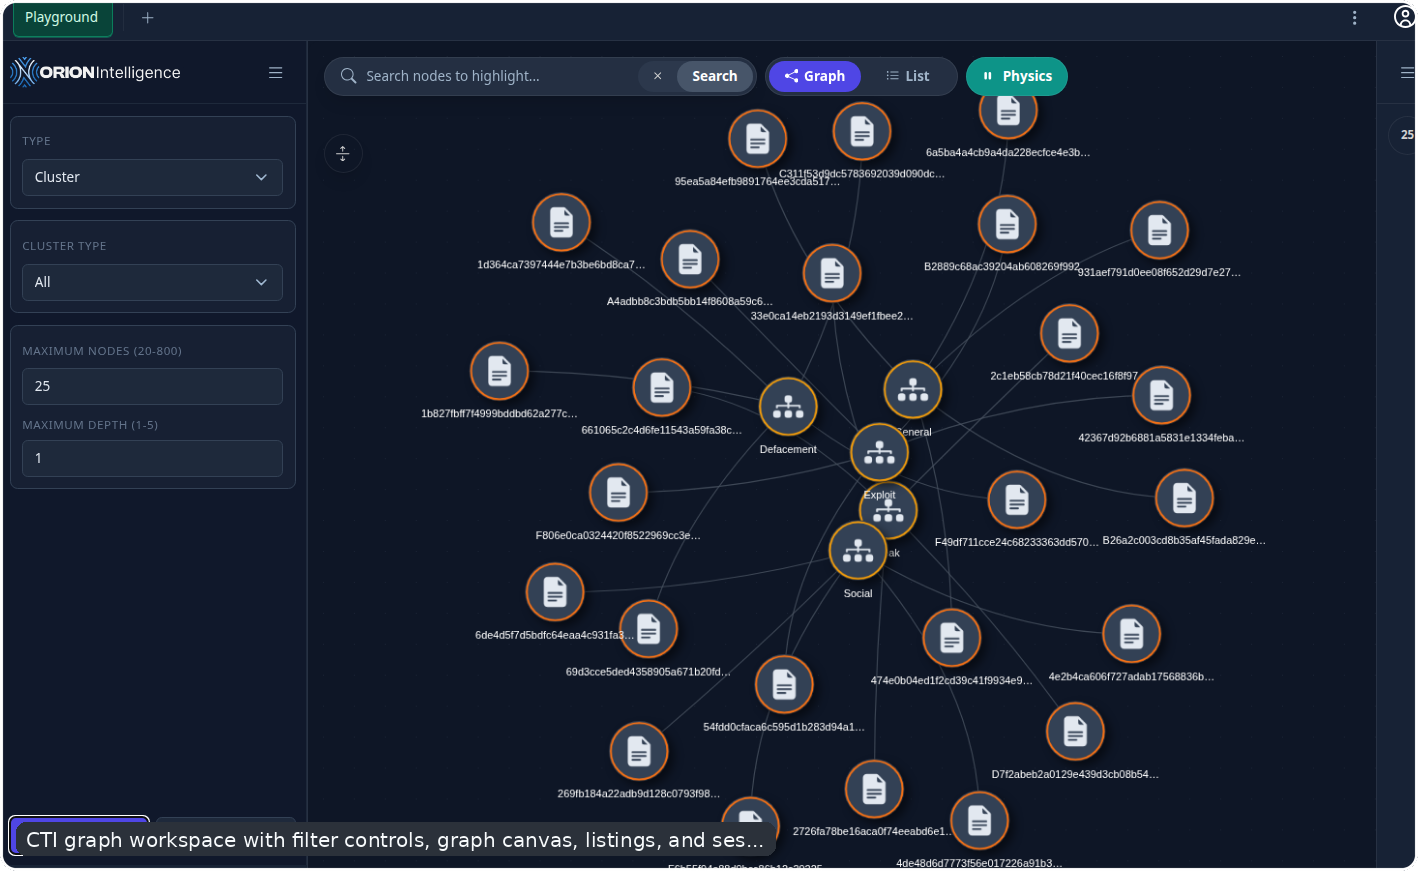
CTI graph workspace with filter controls, graph canvas, listings, and session actions.#
Advanced Graph Builder#
The Advanced Graph Builder is used when a single CTI filter is too broad. It opens from the CTI Graph advanced filter control and lets the analyst combine multiple graph fields in one search.
The builder supports:
up to eight filter rows
searchable field selection
ANDandORjoins after the first rowdirect text values for property-style fields
searchable cluster values for cluster-style fields
removing individual rows
clearing the active builder chips after execution
The first row acts as the initial condition. Additional rows refine or broaden the graph query depending on the selected join operator. Use AND when all conditions should be present in the graph result, and use OR when any of the selected conditions should be enough to bring related nodes into the result.
Typical Advanced Graph Builder workflow:
Open
CTI Graph.Expand the advanced builder control.
Choose the first field, such as country, actor, IP, domain, cluster, or another available graph field.
Enter a value or choose a cluster value.
Add another row when the investigation needs a second condition.
Choose
ANDorORfor the new row.Execute the search.
Review the generated filter chips and graph result.
Clear the builder chips when returning to a broader graph view.
The builder is useful for questions such as:
show graph records tied to a country and a specific infrastructure value
find relationships that match either of two indicators
narrow a noisy graph to a cluster plus one supporting property
prepare a cleaner graph before exporting JSON or a PDF report
The tested CTI workflow also confirms the following operator-visible actions:
switching filter type to
Clusterapplying graph filters
searching and highlighting matching nodes
switching between graph and list views
collapsing and reopening the listings panel
toggling physics simulation
opening the Advanced Graph Builder
adding multiple builder rows
joining builder rows with
ORexecuting builder filters and clearing generated filter chips
creating, renaming, importing, exporting, and closing sessions
exporting report options such as JSON and graph PDF
opening canvas context-menu actions
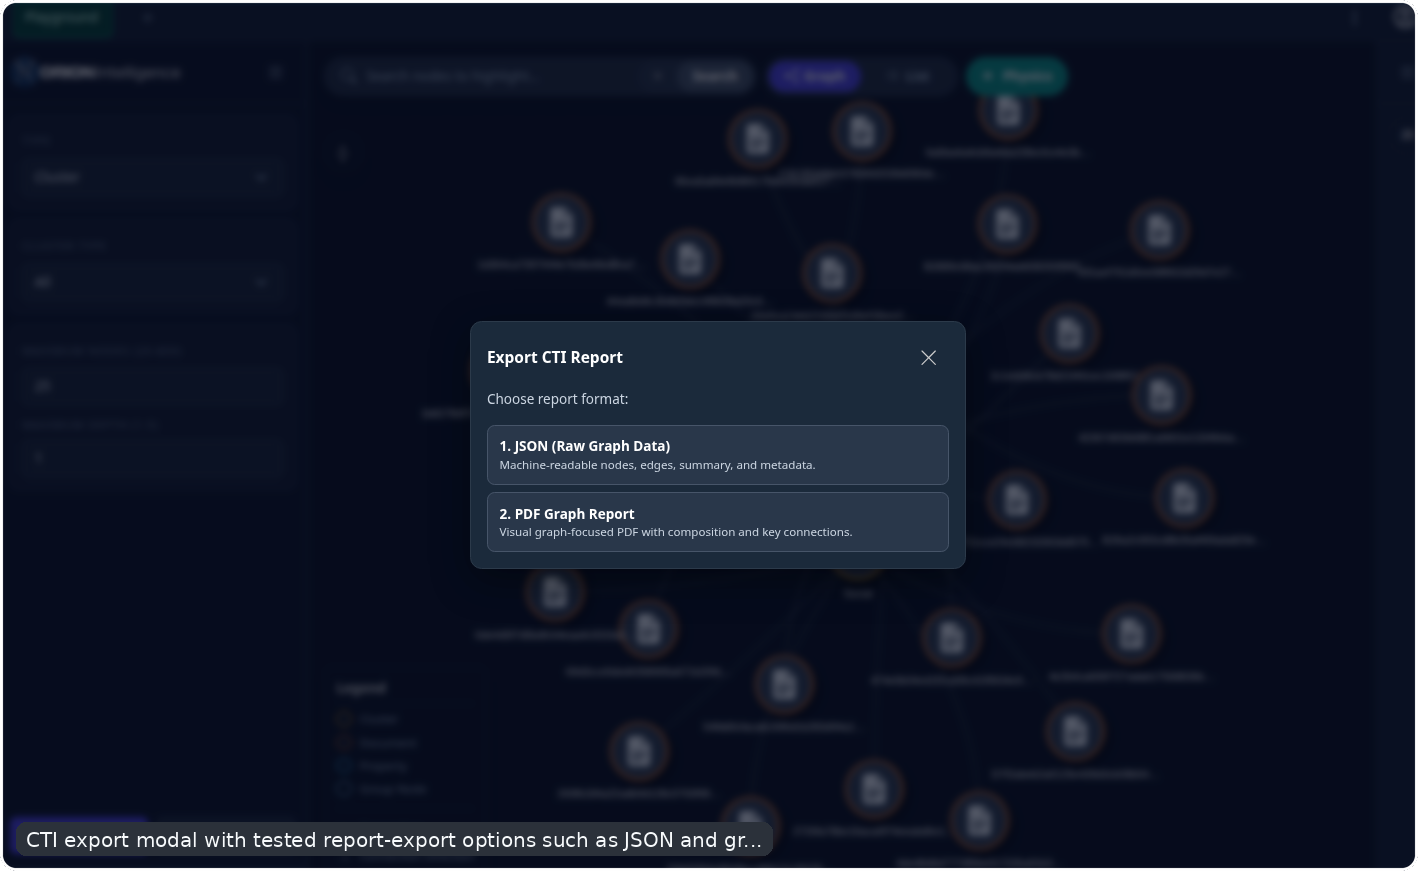
CTI export modal with tested report-export options such as JSON and graph PDF.#
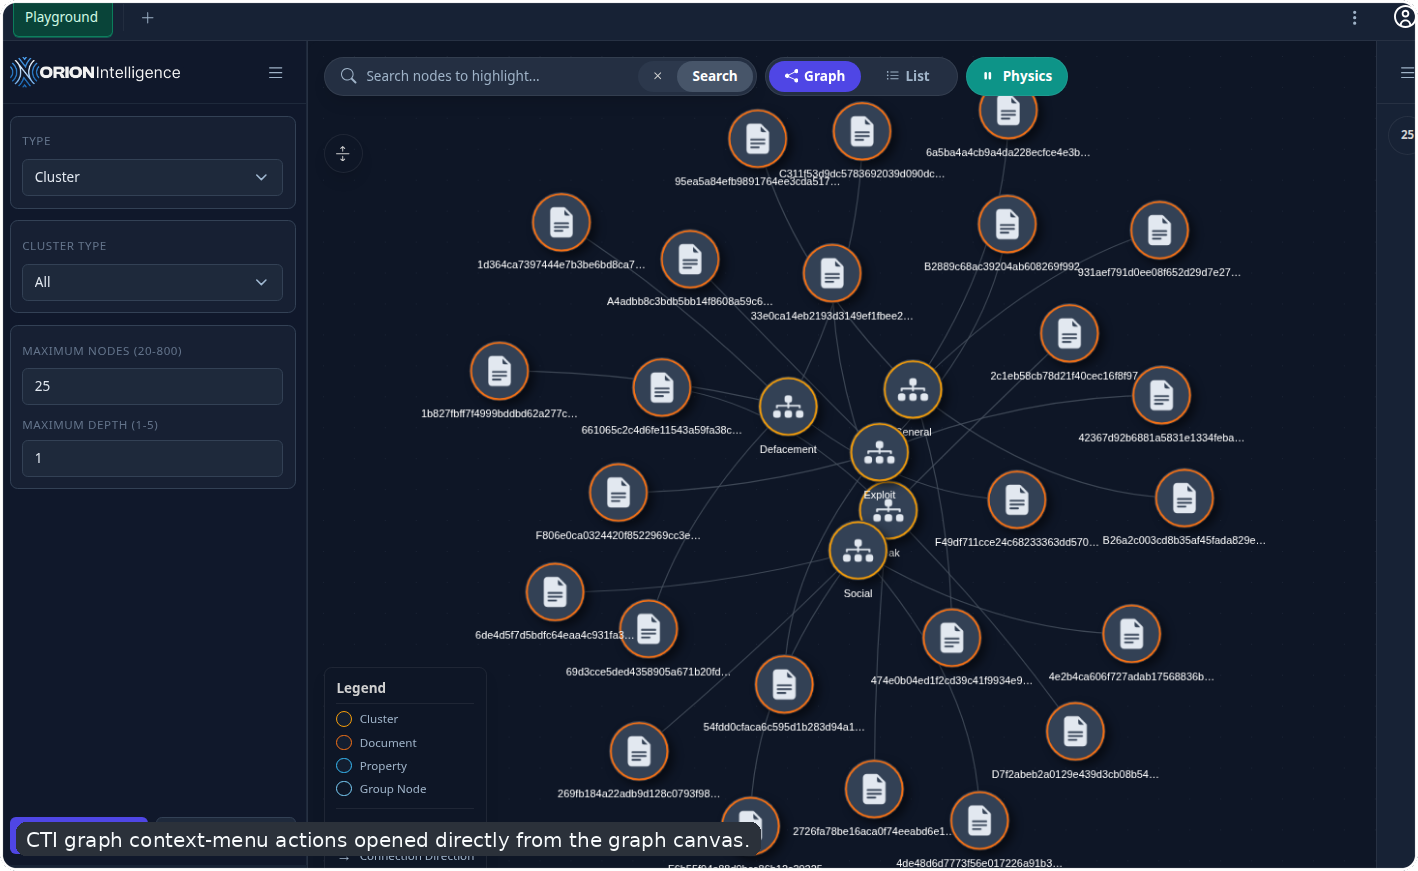
CTI graph context-menu actions opened directly from the graph canvas.#
Social Intel#
Social Intel is a graph-based username and profile mapping workspace.
It is designed for operators who need to move from a single username, image, or related profile into a richer relationship map of platforms, related accounts, and extracted profile evidence.
Core Entry Points#
Social Intel supports several starting paths:
direct username scanning
image-based and reverse image profile discovery
manual custom-entity entry
guided entity lookup submission from the add-entity modal
reopening previously created scan jobs from the left home menu
This makes Social Intel useful for both:
known-profile investigations
unknown-profile discovery from an uploaded image
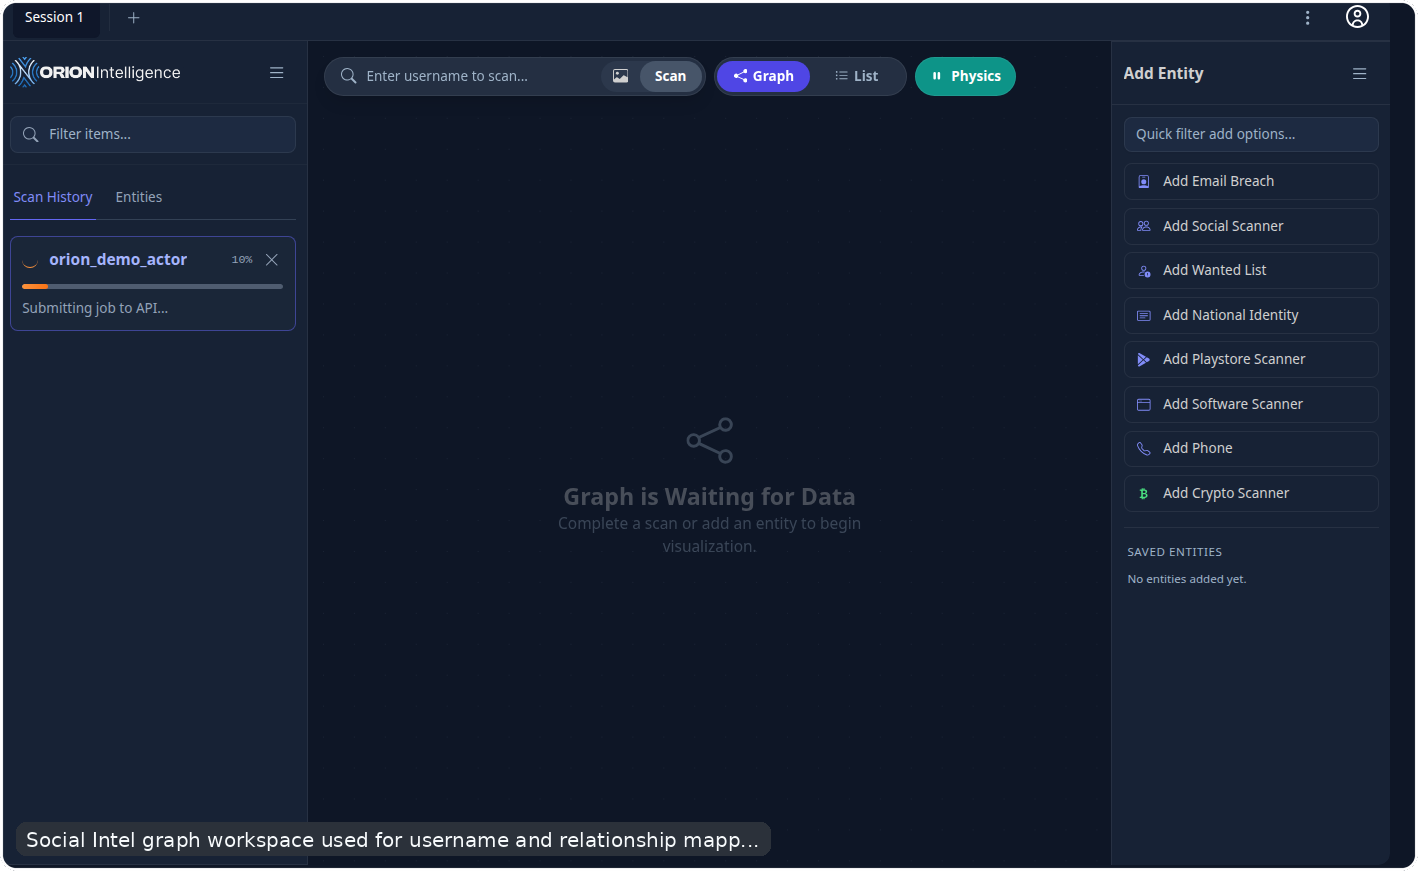
Social Intel graph workspace used for username and relationship mapping.#
Graph and List Views#
The graph view is intended for structural relationship analysis. The list view is intended for profile-by-profile inspection and management.
Common view actions include:
switching between graph and list views
searching within the graph toolbar
clearing graph search input
enabling or disabling graph physics where available
opening relationship popups directly from graph nodes
opening list rows to review platform-specific detail
Use graph view when you want to understand how entities connect. Use list view when you want a more structured review of profiles, links, summaries, and platform records.
The graph is a view of the Social Intel dashboard rather than a separate page. The round diagram button beside the gear switches between the profile list and the graph, and lights up while the graph is shown. Everything around it — scan history, scan box, breadcrumb — stays in place.
In graph view:
clicking a scan in the left history adds that user’s node instead of opening the profile
the
Find a username in this graph...box lists only users already in the graph, and offersAdd @handlefor one that is noteach account node carries badges for the relationship sets found on it, such as
FollowersandCommentersright-clicking an unscanned contact offers
Scan @handle, which starts a normal scan and refreshes the graph when it finishesremoving a user is done from its own node panel
The set of users in the graph is saved per account, so reopening Social Intel restores the same relationship picture.

Relationship graph view showing a scanned account, its platform node, and follower and commenter badges.#
Session Management#
Social Intel supports multiple sessions in the same way the CTI workspace supports multiple investigative tabs.
Covered session actions include:
creating a new session
renaming a session
exporting a social report from the current session
Sessions are useful when you want to separate different investigations, keep one graph focused on one target, or compare multiple usernames without overwriting the previous workspace.
Add-Entity Workflow#
The add-entity modal supports more than one submission mode.
Available tested behavior includes:
opening an entity type such as
Phoneusing an API query mode
validating that the submit button stays disabled until a valid input is present
switching from API mode to manual mode
entering a manual value
submitting the new entity into the social workspace
This matters because Social Intel is not limited to scraped social accounts. It can also be used to place analyst-defined entities into the investigative graph.
Image-Based Profile Discovery#
The image-based workflow is one of the more advanced Social Intel paths.
It supports:
uploading an image
waiting for image recon processing
opening the manage-profiles modal
filtering candidate platforms
reviewing discovered usernames
opening direct profile links for discovered accounts
fetching the selected profile into the workspace
reopening completed profile jobs from the left home menu
selecting multiple discovered profiles and updating the graph with them
Use this workflow when a screenshot, avatar, or reused profile image is the starting point instead of a known handle.
Manage Profiles Modal#
The manage-profiles modal is the main control surface for discovered or queued profile candidates.
From this modal, users can:
filter platforms
search usernames
review discovered profile links
fetch profile data
select all fetched profiles
update the graph with the selected profiles
cancel without applying changes
This modal is central to the Social Intel workflow and should be treated as part of the main graph system, not as a secondary helper.
Profile detail panels can expose platform-specific sections for profile search results, posts, videos, shorts, followers, following, images, online presence, metadata, wanted-list context, forum profile matches, saved profile candidates, and stealer-log matches. Availability depends on the platform and on which data was found for the selected username.
Use the profile detail panels to move from broad identity mapping into source-by-source review. Posts, videos, and shorts help review published content; followers and following show relationship context; images and online presence help validate whether the same identity appears elsewhere; stealer-log and wanted-list sections highlight risk context that may require a case or tenant alert follow-up.
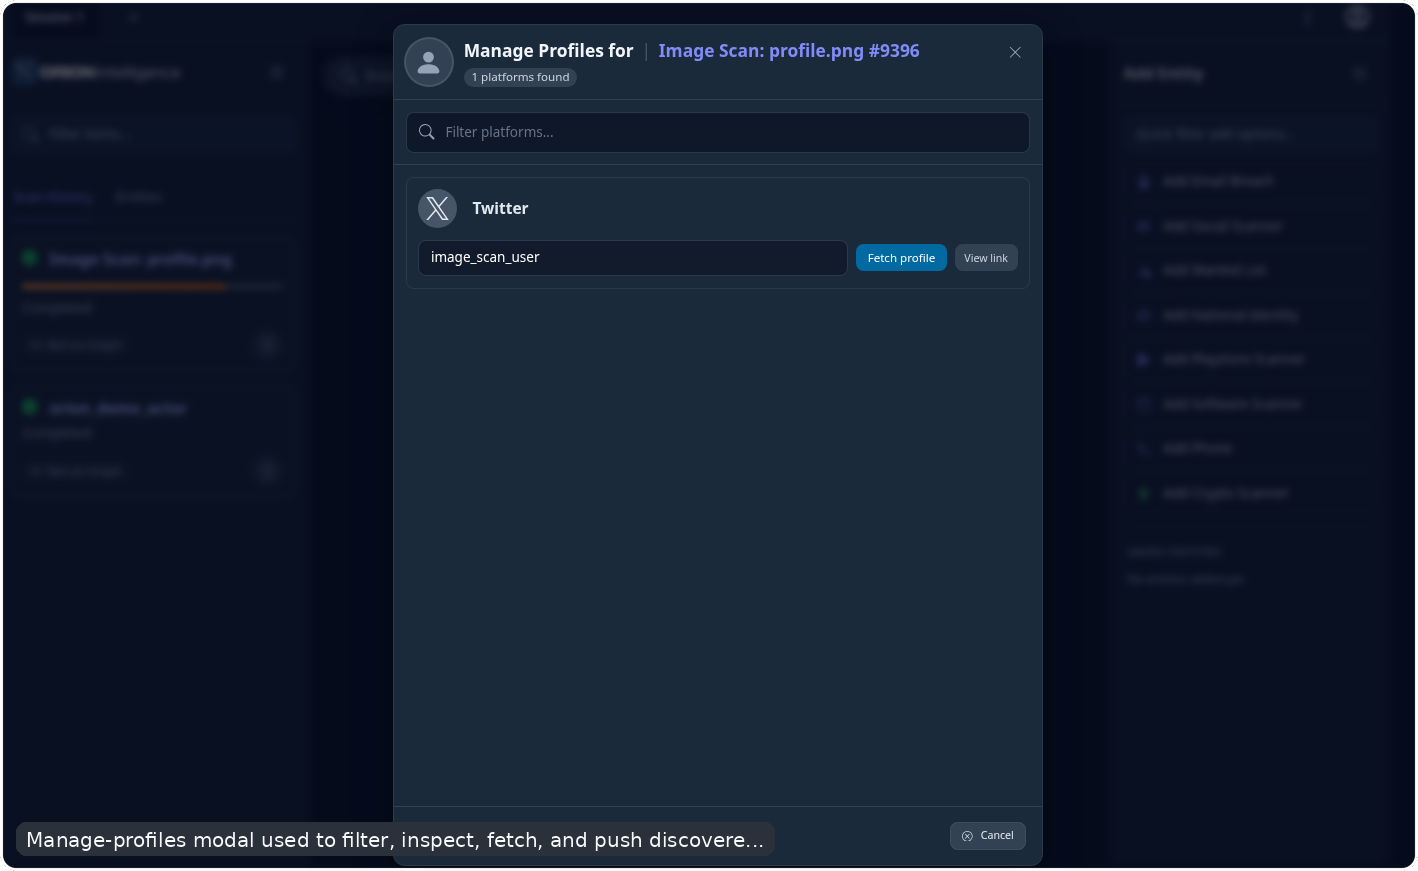
Manage-profiles modal used to filter, inspect, fetch, and push discovered accounts into the graph.#
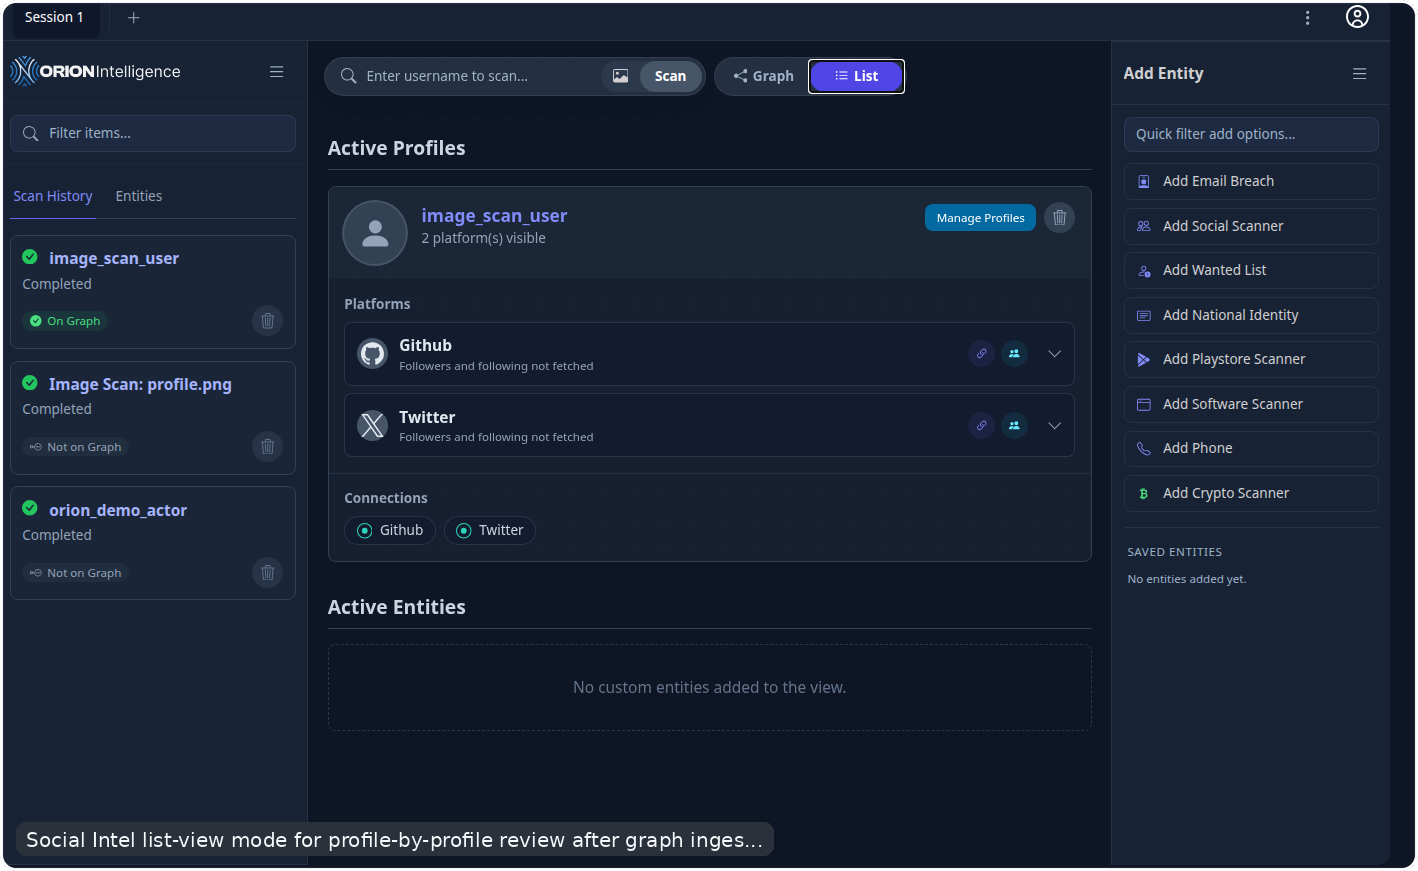
Social Intel list-view mode for profile-by-profile review after graph ingestion.#
Browser Extension and Captured Sessions#
Profile fetching runs through the Orion browser extension, so the profile tabs stay gated until the extension is installed and signed in. When it is missing, Social Intel and the Manage Profiles page show an install prompt: Firefox installs the signed build in one click, while the Chrome package is downloaded and loaded manually from chrome://extensions with Developer mode on.

Install prompt shown while the Orion extension is not available to the browser.#
The Manage Profiles page lists every supported platform with the number of sessions saved for it. From here users can fetch a session for a platform, and expand a platform to verify, re-capture, or delete an individual saved session.

Manage Profiles page listing supported platforms and their captured session counts.#
Summary Popup and Metadata Search#
The summary popup provides deeper profile inspection beyond the main graph or list node.
Supported summary actions include:
opening the summary popup from a list entry
reviewing all detected platforms for the selected subject
opening
Profile Metadata Resultsentering metadata search tokens
validating no-token error states
running metadata searches with terms such as leaked email or other keywords
reviewing returned external links
pivoting into a selected platform from within the popup
reopening external profile links
This popup is where profile-level enrichment becomes operationally useful. It combines raw profile context with searchable metadata and quick pivots.
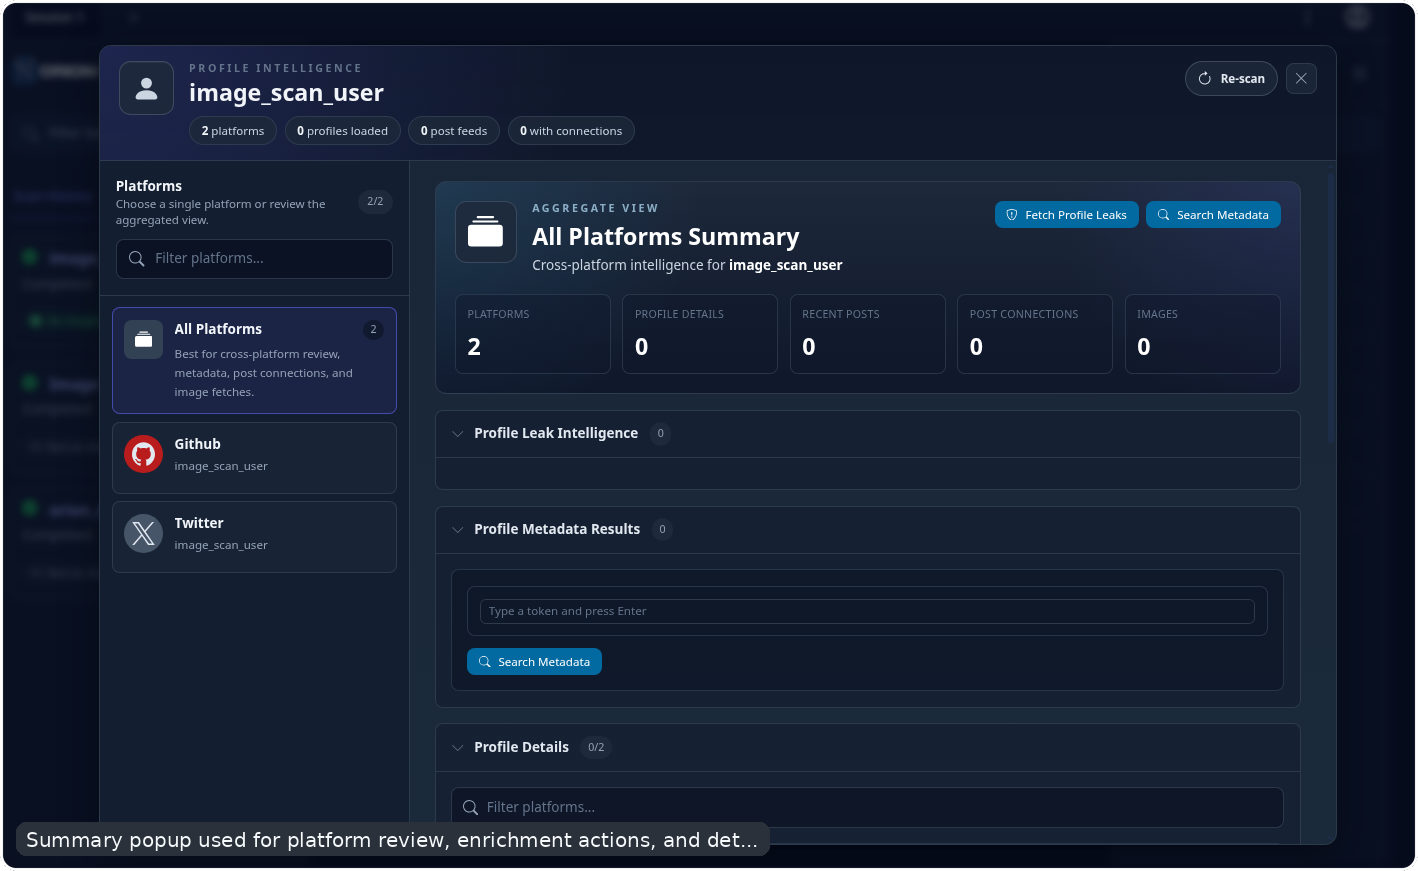
Summary popup used for platform review, enrichment actions, and detailed subject inspection.#
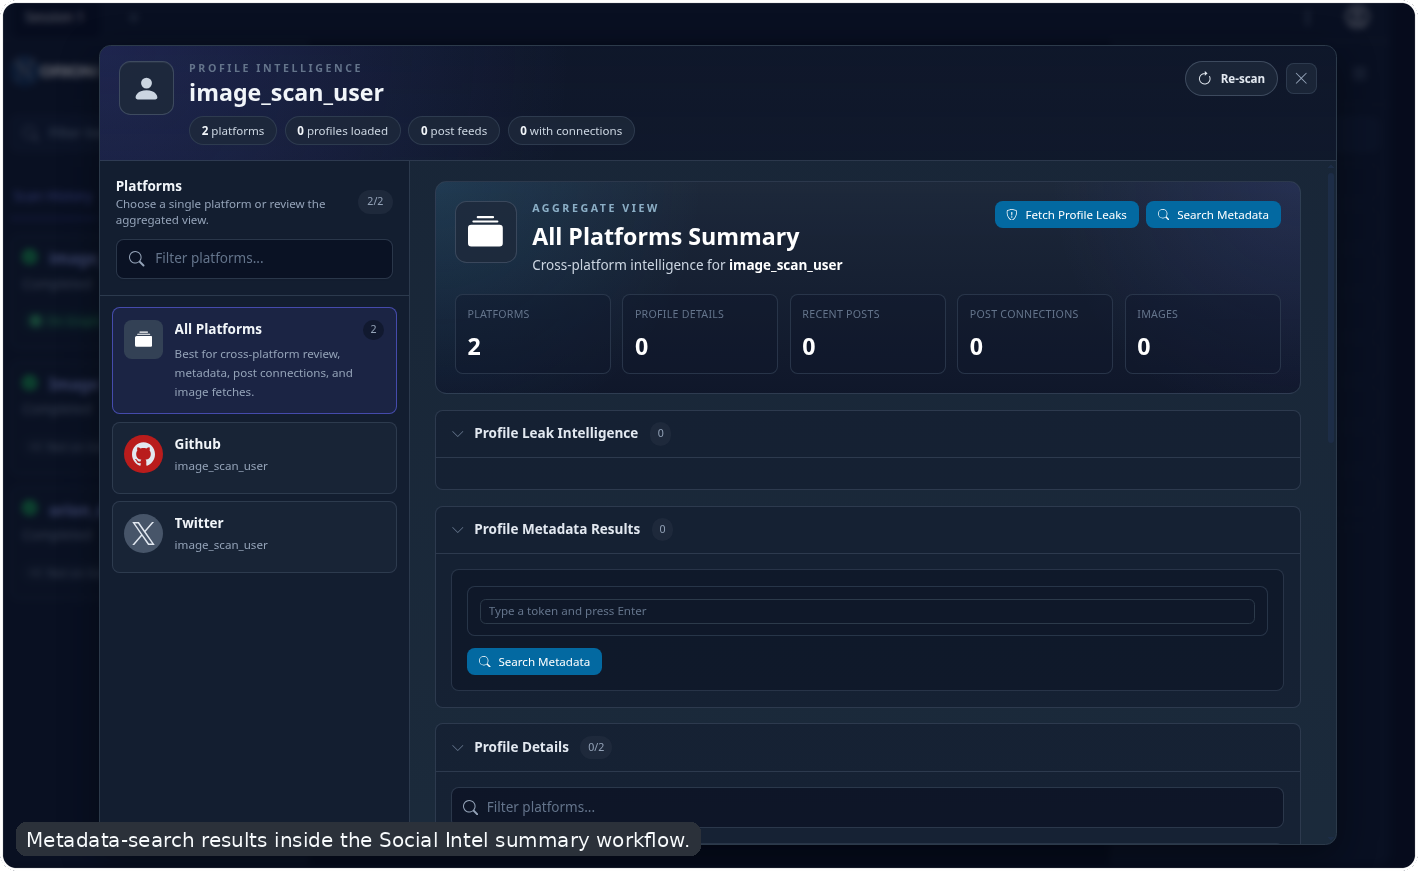
Metadata-search results inside the Social Intel summary workflow.#
Followers, Following, and Connections#
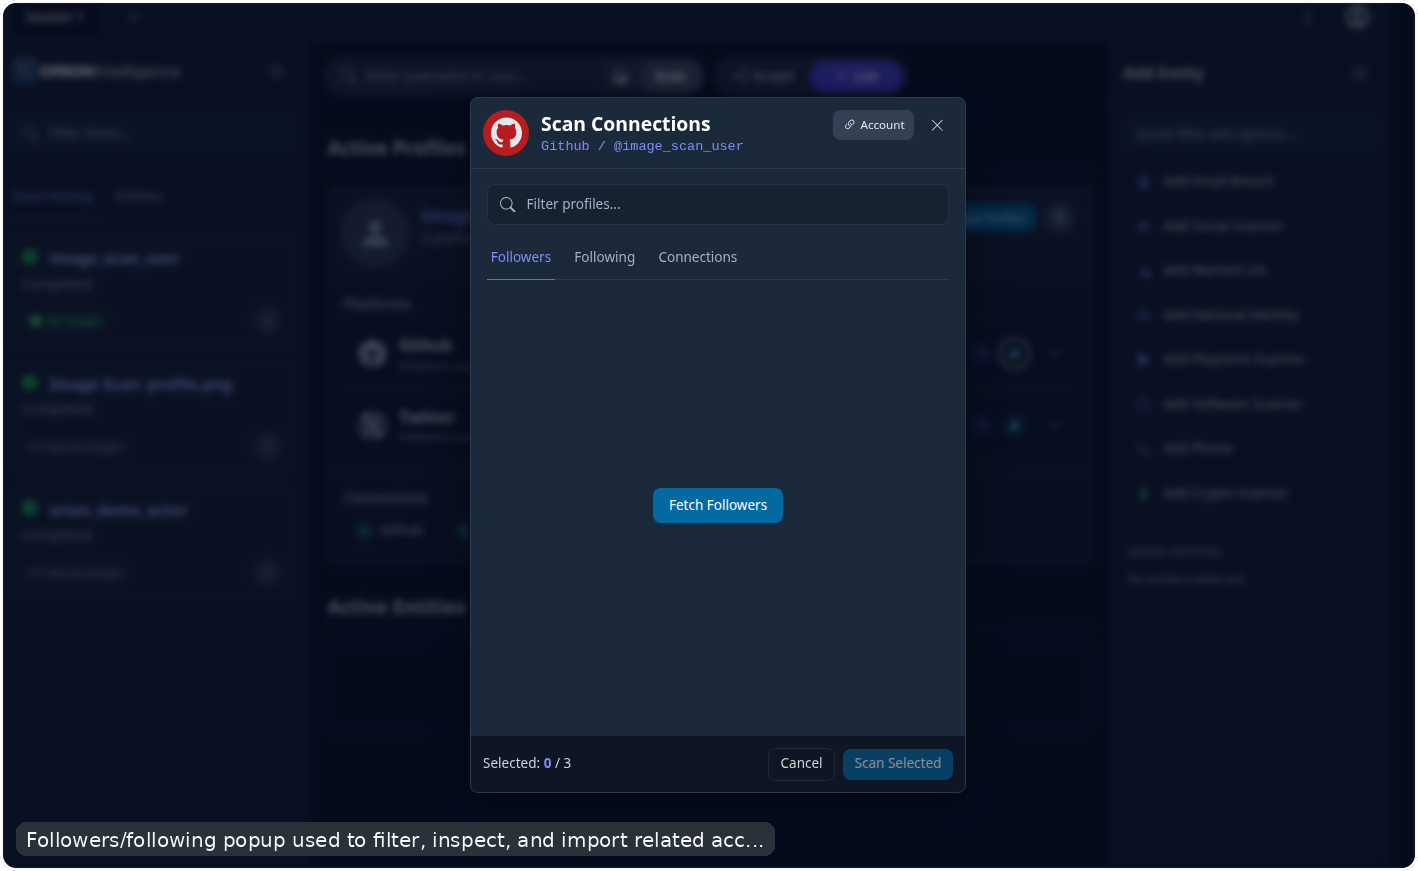
The followers/following workflow is more than a read-only count view.
Covered actions include:
opening the followers-and-following popup
switching among
Followers,Following, andConnectionsfiltering discovered related accounts
fetching more followers from inside the popup
selecting discovered related accounts
confirming selection to import those accounts back into the main workflow
reopening created follow-based jobs from the left home menu
selecting all imported results and updating the graph
In practice, this means Social Intel can expand an investigation outward from one profile into a broader relationship set rather than staying limited to the original target.
A connection is someone who engaged with the profile, not someone who follows it. Orion reads the commenters off each of the profile’s own posts and deduplicates them into a single people list, remembering which posts each person commented on. One handle therefore appears once in Connections even when it commented on several posts, and the count of those posts is kept with it.
The graph carries the same relation. Commenters hang off the account node as a Commenters badge; an individual commenter’s edge reads commented on @handle, and the edge weight and its node panel show how many distinct posts that person commented on. When a commenter is also a scanned user, the two users are joined through the platform node they share. One that has not been scanned yet can be added to the graph as its own user, or scanned directly from its node.
Each fetch section keeps its own state: a band above the results shows whether the section is up to date and when it was last synced, Sync all refetches it, and the section resumes on its own if the page is reloaded while a fetch is still running.
Profile fetch tabs with the per-section sync band, alongside exposure, wanted-list, and phone-lookup panels.#
Images, Followers, and Re-Scan Controls#
Within the summary popup, the suite covers several enrichment actions:
Fetch FollowersFetch FollowingFetch ImagesRe-scan profile
These actions make the popup a live enrichment console rather than only a static summary.
Relationship Popups#
Social Intel also supports relationship-specific popups from graph nodes.
These popups can expose:
related-account information
external account links
quick-close controls
This makes it possible to inspect a connection without leaving the graph canvas.
What the Legend Represents#
The legend distinguishes visual object types such as:
user profiles
platforms
platform groups
custom entities
relationship or connection types
Understanding the legend is important when the graph becomes dense. It tells the user whether they are looking at:
a discovered profile
a platform wrapper
a manually added entity
or a relationship generated by enrichment
Result and Report Workflows#
Most indexed modules eventually lead into a report page. Report pages are one of the most important parts of the product because they consolidate the searchable record, its metadata, and pivot actions.
Report Toolbar#
The shared report header can expose:
download
export report
translation
AI summary
share
open source URL
open CTI graph
The exact buttons depend on the record and deployment configuration.
When available, this toolbar is the fastest way to export, translate, summarize, share, or pivot the current record into graph analysis.
Some report pages also show feedback controls. These controls let signed-in users mark a record as recommended, trusted, or untrusted. The counters help teams identify records that have already been reviewed and make it easier to spot material that needs confidence review before it is reused in a case, export, or briefing.
Result Insights Side Panel#
In consolidated workflows, Orion also provides a dedicated insights panel beside the main result stream. This side panel can expose:
keyword insights
general coverage summaries
threat-actor search helpers
unique URL lists
expandable extracted-data sections
This panel is intended for quick triage and narrowing before opening individual reports.
In practice, it helps answer three questions quickly:
what themes dominate this result set
whether actor- or URL-based pivots are available
which extracted sections are worth opening in full reports
Result insights side panel with URL and extracted-data pivots.#
General Report Page#
The general report view commonly includes:
title
description or important content
web reference
source URL
published date
network
last-checked date
content-type tags
freshness status
Some report layouts also expose quick links, downloadable record output, or direct pivot actions to graph and sharing tools from the same header.
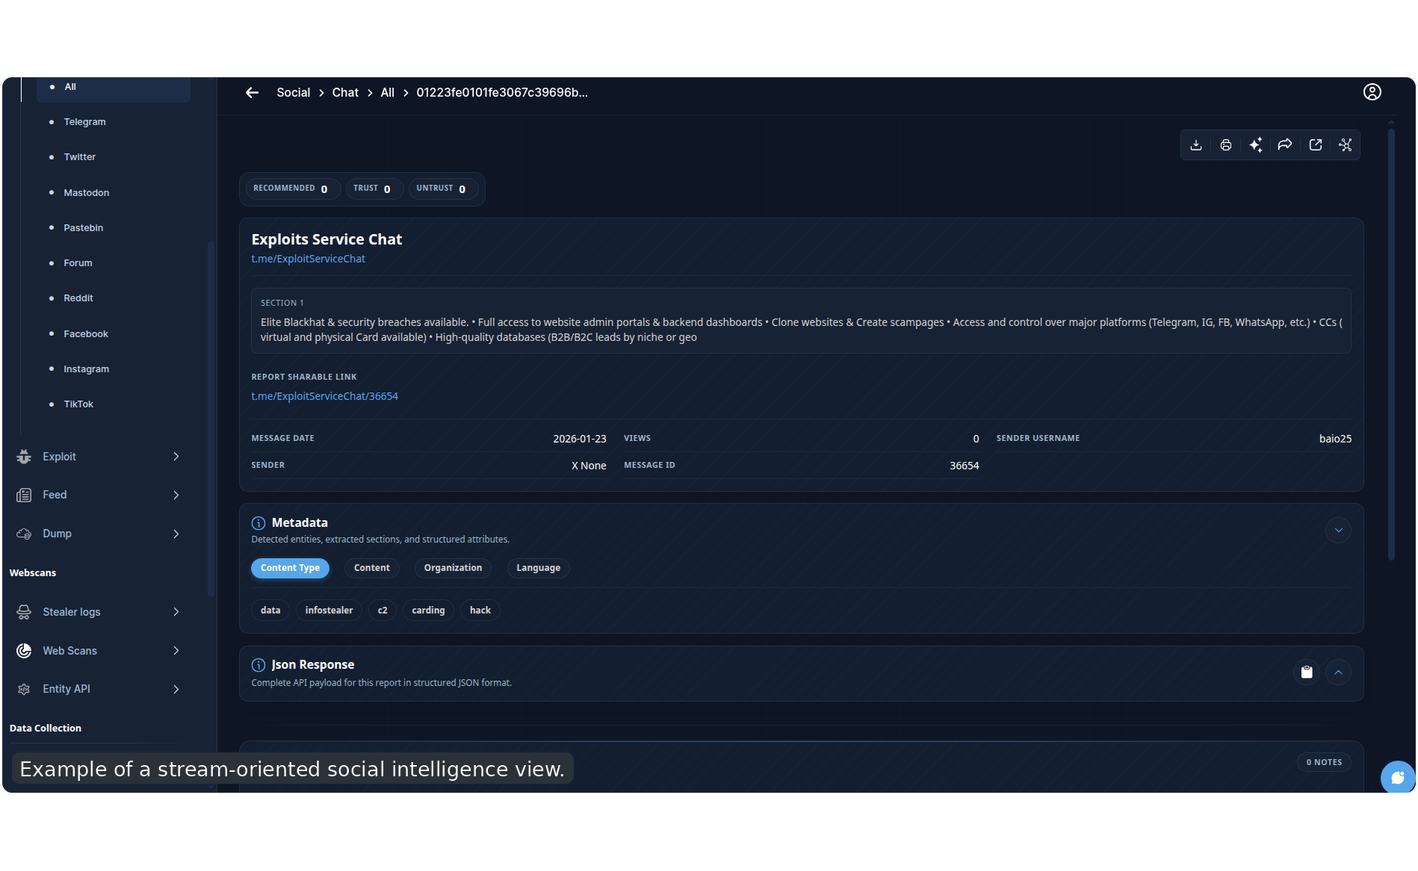
Typical report layout with content and structured context.#
Metadata Panel#
The metadata panel is expandable and lets users browse extracted values by category. Common tabs include:
content
section
organization
entity or person
other extracted attributes
This is the main place to inspect structured extraction results from the record.
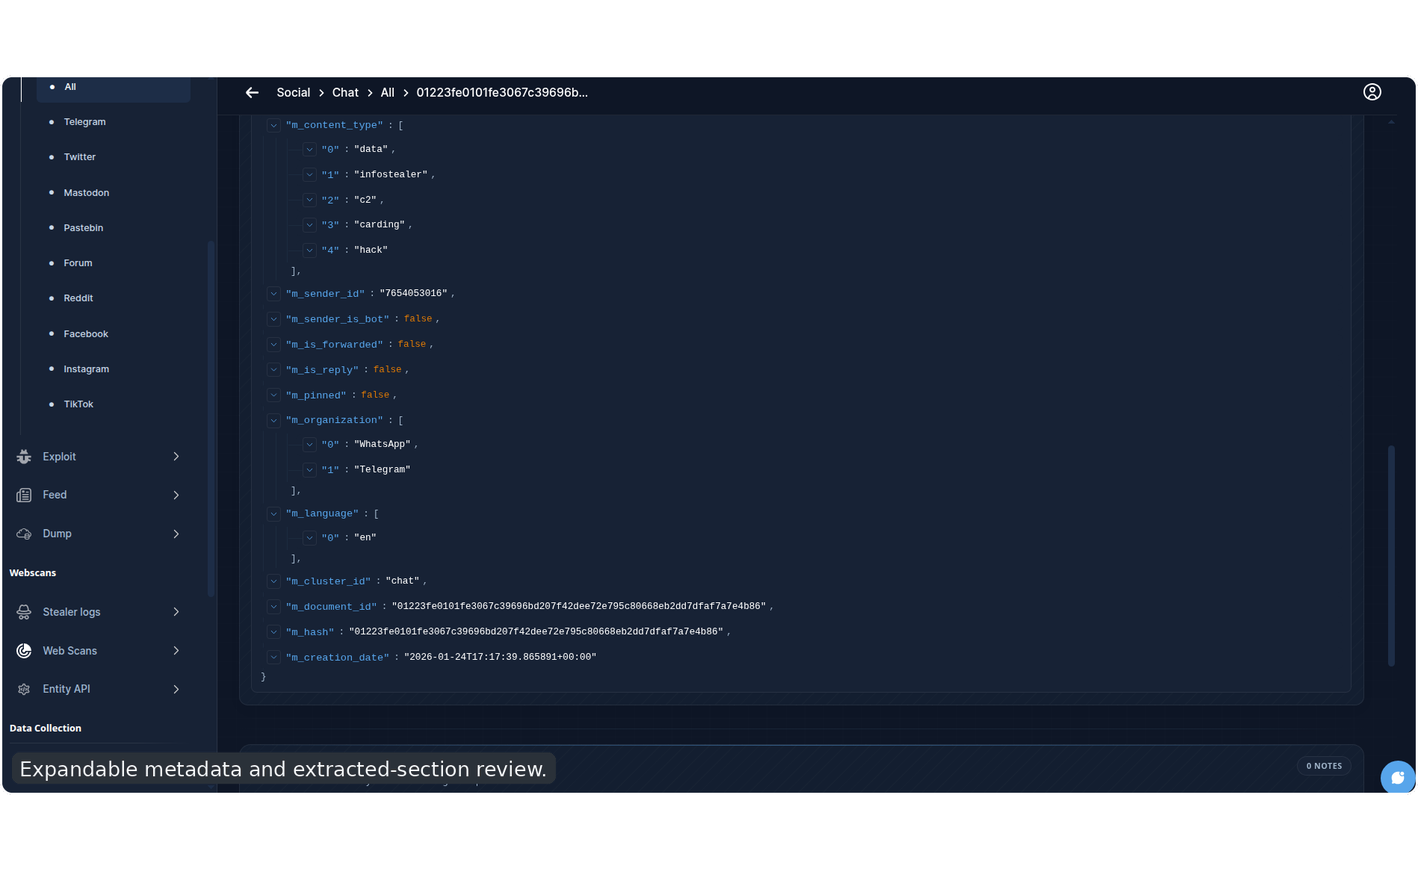
Expandable metadata and extracted-section review.#
Screenshot and JSON Sections#
For relevant breach records, the report may also include:
screenshot preview
JSON record viewer
report mapping
The JSON viewer is useful for raw structured inspection, while report mapping helps users navigate relationships and related record context.
JSON inspection view for raw structured report data.#
AI Chat and Summary#
If AI is enabled, users may also see:
AI summary generation
chat over the report content
For chat-style and social-style records, report pages can also include:
channel or source title
source URL
report sharable link
sender details
message identifiers
views, likes, shares, comments, tags, or retweets
expandable metadata blocks
JSON inspection
This makes the report page suitable for both analyst review and downstream sharing.
The tested chatbot flow specifically confirms:
opening the chat widget from a report
entering a prompt
sending a message
rendering a visible message thread in the chat area
Compromise Monitoring Report Page#
The Compromise Monitoring report is a streamlined variant focused on target and attacker context. It includes:
target URL
saved date
defacer or IOC type
team
source breach reference
IP
location
metadata panel
JSON viewer
Links, Support, and External Navigation#
Directory#
The Directory page presents monitored live services and related records in a browsing-oriented layout. It differs from the normal search-result workflow by focusing on monitored entries and operational visibility rather than keyword-first investigation.
Common behaviors include:
page-level filtering
paginated or progressively loaded directory entries
monitoring-status style browsing
service and reference review across monitored live entries
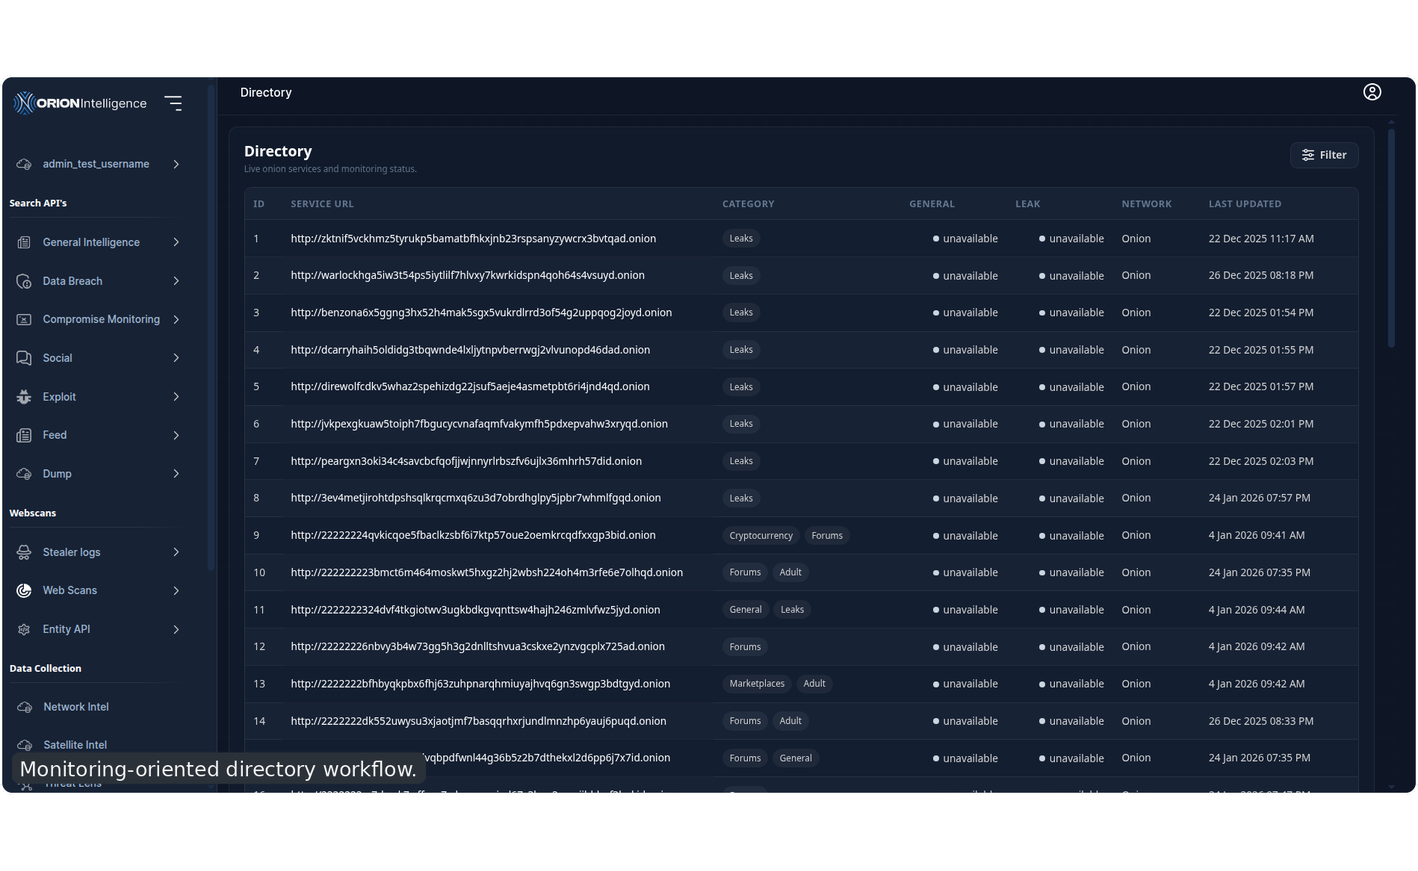
Monitoring-oriented directory workflow.#
Links#
The Links sidebar item acts as the user-facing entry into the directory-style workflow above.
Onion Link#
If configured, Onion Link opens the deployment’s onion address in a separate tab.
Whistle Blowing#
If enabled, Whistle Blowing opens an external anonymous reporting portal. This is outside the main indexed investigation workflow.
Documentation#
The Documentation entry opens the published documentation site in a new tab.
Profile, Tenant, and Alert Workflows#
The user profile area at the top of the sidebar contains user-specific and tenant-specific pages.
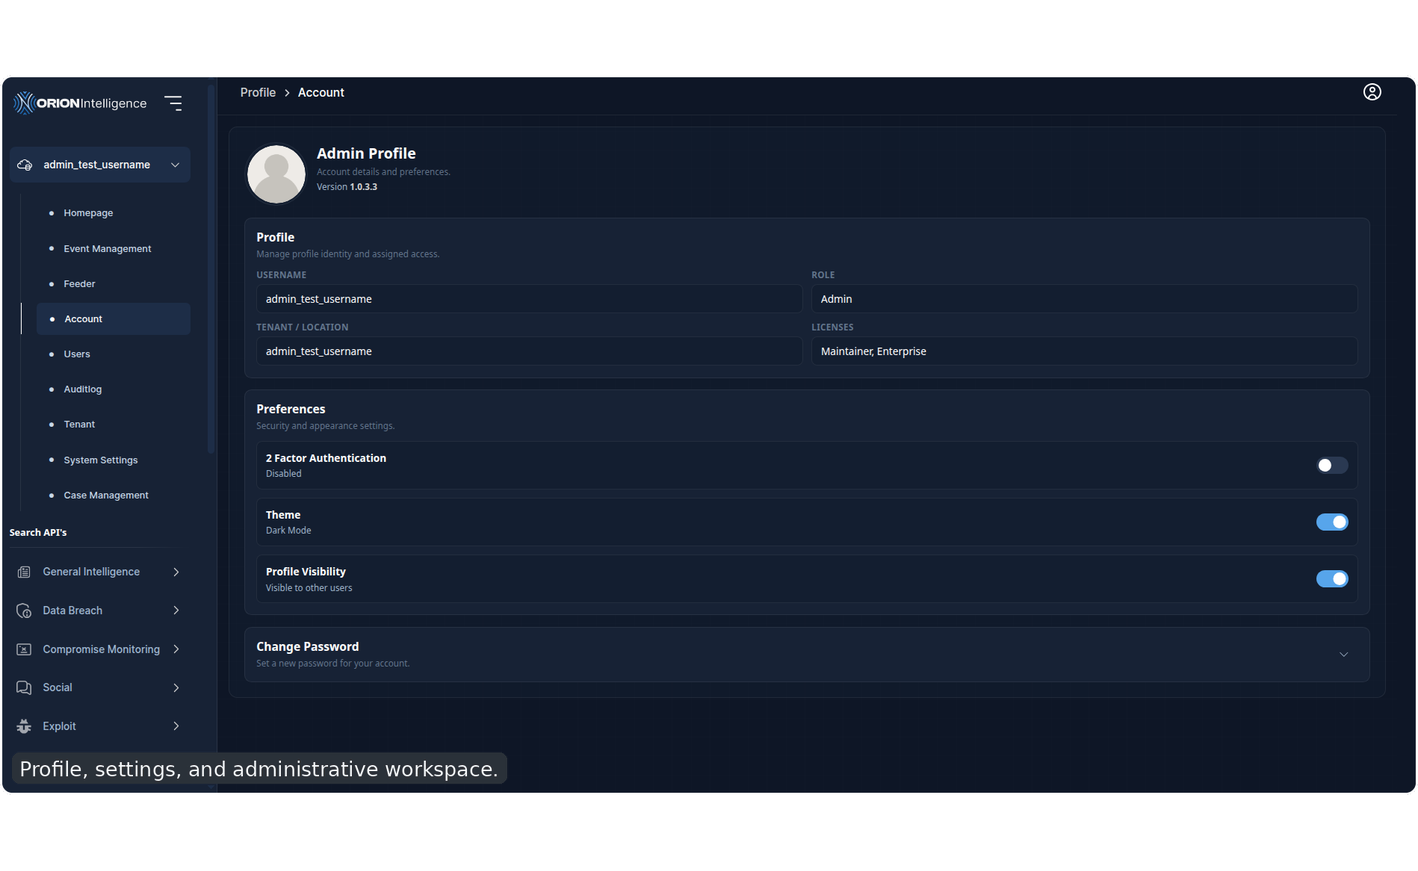
Profile, settings, and administrative workspace.#
Account Settings#
The account page allows the current user to review and manage:
profile image
username
role
tenant or location display
assigned licenses
two-factor authentication
password
global recovery key
theme preference
The page also shows the currently running platform version. It is focused on the current user rather than the tenant as a whole.
The tested account workflow also includes:
avatar upload
theme toggle and persistence
enabling
2FAlogging out and reaching the two-factor challenge screen on next login
viewing the QR image and OTP input state for 2FA setup/verification
changing the account password
generating or replacing a global recovery key
Changing the password, enabling or disabling 2FA, and generating or replacing a recovery key opens a Confirm your identity dialog. Enter the current account password to authorize the change. Orion verifies it on the server against the stored password hash; an incorrect password leaves the dialog open and shows an error. Profile, language, theme, and visibility changes do not require this additional confirmation.
Generate or Replace a Recovery Key#
Open
Profile > Account.In
Recovery Key, selectGenerate / replace recovery key.Enter the current password in the identity-confirmation dialog.
Copy the recovery key from the popup and store it in a password manager or another secure location.
Close the popup after saving the key.
The recovery key is 43 characters and is shown only once. Orion stores only its hash. Generating another key immediately replaces the previous key, so the older value can no longer recover the account.
When 2FA is configured, the authenticator secret is encrypted with tenant-scoped encryption before it is retained. Existing unencrypted 2FA secrets are encrypted after successful verification.
Current-user profile and account settings form.#
Public User Activity#
User activity pages open from profile, report, comment, or interaction links when profile visibility allows it.
The page can show:
the user’s profile image
visible activity items
report or thread links for activity entries
an unavailable or private-profile state when visibility is disabled
Tenant profile visibility and the user’s own profile preference can hide public activity from other users.
AI Workspace#
AI Workspace is opened from Profile > AI when the deployment enables the AI endpoint. It is used for support-style and investigation-assistant conversations inside the profile area.
The workspace can support:
asking investigation or support questions
reviewing previous messages in the chat rail
sharing a chat transcript through a tokenized shared link where enabled
opening shared chat transcripts outside the dashboard shell
Nexus Conversation Controls#
AI Workspace uses the Nexus assistant surface when the AI endpoint and user license allow access. The workspace opens as a full chat view and can also receive a query context from the surrounding dashboard route.
The main controls are:
New Chatclears the current visible conversation and starts a fresh Nexus session when no response is actively streaming.Sharecreates a tokenized shared-chat link for the current visible user and Nexus messages.quick prompt buttons prefill the composer with common investigation-assistant prompts.
the composer sends with
Enterand inserts a new line withShift + Enter.the send button changes to a stop control while Nexus is generating a response.
The composer and edited user messages use a 300-token limit. When a draft is over the limit, the workspace shows how many tokens must be removed before the message can be sent or saved.
Message Actions#
User messages can be copied or edited when Nexus is not currently sending. Editing a user message removes that message and the later conversation turns, places the edited text back into the composer flow, and resends it as a new request. This keeps the visible conversation aligned with the revised prompt instead of leaving stale assistant answers after an edited question.
Nexus responses render markdown when returned by the assistant. Completed Nexus messages expose bot-message actions, while actively streaming messages show an in-progress indicator instead of the completed-message action row.
History, Streaming, And Recovery#
AI Workspace loads saved chat history when the page opens. History preserves user, Nexus, and explicit cancellation messages; older history is trimmed so the workspace does not keep unlimited user or bot turns.
When a response is running, the workspace shows streaming status and step text when available. If the user presses the stop control, the current Nexus stream is cancelled and a Message canceled. entry is stored in history.
If the page reloads or the user returns while the last saved item is a user message with no matching Nexus response, AI Workspace attempts to resume the active Nexus stream. If recovery fails, the conversation remains visible and the user can retry from the error state where a retry payload is available.
Shared chat links are separate from the editable workspace. A shared transcript opens outside the dashboard shell and shows only the messages included in the generated share payload.
Tenant Homepage#
For tenant users, the profile homepage may function as a tenant intelligence and alert workspace instead of a simple profile landing page.
Depending on license and role, this page can include:
homepage search
alert export
scan-all or flush-all actions
risk summary cards
category alert cards
monitored IOC counts
alert scanner settings
In some deployments, this page behaves differently by role:
maintainers or higher-license users may receive the full alert-and-action workspace
analysts may see a simpler search-first homepage variant
some users may see an insights-only fallback instead of tenant alert controls
The summary area commonly displays:
critical alerts
high-risk alerts
medium-risk alerts
low-risk alerts
Category cards provide quick access to alert-specific drill-down reports.
Maintainer-level users can manage alert scanner settings when the workflow is enabled. The scanner settings page lets the tenant enable or disable allowed alert categories for future tenant scans. Saving updates the tenant’s allowed alert categories.
Scheduled alert scans use the tenant’s monitored IOC values, allowed alert categories, and alert run-time configuration. The run time controls when the platform should perform the tenant’s recurring alert scan, while scan-all remains the manual path for immediate follow-up.
The profile area also supports alert-focused workflows such as:
category-specific alert reports
custom alert creation where enabled
category-level alert scanner settings where enabled
Custom Alerts#
Custom Alerts allow a permitted user to create or edit an alert record manually. The form captures alert type, status, title, description, source, reference URL, and one IOC bucket.
Supported alert types are:
generalbreachexploitsocialdefacement
The alert form validates title, description, source, and URL before saving. The reference URL must start with http:// or https://. The IOC selector uses the deployment’s supported entity list, and the saved alert receives license visibility based on the alert type.
Alert Scanner Settings#
Alert scanner settings control which alert categories are allowed to run for the tenant. They are useful when a tenant wants monitoring but does not want every possible scanner category to execute.
Typical scanner categories can include:
general intelligence
breach and credential exposure
compromise monitoring
social and discussion sources
exploit intelligence
stealer logs
scanning-backed categories such as email breach, social scanner, software scanner, repository scan, SEO scan, playstore scan, advanced scan, and vulnerability scan
The exact list depends on the deployment and tenant configuration. Disabled categories are not a data deletion control; they affect future alert scanning and visibility behavior.
Alert Report Drilldown#
Category alert reports are opened from Profile > Homepage or from alert drilldowns. The report page is used to review category-specific alert records, inspect risk context, export findings, and move from an alert into a deeper investigation.
Alert detail drawers can show the alert risk, title, description, URL, category, source, matched entity, result date, content type, password when present, and raw findings when the source record includes additional evidence. Use the drawer to verify the underlying finding before exporting, creating a custom alert, or opening a case workflow.
Admins with case-management visibility can also open tenant alert views inside case management. That workflow is used when tenant alerts need administrative review alongside cases and tracked investigation work.
Take Down#
The Take Down page is the root-administrator review workspace for abuse/takedown evidence requests. It appears in the profile area as Takedown Requests for root-tenant administrators and opens at /dashboard/profile/take-down.
The feature has two user-visible entry points:
Initiate Takedownon eligible Compromise Monitoring or defacement reportsReport Takedownon the Take Down review page for a manually entered target URL
When a user initiates a takedown from a report, Orion uses the report target URL and captures abuse-contact evidence before creating the review entry. The modal shows the captured abuse email when one is found and confirms that evidence has been saved for administrator review. If no public abuse contact is exposed for the target, no evidence entry is saved and the modal shows that the request was not created.
The review page supports:
searching by target, abuse email, user, or report identifier
date-range filtering
status filtering for
All,Pending,Accepted,Denied, orFailedpagination
accepting pending requests
rejecting pending or failed requests with a reason
manually creating a request from a target URL
Request statuses are shown with the same meaning across reports and the review page:
Stored status |
Report label |
Meaning |
|---|---|---|
|
|
Evidence was captured and the request is waiting for root-admin review. |
|
|
A root administrator accepted the request and the abuse email was dispatched. |
|
|
A root administrator rejected the request, optionally with a reason. |
|
|
The request is in a failed state and can be reviewed or rejected. |
Accepting a request sends the abuse/takedown email to the captured abuse contact using the saved evidence. Rejecting a request closes the review path and stores the rejection reason when one is supplied. After a request exists for a target domain, the source report disables duplicate initiation and shows the current takedown label.
Access and scope
Creating a takedown request requires an eligible role and defacement-module access. Reviewing, accepting, or rejecting takedown requests requires root-tenant administrator access.
Manage IOCs#
The IOC management page allows tenants to maintain the set of monitored values used in searches and alerting.
Capabilities include:
IOC category search
horizontal category browsing
adding IOC values
IOC import from CSV
CSV upload action for bulk IOC upload
downloading the CSV template
removing IOC values
clearing all IOC values
This page is especially important for tenant-driven monitoring workflows.
CSV imports must use an exact key,value header. Files must be CSV format, no larger than 1 MB, and each key must match a supported IOC entity key. Duplicate values are ignored during import.
Some tenants can be marked for Privileged IOC handling. When that protection applies, users without the required permission can review IOC values but cannot add, remove, clear, or upload IOC values for that tenant. The page shows a permission warning when IOC editing is disabled.
Example CSV structure:
key,value
domain,example.com
email,analyst@example.com
ip,203.0.113.10
url,https://example.com/login
After import, review the visible IOC counts before running tenant alert scans. Invalid keys or oversized files should be corrected before retrying the import.
The tested tenant IOC workflow includes:
opening the IOC page from the tenant profile area
switching across IOC category tabs
adding values in multiple categories
importing values from a CSV template
adding monitored email values for downstream alerting
returning to the tenant homepage and triggering follow-up scanning actions
Statistics#
The Statistics page in the profile area reuses the insight-oriented summary experience for users who want a visual overview without returning to the main homepage.
Profile Consolidated View#
The profile area also contains a consolidated-search view. Functionally, it behaves like the main consolidated workspace but sits within profile and tenant-oriented workflows.
Monitoring#
Monitoring is an operational profile workspace that groups monitoring-related tabs. Depending on role and tenant configuration, the visible tabs can include:
Log ManagerAuditlogEvent Management
Admins can see Log Manager. Admins and maintainers can see Auditlog. Event Management appears only for admins or maintainers when the tenant has event management enabled.
Event Management#
Event Management is the SIEM-style event search workspace. It is available from the profile area or the Monitoring tab when enabled.
Capabilities include:
searching SIEM events
using IOC-style search tags such as all, domain, email, and IP
validating domain, email, and IP input
filtering by date range
paginating large event result sets
expanding a result to inspect raw event fields and extracted IOCs
Log Manager#
Log Manager is an admin-only operational log viewer.
Capabilities include:
filtering logs by type:
INFO,WARNING, orERRORfiltering by available log date
paginating log entries
deleting an individual log file
flushing all logs after confirmation
reviewing file size and log metadata
Use Log Manager for operational troubleshooting, not analyst investigation.
Feeder#
Feeder is the source/rule intake workspace for users with feeder access.
The Feeder workspace includes:
a rule catalog dropdown
grouped Social Media rules for supported social platforms
an
Addtab for uploading parser files or saving URL valuesa
Viewtab for uploaded scriptsa
Valuestab for stored rule values where supportedsearch, sorting, pagination, preview, enable/disable, delete, and clear controls
owner transfer for admins
Upload rules depend on the selected rule type:
Python parser uploads must use
.pyfiles no larger than 1 MB.Shared session uploads must use
.zipfiles.Value-backed rules accept newline-separated URL values.
Shared rules require the parser file before adding values.
Feeder data is used by collection workflows. It should be managed carefully because enabling, disabling, clearing, or deleting entries affects future ingestion behavior.
Case Management#
Case Management is the investigation workspace for turning alerts, findings, and analyst leads into tracked cases. It is available from the profile area when the user has the required case-management access.
Common entry points include:
Profile > Case ManagementProfile > Case Management > Tracking BoardProfile > Case Management > Case Detailsshared case links
admin tenant alert views inside case management
Case visibility and allowed actions depend on role:
Role or access pattern |
Typical capabilities |
|---|---|
Admin |
create, assign, update, archive, unarchive, close, share, export, and review tenant alert case flows |
Maintainer/member with access |
create, assign where permitted, update, archive, share, export, and close eligible cases |
Analyst with case-management permission |
view assigned or permitted work, update allowed case fields and task state, review evidence, and contribute comments |
Shared-link viewer |
view only the shared case material allowed by the generated share link |
Case List, Filters, And Analytics#
The Case Management landing page has three working modes where permissions allow them:
Case Listfor day-to-day triage and opening casesAnalyticsfor summary charts and workload reviewAlertsfor admin tenant-alert review inside the case-management context
The case filter row applies to the list and analytics modes. It supports:
case-list scope selection for open or archived cases where the user can manage cases
free-text search across case ID, title, and description
status filtering
severity filtering
priority filtering
searchable case-type filtering
sort order selection
The same filter state is used by the list and analytics panel. For example, if the user searches for a case ID and switches to Analytics, the analytics counts and charts reflect the filtered set rather than silently reverting to all cases.
The analytics panel shows:
visible cases compared with total cases
active case count
critical-severity case count
high-priority case count
unassigned case count
open-task count
artifact count
average case age and stale case count
status distribution
severity distribution
priority distribution
case-type distribution
intake-source distribution
task-status distribution
analyst workload
Needs Attentioncases
Use analytics when a lead or administrator needs to understand workload, stale investigations, unassigned work, or high-risk cases before assigning analysts or moving cases through the tracking board.
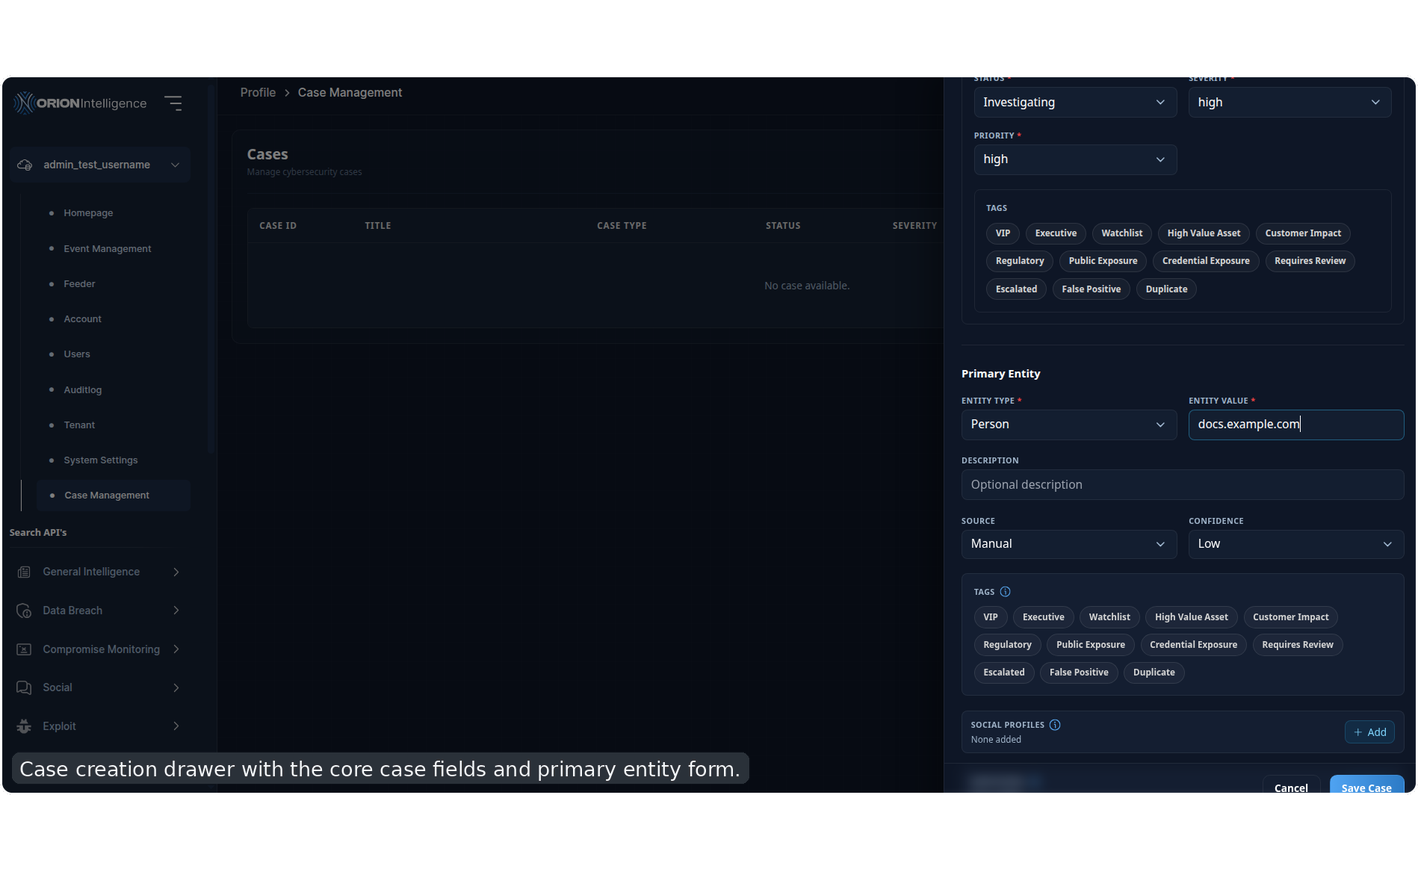
Case creation drawer with the core case fields and primary entity form.#
When adding a case, users define:
case title and investigation description
case type and intake source
status, severity, and priority
tags for triage and reporting
primary entity, such as a person, organization, email, domain, IP, URL, account, credential, or infrastructure indicator
Recommended case creation flow:
Create the case with a clear title, severity, priority, and intake source.
Add a primary entity before adding secondary evidence.
Attach artifacts or report references while the source context is still fresh.
Assign analysts or tasks if follow-up work is needed.
Use the tracking board for status movement rather than editing status informally.
The case details page keeps the case record organized into independent sections. Each section has its own add or edit action, and side drawers are used for focused data entry.
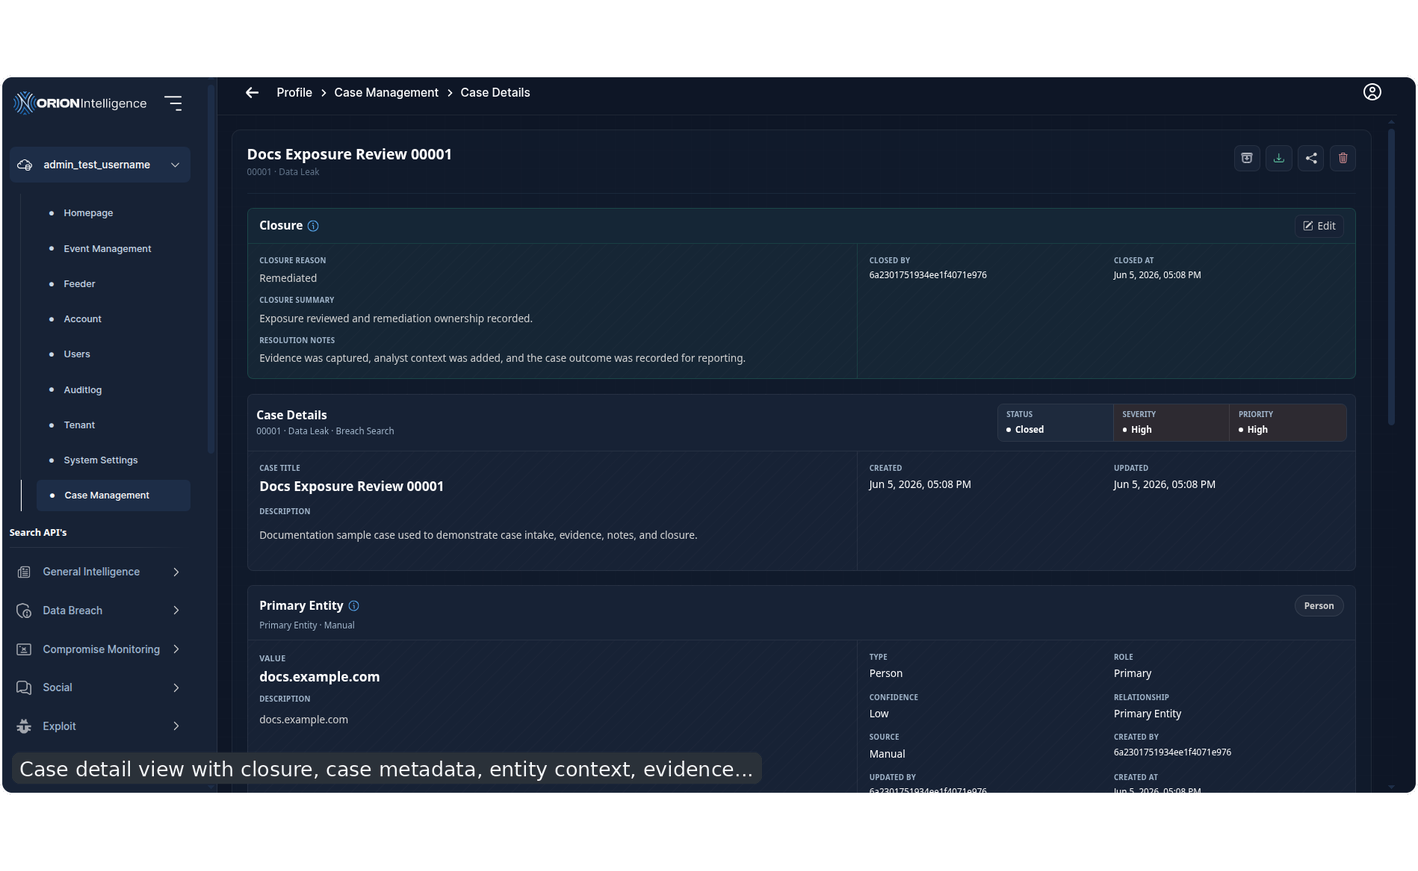
Case detail view with closure, case metadata, entity context, evidence, and analyst workflow sections.#
The main case details section shows the title, description, case ID, type, intake source, status, severity, priority, tags, assigned analysts, PDF export, and share-link actions.
PDF export is intended for handoff and reporting. Share links are intended for controlled review of a case without giving the recipient broader application access. Revoke case shares when external review is complete.
Primary Entity stores the main subject of the investigation. Related Entities are additional people, domains, accounts, assets, indicators, sources, or actors connected to the case.
The case details page also exposes a case-level Nexus assistant where enabled. This assistant receives the current case details as its working context, so it is useful for summarizing case state, asking what evidence is already attached, preparing handoff notes, or identifying likely next steps from the visible case record. It is separate from public case shares; shared-link viewers do not receive broader application access through the assistant.
Case Artifacts#
Artifacts store evidence and supporting material. Common artifact types include screenshots, uploaded files, URL captures, raw alerts, log excerpts, email headers, chat transcripts, linked reports, and generic evidence.
Artifact records include:
title
type
source
captured date
description
optional URL for URL-capture artifacts
optional files for screenshot and file artifacts
optional linked report metadata for report artifacts
Artifact cards show the title, type, source, captured date, description, URL actions, linked-report actions, and file actions where relevant.
Linked Report Artifacts#
When the artifact type is Report, the user can attach an existing Orion report instead of only typing a free-form artifact description.
The linked-report workflow is:
Add or edit an artifact.
Set artifact type to
Report.Choose a report source.
Search for a report title.
Select a result from the report dropdown.
Save the artifact.
Use
View Reportfrom the artifact card when the linked report needs to be reopened.
Supported report sources are:
General IntelligenceData BreachDefacementSocialFeedExploitStealer Logs
If no result matches the search term, the dropdown shows the empty state. Clearing the selected report removes the linked report ID and title from the artifact before saving.
Artifact Files And Integrity#
Screenshot and file artifacts support multiple uploaded files. Screenshot artifacts accept PNG files. File artifacts accept PDF, JPG, PNG, TXT, or DOCX files. The current UI allows up to five files per artifact.
Saved artifact files show the file name and an integrity badge. Users with case-management authority can:
download a file
verify a file’s integrity
delete a file from an open case
Integrity verification compares the stored file against the case artifact record and updates the badge to Verified or Integrity Failed. Failed integrity disables download for that file so users do not rely on evidence that no longer matches its stored integrity record.
Analyst-style users without the required management permission can review artifact files, but they cannot run artifact integrity verification.
Tasks track follow-up work for analysts. A task can hold status, priority, assignee, due date, description, and links to relevant entities or artifacts.
Linked Cases connect the current case to other case records. Links can mark duplicates, parent or child cases, follow-ups, escalations, shared actors, shared victims, shared infrastructure, or general related cases.
Comments provide the analyst discussion thread for the case. Use comments for review notes, handoff context, evidence interpretation, or follow-up decisions. Comment authors can be opened through the user sidebar where supported.
Closure records the final outcome. It includes the closure reason, summary, resolution notes, who closed the case, and the close time. Closing a case is the point where the investigation outcome becomes part of the case report and exported PDF.
Case Status Lifecycle#
Case status changes follow a fixed tracking-board flow:
newintake_reviewunder_investigationevidence_collectionverificationregulatory_actionlegal_reviewresolvedclosed
Status changes must be made from the tracking board, require a reason, and can move only one step forward or backward. A case cannot be moved back to new, and a closed case cannot be moved to another status.
Each board move stores the submitted reason in the case status history. Use concise reasons that explain why the case moved, because this history supports handoff, review, export preparation, and later audit of the investigation timeline.
Closure is handled separately from board movement. A case can be closed only from the case details closure section, only after it reaches resolved, and only by admins, maintainers, or the case creator.
Archived cases are read-only for update-style actions. Analyst access is intentionally narrower than admin or maintainer access: analysts can view assigned work and update their allowed task state, but case assignment, case status movement, and closure remain restricted.
Admin Tenant Alerts In Case Management#
Administrators can review tenant alert categories from the case-management area when the workflow is enabled. This view is useful when an alert needs to become a case, be compared with existing cases, or be reviewed across tenants.
Use this path when:
a tenant alert requires administrative triage
a category alert needs to be linked to active case work
a default or administrative tenant needs to inspect alerts for another tenant
alert review and investigation status need to be handled together
Tenant Settings#
Tenant Settings stores tenant-level identity and contact information.
Depending on permissions, users can:
upload a tenant image
review assigned licenses
review license count
review assigned user quota
edit phone
edit country
edit city or state
review alert visibility and scanner-category settings where the tenant role allows it
control whether tenant alerts are visible to the parent tenant, on sub-tenants only
Some fields remain read-only depending on role. The page also acts as a tenant overview by summarizing the tenant name, status-style badges, location, assigned quota, and current license list.
A sub-tenant sees an extra Allow Parent Tenant Alert Visibility toggle next to the admin visibility toggle. The two are independent: hiding alerts from administrators does not hide them from the primary tenant, and hiding them from the primary tenant does not hide them from administrators. Disabling either toggle also withdraws that tenant from the alert-access lists of the users on the side that lost visibility.
Tenant Alert Webhook Integrations#
Tenant Settings also shows tenant alert webhook integrations that an administrator has configured at the platform level. Tenants use the visible Connect or Reconnect action to authorize their own Slack or Jira webhook destination in a new tab. Providers that are not configured by an administrator are hidden from the tenant page.

Tenant alert webhook integrations showing Slack as the only available configured connector.#
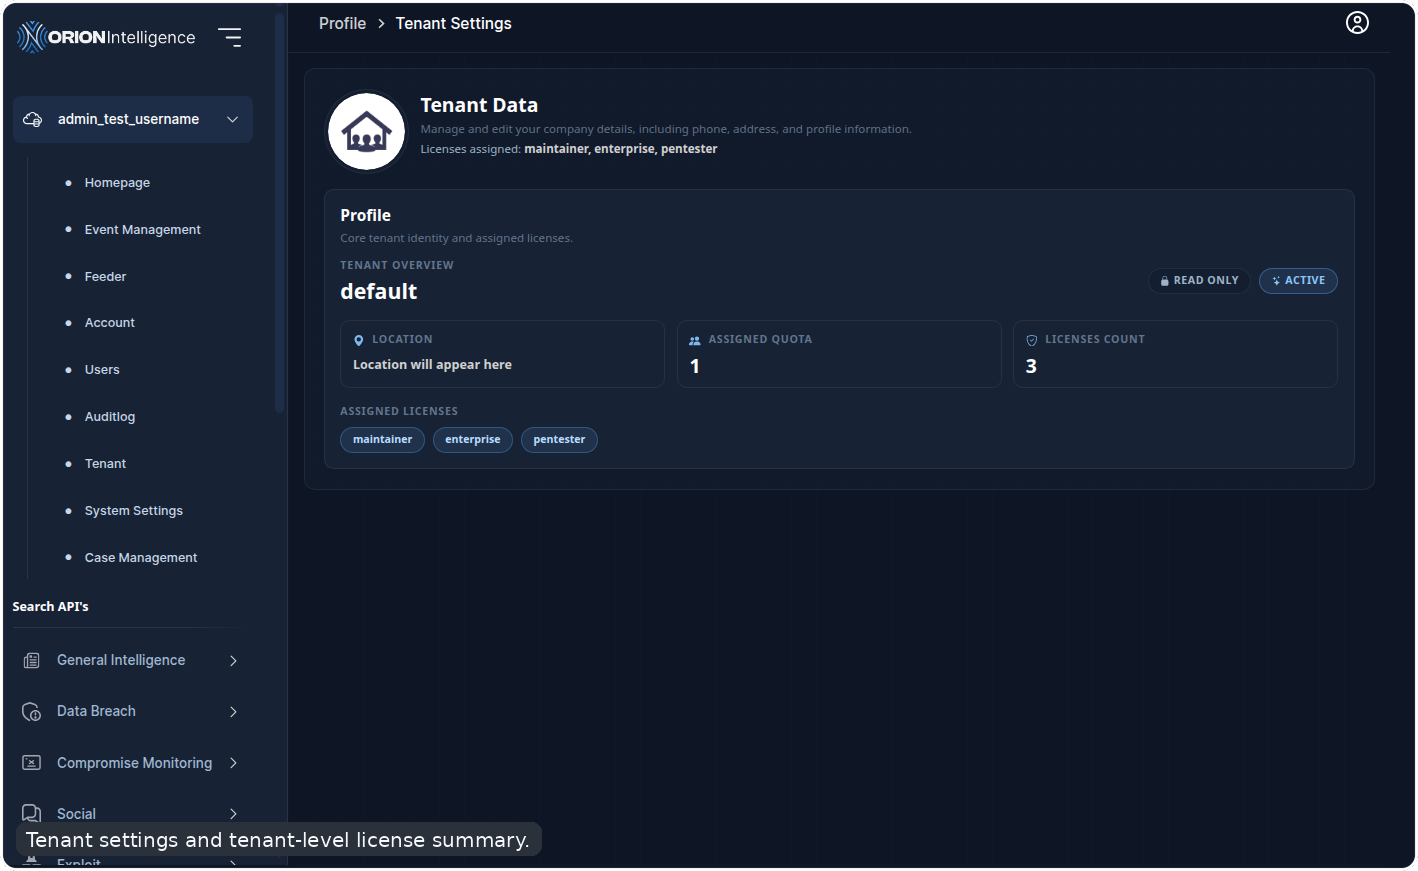
Tenant settings and tenant-level license summary.#
User and Tenant Administration#
Tenant Users#
The Users view is the main tenant user-management page.
It supports:
viewing users in a table or mobile card layout
adding a user
expanding a user row for details
changing status
editing assigned licenses
editing user permissions where available
limiting alert-administration visibility to all tenants or selected tenants where enabled
deleting a user
Displayed information commonly includes:
username
email
role
status
subscription
licenses
permissions
alert access scope where enabled
The page also respects quota-based restrictions.
Per-user permissions are assigned here when adding or editing a user. Assignable permissions include Case Management, Orion Mail, and Dismiss Result. The Dismiss Result permission controls who can dismiss or restore stealer-log and credential results for the tenant (see Dismissing Results); users without it can view results but cannot dismiss them.
The broader tested user-management lifecycle also covers:
creating multiple users with different roles and license mixes
verifying role- and license-based sidebar visibility after login
triggering subscription or paywall behavior for limited-license users
showing near-expiry trial state messaging where applicable
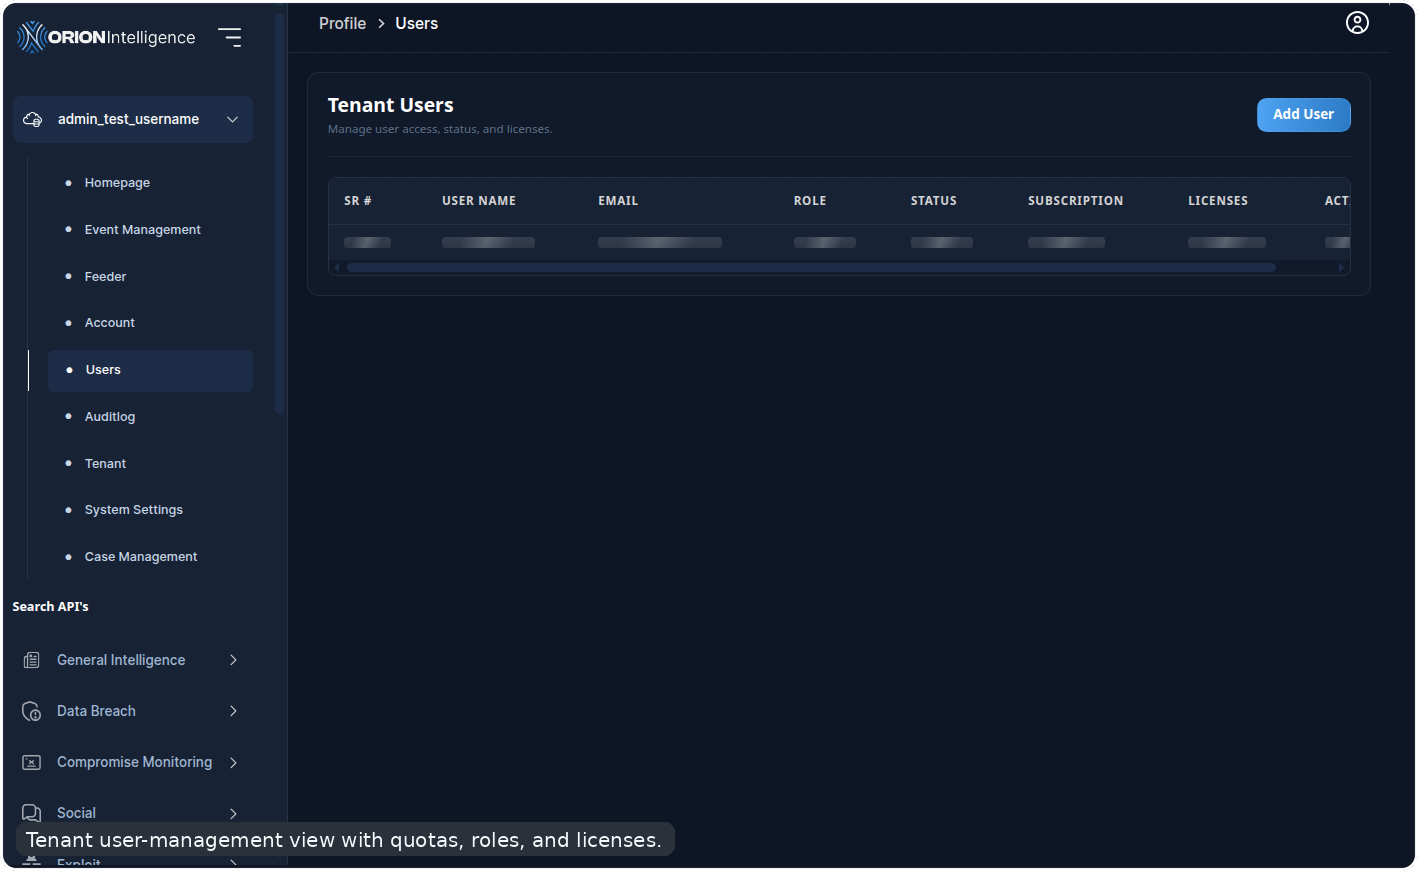
Tenant user-management view with quotas, roles, and licenses.#
Tenant Administration#
The Tenants view is used by higher-privilege roles to manage tenant records across the platform.
It supports:
reviewing tenant information
expanding a tenant for detail and editing
changing verification state
changing quota
marking a tenant as a primary tenant and setting the tenant quota that limits how many sub-tenants it may hold
reviewing and editing sub-tenants as the maintainer of a primary tenant
changing status
updating tenant licenses
setting tenant alert run time in
HH:mm24-hour formatcontrolling whether tenant alerts are visible to admins
configuring allowed alert scanner categories
enabling Privileged IOC handling where required
assigning which tenants a user can view in tenant-alert administration workflows
deleting a tenant and its associated users and keys after confirmation
Displayed fields include:
company name
country
subscription
verification state
user quota
primary tenant state and tenant quota
the owning primary tenant on sub-tenant records
status
license assignments
alert visibility and alert run-time settings where enabled
privileged IOC state where enabled
Admin tenant-alert views can summarize alerts across visible tenants, filter or search tenants from a multi-select dropdown, open category-specific alert drilldowns, review risk summary cards, and export a tenant’s alerts as a PDF report.
Administrators delete top-level tenants, and the maintainer of a primary tenant deletes its own sub-tenants. The root/default tenant cannot be deleted, and an administrator cannot delete or edit a sub-tenant directly; those records are managed through their primary tenant.
To delete a tenant:
Sign in as an administrator, or as the maintainer of the primary tenant that owns the sub-tenant, and open
Tenants.Find the tenant and select its red delete button.
Review the confirmation message and select
Yes, Confirm.Confirm that the tenant disappears from the list.
This permanently removes the tenant and its associated users and keys. Deleting a primary tenant also removes every sub-tenant beneath it, together with their users and keys.
Primary Tenants and Sub-Tenants#
A tenant can be promoted to a primary tenant, which lets it hold its own sub-tenants and administer them without administrator involvement. Sub-tenants are ordinary tenants that carry a parent reference; they sign up through the primary tenant’s subdomain and inherit its branding and licensing boundaries.
To promote a tenant:
Sign in as an administrator and open
Tenants.Expand the tenant and enable the
Primary Tenanttoggle.Set
Tenant Quotato the number of sub-tenants the primary tenant may hold.Save the tenant.
Promotion raises the tenant’s own quotas to the primary defaults when they are lower: a user quota of 15 and a tenant quota of 5. Non-primary tenants accept a user quota of up to 8 from this page.
Quotas are pooled. The primary tenant’s user quota covers its own users plus every user of its sub-tenants, and each sub-tenant’s user quota reserves a slice of that pool. Users holding the maintainer license are not counted. A sub-tenant created through signup starts with a user quota of 1 when the pool still has room, and 0 when it does not.
The maintainer of a primary tenant can:
open
Tenantsand see only the sub-tenants beneath its own tenantverify a sub-tenant, change its status, and set its user quota within the remaining pool
assign sub-tenant licenses from the set the primary tenant itself holds
enable Privileged IOC or the AI endpoint for a sub-tenant only when the primary tenant already has that capability
require a password reset for a sub-tenant maintainer
create users for its own tenant with the
Member,Analyst, orDemorole and assign tenant-alert access to themreview the tenant alerts of sub-tenants that allow parent visibility
accept or reject takedown requests raised by its own tenant and its sub-tenants
Sub-tenant users are blocked at login when the primary tenant is unverified, disabled, or no longer marked as primary. A sub-tenant member also inherits the primary tenant’s subscription state, so an active subscription on the primary tenant prevents trial-expiry lockout in its sub-tenants.
When a quota is exceeded, the affected users are stopped at login with an explanatory message, and signed-in sessions display a banner until the tenant reduces usage or the quota is raised. Exceeding the user quota and exceeding the tenant quota are reported separately.
Turning off the Primary Tenant toggle disables every sub-tenant beneath the tenant. Reducing the licenses of a primary tenant also trims its sub-tenants to the remaining license set and re-levels the affected users.
Dedicated Tenant Subdomains and White-Labeling#
Each tenant uses a dedicated subdomain, such as <tenant-slug>.<platform-domain> (<tenant-slug>.localhost in local environments). Tenant accounts sign in through that tenant URL, keeping authentication isolated from the main platform domain. The platform resolves the tenant from the request host on every call, so the branding, public configuration, signup availability, and login screen a visitor sees are the ones belonging to that subdomain. A host that matches no tenant is rejected.
Branding is tenant-scoped, so the application name, favicon, light and dark logos, and public header links can be customized without changing other tenants.
Who can change branding:
an administrator can change every platform setting for the tenant being edited
a user holding the
maintainerlicense can change the branding of its own tenant only, limited to the application name, the onion address, and the public data-source, adversary, and pricing linkssettings such as version, allowed language, admin-panel visibility, backup schedule, and platform mail credentials stay administrator-only
a maintainer cannot edit another tenant’s settings, including the settings of its own sub-tenants
Brand assets:
three images are white-labeled per tenant: the primary logo used as the favicon, the wide light logo, and the wide dark logo
uploads are limited to image files of at most 100 KB
each tenant’s uploads are stored against that tenant, so one tenant’s logo never appears on another
removing a custom asset restores the stock image shipped with the platform
a tenant that has not uploaded an asset automatically falls back to the stock image
replacing an asset takes effect immediately, because asset URLs are versioned
New tenants start from an inherited brand. When a tenant is created, its settings and uploaded logos are copied from a source tenant: the parent tenant for a sub-tenant, and the root tenant for a top-level tenant. A sub-tenant therefore opens already wearing the white-label identity of its primary tenant, and can then diverge from it. Version, language, admin-panel, and onion values are not inherited, and the AI endpoint starts disabled until it is enabled for that tenant.
The tenant image shown on the tenant overview is separate from these brand assets and is uploaded from Tenant Settings.
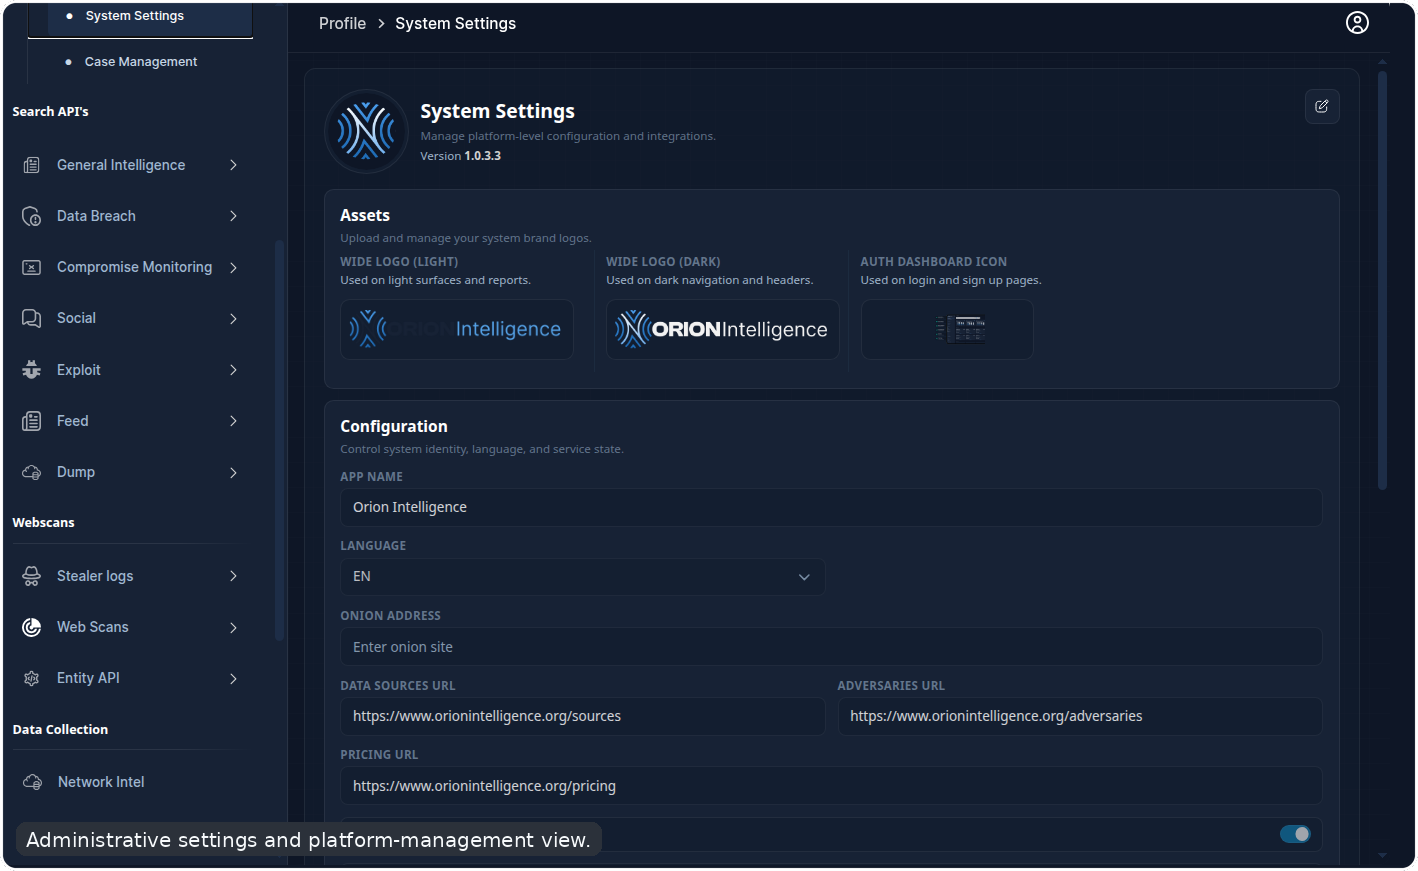
Brand assets and application identity controls used for tenant-level white-labeling.#
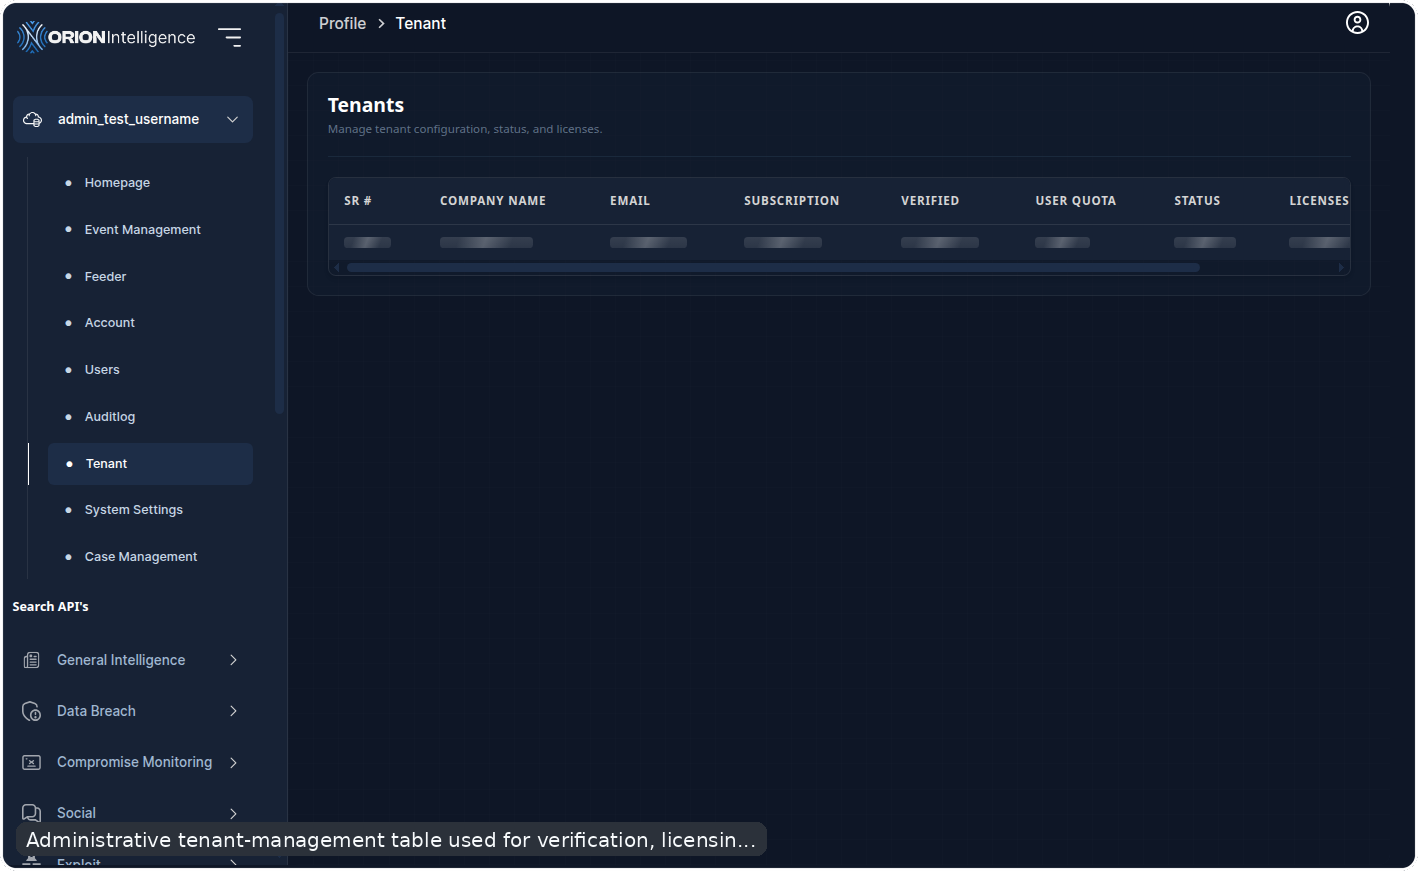
Administrative tenant-management table used for verification, licensing, and quota updates.#
Audit Logs#
Audit Logs provide a searchable activity trail across user and tenant actions.
Audit data shown
The audit log list typically shows a timestamp, actor, tenant, and event description for each recorded entry.
The audit-log page supports:
export
filtering
pagination
desktop and mobile layouts
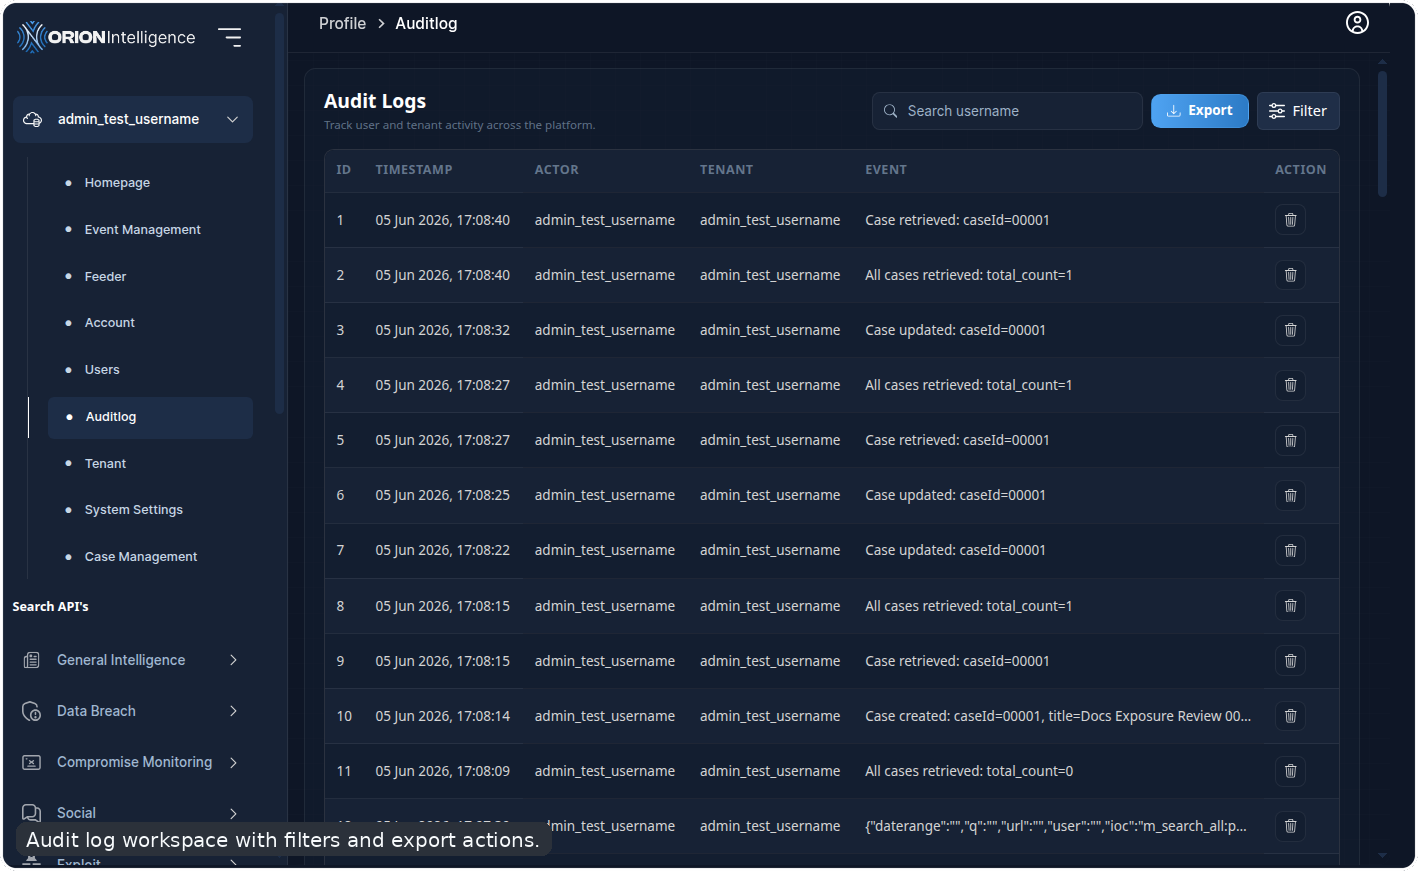
Audit log workspace with filters and export actions.#
System Administration#
System Settings#
System Settings is the primary platform-level configuration page.
It includes two main groups:
asset and branding configuration
application and service configuration
Asset Management#
Administrators can manage brand and UI images such as:
primary logo
wide light logo
wide dark logo
authentication dashboard icon
On a tenant subdomain the same page manages that tenant’s own assets, so a maintainer uses it to white-label its tenant. See Dedicated Tenant Subdomains and White-Labeling under Tenant Administration for the editing rules, size limits, and inheritance behavior.
Configuration#
Editable platform settings can include:
application name
language
onion address
AI endpoint visibility
admin panel visibility
documentation, pricing, data-source, and adversary public URL settings
account email and SMTP settings for platform mail delivery
version and platform metadata
logo and authentication dashboard image URLs
Alert Webhook Integrations#
Administrators configure platform OAuth credentials for alert webhook integrations from System Settings. System Settings stores the Slack and Jira app credentials and redirect URI notes only; tenants connect their own webhook destinations from Tenant Settings.
Backup#
The Backup card controls whether Orion Intelligence creates backups on its own schedule.
When Scheduled Backup is enabled, the platform creates a backup automatically every 3 days. The toggle saves immediately; there is no separate save action for it.
Only the 2 most recent backups are retained. When a new backup would exceed that limit, the oldest existing backup is deleted first. This retention limit is shared across scheduled and manually created backups, so enabling the schedule will eventually displace older manual backups.

System alert webhook integration settings for configuring Slack OAuth credentials.#
Administrative settings and platform-management view.#
Backup and Restore#
Backup and Restore lists every backup held by the platform and allows administrators to create, restore, and delete them.
Each backup captures:
MongoDB collections
ArangoDB collections
Elasticsearch indices
application logs
static resource files
The listing shows a sequence number, backup name, type, and creation date. Backup type is either auto for backups produced by the 3-day schedule, or instant for backups created manually.
Administrators can:
Instant Backup — create a backup immediately. The button shows a progress indicator and stays disabled until the operation finishes.
Restore — replace current data with the contents of the selected backup. The platform enters maintenance mode until the restore completes.
Delete — permanently remove a stored backup.
Each action asks for confirmation before it runs. When the platform already holds 5 backups, the Instant Backup confirmation warns that the oldest backup will be removed if the operation proceeds.
Restoring is destructive: collections are cleared before the backup contents are written back. Only administrators can reach these operations.
Detailed UI Coverage Appendix#
This appendix documents exact user-visible behaviors verified during documentation coverage. It is intended to close the gap between a feature overview and the concrete interactions that an operator, tenant user, or administrator can perform in the current product.
Authentication and Session Lifecycle#
The tested authentication lifecycle includes:
loading the login page from the public entry point
signing in as an administrator
keeping the browser access token in an encrypted HTTP-only cookie rather than local storage
applying progressive delays after consecutive unsuccessful login attempts
opening the profile menu and signing out
requesting a password-reset email
receiving the same reset-request result regardless of whether an account exists
requesting recovery with a registered email and global recovery key
opening a tokenized reset-password screen
validating that the new password cannot match the old password
applying a new password successfully
signing in again with the updated password
encountering a two-factor prompt after enabling
2FAviewing the 2FA QR image and OTP input state
requiring the current password before password, 2FA, or recovery-key changes
Homepage, Heatmap, and Support Interactions#
The homepage is validated as more than a search landing page. The automated flow covers:
world heatmap rendering
tooltip visibility on country hover
tooltip hide behavior on pointer leave
opening a country-level report from the map
closing the country report with the close button
closing the same report by clicking the overlay
fallback behavior when heatmap data or world data changes
The support workflow is also covered directly from the profile menu:
opening the Help & Support modal
filling email, subject, and message fields
submitting the support request
Search Behavior and Result Expectations#
Documentation coverage validates that indexed modules are not only searchable but also return stable, inspectable result structures.
Covered search behavior includes:
general keyword searching
module-specific searching
result opening from cards and table rows
returning from a report to the original listing
opening reports in both modal-style and page-style layouts
validating first-result content against fixtures in key modules
The search-result verification suite explicitly checks stable first-result expectations for:
General IntelligenceData BreachDefacementSocialExploitFeed
This means the manual should treat these modules as search-first experiences with expected, stable result-card or row-based layouts, not as experimental views.
Indexed Module and Tab Coverage#
The suite covers more module variations than the earlier manual described explicitly.
General Intelligence coverage includes:
AllGeneralForumsNewsStolenDrugsHackingMarketplacesCryptocurrencyLeaks
Data Breach coverage includes:
AllDatabasesTrackingleak URL and dump-reference fields inside breach reports
Defacement coverage includes:
AllHackedPhishingDatabases
Social coverage includes:
AllTelegramTwitterMastodonPastebinForumReddit
Exploit coverage includes:
AllCVEToolsZeroDay
Feed coverage includes:
News
Stealer Logs coverage includes:
IOCS
Report Opening, JSON Review, and Chat Workflows#
Report handling is one of the most deeply exercised areas of the suite.
Covered behaviors include:
opening the first available report from multiple modules
verifying that a report can open as a page or modal, depending on module layout
opening JSON-backed report viewers
closing modal reports with escape
opening chat from a report
sending a chat message
verifying that a chat response area renders messages
The manual should therefore treat chat and JSON review as first-class report features, not optional side notes.
Search Tools and Advanced Filters#
The suite covers two layers of filtering:
toolbar-level search tools
sidebar filter drawers
Toolbar-level coverage includes:
toggling
Advanceopening
Toolschanging result sort order
switching search behavior between semantic, OR, AND, and full-query modes
clearing entity-filter selections
Sidebar-filter coverage includes:
network filtering
safe-search filtering
content-type filtering
date-range filtering
reset
apply
auto-apply and manual-apply variations
The tests also verify these filters across multiple modules, including:
General IntelligenceData BreachDefacementSocialExploitFeed
Advanced resilient filter validation also scans report detail and metadata after filtering, which means filtering is expected to affect downstream report inspection, not just the list page.
For users, that means the filtering model should be understood as end-to-end rather than cosmetic. The tested behavior confirms:
search-tool mode changes affect the actual returned result set
sort order changes are preserved into refreshed searches
side filters can be applied repeatedly across different modules
date filters support both matching and intentionally empty result windows
filtered state is expected to remain meaningful when opening report detail and metadata panels
Pagination, Load More, and Result Expansion#
The suite validates navigation through large result sets rather than assuming a single-page result view.
Covered pagination and expansion behaviors include:
next-page navigation in
General Intelligencenext-page navigation in
Data Breachnext-page navigation in
Defacementnext-page navigation in
Socialnext-page navigation in
Exploitnext-page navigation in
Feeddirectory pagination
directory page-number navigation
directory lazy expansion by scrolling to the bottom
stealer-log row expansion
IOC row expansion in consolidated tables
consolidated
See MoreandSee Lesstoggles where present
This matters operationally because the interface is tested as a browsing workspace, not only a single-query landing page. Users should expect:
multi-page navigation in indexed modules
progressive loading where directory-style surfaces support it
expandable rows and cards in result-heavy modules
persistence of the browsing context while moving in and out of details
Stealer Logs: Full Tested Behaviors#
In addition to the broader description above, the stealer-log suite covers:
tag-based basic searching
advanced row-based condition building
validation of empty or invalid search states
result download initiation
password-scheme modal opening
password-length and character-class filtering
helper-driven pivots from results
expansion of matched credential rows
review of email and telemetry fields inside expanded rows
This means Stealer Logs should be understood as a full hunting workspace with both simple and compound-query modes.
Consolidated: Full Tested Behaviors#
The consolidated area is one of the deepest tested surfaces in the application.
Covered behaviors include:
opening
Deep Searchopening
IOCsusing the profile-scoped consolidated view
searching from the homepage into consolidated
reviewing defacement-style threat cards inside deep search
expanding and collapsing grouped threat cards
inspecting keyword and coverage insight sections
expanding all insight sections
searching inside the threat-actor insight panel
testing no-match behavior inside insight search
opening report details from consolidated results and returning
filtering consolidated results by network
validating that filtered result cards reflect the chosen network
opening the domain-scanner modal
running subdomain scans
running IP lookup when available
running wayback-style scans when available
closing the domain-scanner modal
opening IOC tables for stealer and threat entries
expanding the first several IOC rows
switching IOC search terms and validating both non-empty and empty states
downloading IOC results
applying password-scheme filters from the consolidated IOC context
applying date filters that produce both non-empty and empty results
The consolidated right-side insight panel should therefore be considered part of the documented workflow, not an ancillary convenience.
CTI Graph: Full Tested Behaviors#
The CTI suite covers substantially more than opening the graph.
Covered CTI behaviors include:
switching graph filter type to
Clusterapplying CTI filters
opening the Advanced Graph Builder
adding multiple advanced-builder rows
selecting searchable advanced-builder fields
joining builder rows with
ORexecuting advanced-builder filters
clearing generated builder filter chips
searching the graph toolbar
validating highlighted results
opening export-report modals
switching between graph and list views
collapsing and expanding the listings panel
toggling physics simulation
creating a new CTI session
renaming a CTI session
exporting the current session through the
Export Current Sessionactionimporting a session from JSON
closing a session tab
selecting export format options such as JSON and graph PDF
opening a context menu from the graph canvas
There is also component-level branch coverage for:
graph-change handling
empty category handling
rotated category sets
report retrieval by country
Those coverage points confirm fallback and re-render behavior in the current UI.
Entity Lookup and Scan Modules: Full Tested Behaviors#
Documentation coverage includes every documented live lookup workflow currently present in the main product:
Email BreachSocial ScannerWanted ListNational IdentityPlaystore ScannerSoftware ScannerFile ScannerCrypto Scanner
It also covers the web-scan routes:
Basic ScanPort ScanRepository ScanSEO ScanAPK Scan
Specific validated actions include:
submitting text lookups
submitting file uploads
showing success badges
downloading reports
printing reports
resetting file-upload flows with
Analyze Another Filere-uploading and re-running the same scanner after reset
The tested scan and lookup journeys are therefore more specific than a single generic “scan” action. They include:
email-driven breach validation
social handle lookups
wanted-person lookups
national identity checks
Playstore package lookups
software-name searches
file-upload IOC extraction
cryptocurrency address or hash lookups
web-target scans for basic, port, repository, SEO, and APK workflows
Network Intel: Full Tested Behaviors#
The Network Intel suite covers:
host recon search
IP scan search
vulnerability scan search
target selection inside vulnerability scanning
depth-aware vulnerability scanning controls
detail row expansion and collapse
downloading reports from each main network-intel tab
export-trigger validation
The Geo IoT modal is also covered end to end, including:
opening the modal
closing with the close control
closing with the cancel control
switching between map mode and manual mode
zooming in and out on the map
editing coordinates manually
editing radius
editing max-IP count
switching back to map mode
starting a geo scan
reusing the selected coordinates as the active network-intel query
Satellite Map: Full Tested Behaviors#
The Satellite Map documentation flow covers the embedded Geo Fencing map workspace inside consolidated results.
Covered behaviors include:
loading the Satellite Map from the dashboard
loading indexed map entities
rendering the Leaflet map before screenshots are captured
selecting all loaded map-entity categories
showing loaded and visible entity counts
switching from the street map layer to the satellite imagery layer
searching loaded map entities from the dashboard panel
selecting a search result and updating the selection panel
opening the geocode location modal
applying coordinates from the location modal
loading nearby facilities
showing nearby facility counts and type breakdowns
enabling aircraft tracking
enabling ship tracking
showing aircraft and ship counts in the tracking and facilities panels
opening the panel menu
switching to
Imagery Analysisloading comparison imagery from the satellite imagery flow
running anomaly analysis
rendering comparison and anomaly output before capture
Threat Lens: Full Tested Behaviors#
The Threat Lens documentation flow covers the standalone Threat Lens workspace.
Covered behaviors include:
loading the Threat Lens page from the dashboard
rendering the map fallback during documentation capture
loading consolidated Threat Lens data
ranking top highlighted countries from consolidated country metadata
rendering category-layer rows for leak, tracking, news, exploit, defacement, chat, social, and generic records
rendering live news feed records
rendering archive feed records
running the default IP exposure scan through the Network Intel geo scanner
showing IP scan scope, radius, status, and marker count
searching Threat Lens with a keyword
showing the active keyword state
applying local archive-feed search
switching feed range filters
opening and capturing the Threat Lens filter drawer
Directory: Full Tested Behaviors#
The directory workflow is covered as an operational browsing surface rather than a search-first module.
Covered behaviors include:
initial page load
table and empty-state validation
progressive loading by scrolling
pagination to page two and back to page one
filtering by network
filtering by index
filtering by content type
applying and clearing date ranges
full filter reset
Account Settings, Preferences, and Reset Journey#
The suite covers more account behavior than the current summary described.
Covered account behaviors include:
avatar upload
theme toggle
two-factor toggle
current-password confirmation for sensitive changes
one-time recovery-key generation and replacement
post-update persistence
returning to login after logout
viewing the 2FA challenge screen
requesting password reset from login
switching between Reset password and Account recovery without retaining fields or errors
validating email and recovery-key formats before submission
returning a generic result for validly formatted reset and recovery requests
reading the reset email flow
submitting an invalid reused password
submitting a valid new password
logging in again with the updated password
User Management, License Visibility, and Subscription States#
The user-management suite covers both admin and non-admin behavior.
Covered behaviors include:
creating multiple users with different roles
assigning licenses during creation
logging in as those users
verifying sidebar visibility based on assigned licenses
verifying that some users see only indexed modules
verifying that some users also see breach, social, exploit, feed, stealer-log, or scanner modules
updating account preferences as a non-admin user
triggering the stealer-logs subscription or paywall flow for a demo user
showing a near-expiry trial banner for a member user
deleting managed users until only protected system users remain
This means license-aware UI visibility and paywall/subscription behavior are part of the documented product behavior.
In practical terms, the tested product states include:
users whose sidebar is limited to core indexed modules only
users who gain additional breach, social, exploit, feed, stealer-log, or scanner visibility through license assignment
users whose role grants scanner and entity-API access
demo or limited users who are redirected into subscription/paywall flows instead of full module access
expiring users who receive warning banners before access changes
Tenant Provisioning and Tenant Operations#
The tenant suite covers the full tenant lifecycle, including both admin-side and tenant-side workflows.
Covered provisioning and onboarding behaviors include:
tenant signup
email verification
admin review of tenants
tenant verification state changes
enterprise-license assignment
tenant onboarding wizard completion
tenant IOC initialization during onboarding
creating a tenant sub-user
editing tenant user quota
Covered tenant-home behaviors include:
tenant homepage navigation
alert export
notification sidebar opening
opening alert details from notifications
exporting alert reports from multiple alert contexts
opening category alert cards
creating a custom alert
date filtering for tenant alerts
flushing all alerts after confirmation through the
Flush Allworkflow
The tenant-alert workflow therefore includes both content review and alert-maintenance controls, not only passive monitoring.
Audit Logs and Administrative Operations#
Administrative audit coverage includes:
opening the audit-log page
exporting audit records
applying a date range that intentionally yields no rows
resetting filters to return to populated records
using the audit-log page in both tenant-management and standalone admin contexts
System Settings and Error States#
System Settings coverage includes both successful edits and validation failures.
Covered behaviors include:
opening the system settings page
entering edit mode
changing the application name
editing external URLs such as data sources, adversaries, and pricing
saving the updated configuration
attempting to upload an oversized authentication-dashboard icon
showing the
File too largevalidation error for files above1 MB
This should be documented explicitly because it is one of the tested administrative guardrails in the platform.
Case Management: Full Tested Behaviors#
The case-management suite covers the active investigation workflow from creation through evidence handling, status movement, closure, sharing, and archive review.
Covered behaviors include:
opening Case Management from the profile area
creating a case with core fields and a primary entity
assigning an analyst when an eligible analyst is available
opening the created case detail page
filtering the case list by case ID or text
filtering by status, severity, priority, and case type
changing sort order
switching between open and archived case lists
switching between
Case ListandAnalyticsrendering the analytics panel
editing case details
editing the primary entity
adding and editing related entities
adding file artifacts
uploading artifact files
verifying artifact-file integrity
showing verified file integrity state
editing artifact metadata
adding linked-report artifacts through report source and search controls
adding raw-alert artifacts
deleting artifact files
adding and editing tasks
adding and editing linked cases
adding comments
exporting a case PDF
creating a public case share link
revoking case share links
moving a case through the tracking board with required reasons
closing a resolved case
enforcing read-only controls after closure
archiving a closed case and reviewing it from the archived list
This means Case Management should be documented as a complete investigation workspace rather than only a form for saving case metadata.
Chatbot and Report Conversation Flow#
The report workspace also includes a tested conversational path when the chat widget is enabled.
Covered user-visible behavior includes:
opening the chat widget from a report
typing a prompt into the report chat input
sending the message
seeing the chat thread render inside the report workspace
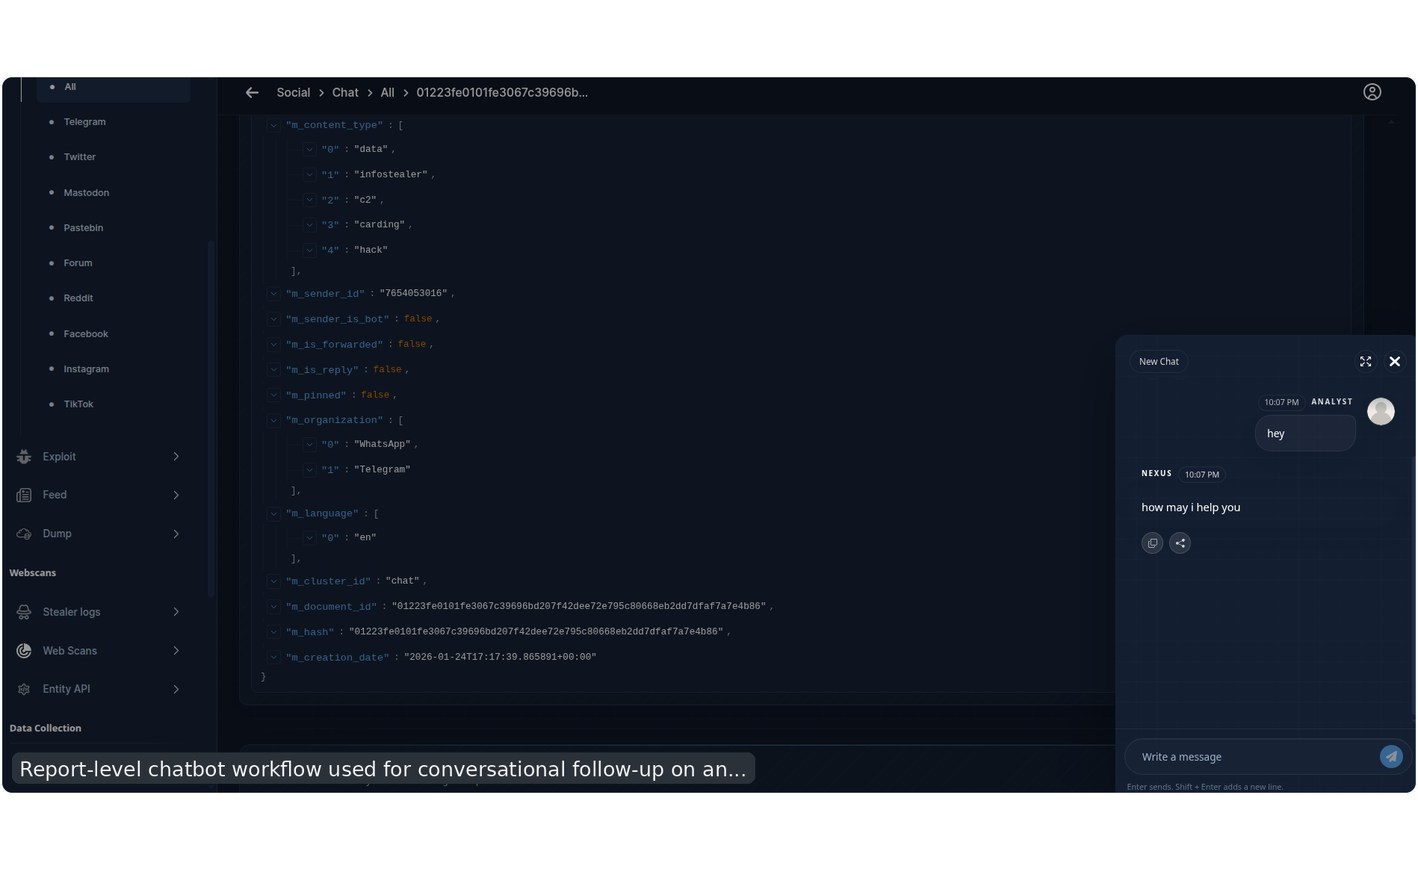
Report-level chatbot workflow used for conversational follow-up on an opened record.#
Practical Workflows#
Workflow 1: Broad Investigation#
Start in
HomepageorGeneral Intelligence.Enter a keyword or topic.
Use
Advanceand sidebar filters to narrow the results.Switch search mode if the results are too broad or too narrow.
Open a report for the most relevant record.
Review metadata and open CTI Graph if a relationship pivot is needed.
Workflow 2: Identity Exposure Check#
Open
Data BreachorEntity Lookup.Search for an email or identity value.
Review breach details or live lookup results.
Use Stealer Logs if deeper credential evidence is required.
Workflow 3: Infrastructure Review#
Open
Network IntelorWeb Scans.Enter a domain or IP.
Run the appropriate recon or scan view.
For vulnerability scans, choose the target and scan depth that match the investigation need.
Review the report, severity, scanned URLs, request details, and evidence.
Export the report if it needs to be shared externally.
Workflow 4: Profile Mapping#
Open
Social Intel.Scan a username.
Review the graph or list view.
Open profile summaries and metadata popups.
Add custom entities or manage connections if needed.
Workflow 5: Tenant Monitoring#
Configure IOC values in
Profile > IOC.Review alert summaries from the tenant homepage.
Open category alert reports for the highest-risk items.
Export alerts when sharing findings with teammates.
Adjust
Profile > Alert Scannersif future scans should include or exclude specific categories.Create or link a case when an alert needs ownership, tasking, or closure tracking.
Workflow 6: Actor Or Malware Investigation#
Open
Actors & Malware.Search by actor name, alias, malware family, country, signature, reporter, or related keyword.
Switch between
APT,Malware, andCompromised-Actorswhen the result type is unclear.Open the actor or malware report.
Pivot to related indicators, infrastructure, reports, or graph views when relationship context is needed.
Workflow 7: Geo-Fencing Review#
Open
Geo FencingorSatellite Intel.Search for a place or enter coordinates.
Review indexed facilities and nearby facility results.
Enable aircraft or ship tracking if transportation context matters.
Use
Imagery Analysisfor comparison or anomaly review.Switch to
Threat Lenswhen country-level threat records or map arcs are more relevant than facilities.
Workflow 8: Long-Running Scan Review#
Start the scan from
Entity Lookup,Web Scans,Network Intel, or a geo camera workflow.Leave the page only after the scan job has been created.
Use the notification or scan-job surface to reopen incomplete or completed scans.
Reuse recent completed results when the application offers them.
Choose a new scan only when a fresh result is required.
Workflow 9: Case Handoff#
Create a case from
Profile > Case-Management.Add the primary entity and the first set of artifacts.
Attach uploaded files, linked reports, or raw alerts as separate artifacts.
Verify uploaded artifact-file integrity before handoff where the action is available.
Assign analysts or tasks.
Use the case filters and analytics view to monitor open, stale, high-risk, or unassigned work.
Move the case through the tracking board as work progresses.
Close the case only after it reaches
resolved.Export a PDF or generate a share link for review, then revoke the share when review ends.
Notes and Limitations#
Feature availability
If a module described in this manual is not visible in your sidebar, the most common reasons are role restrictions, license restrictions, or deployment-level configuration toggles.
External modules
Some sidebar items open new tabs or external services rather than rendering inside the main Orion workspace. CTI Graph, Social Intel, Onion Link, Whistle Blowing, and Documentation may behave this way depending on feature and deployment setup.
Recommended starting point
New users should begin with Homepage, General Intelligence, Data Breach, and Stealer Logs before moving into graph tools, tenant administration, or system administration.
Social#
The Social module aggregates intelligence from social and community platforms.
Supported views:
AllTelegramTwitterMastodonPastebinForumRedditFacebookInstagramLinkedInTikTokYouTubeUse this module for:
early warning and chatter monitoring
leak discovery
discussion tracking
platform-specific searches
Example of a stream-oriented social intelligence view.#
Discussion Route#
Discussion opens discussion-style chat and social result contexts. It uses the current result container and can open chat, social, general, leak, exploit, and compromise-monitoring reports.
Use the Social module for normal sidebar navigation. Use Discussion when a workflow routes through discussion-style result paths.